
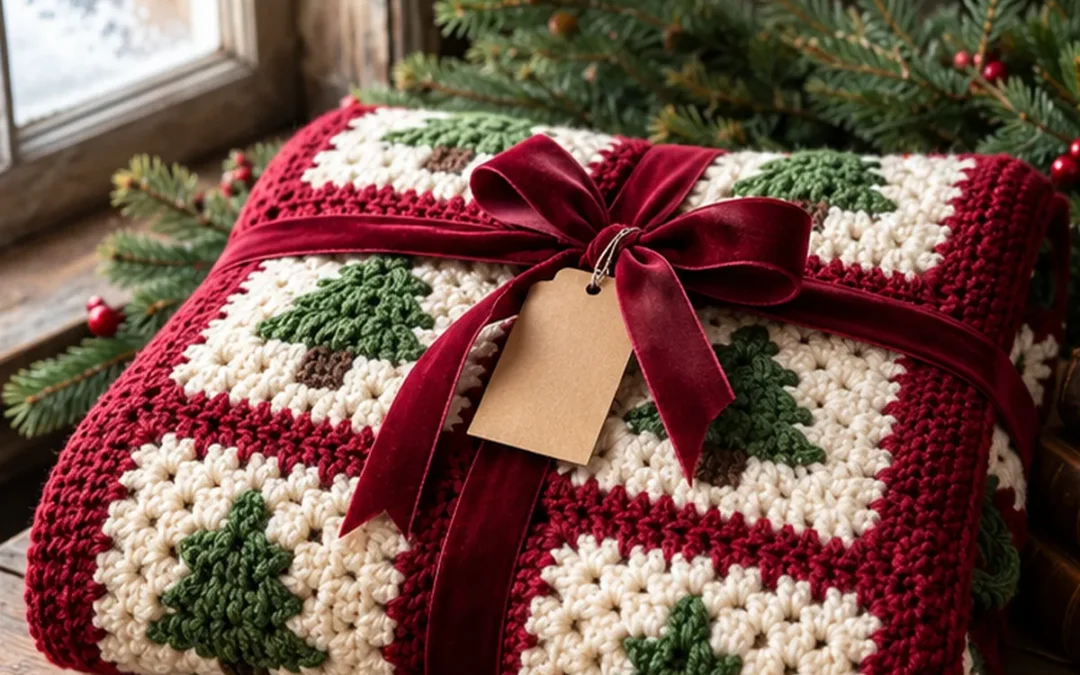
Imagine curling up beside a crackling fireplace in a cozy woodland cabin, snow falling gently outside the window, and a beautiful handmade crochet blanket resting across your lap.
That's exactly the feeling this Forest Cabin Crochet Blanket Pattern captures!
With its charming evergreen Christmas trees, warm ivory granny squares, rich burgundy borders, and timeless farmhouse style, this blanket brings together everything we love about cozy winter crochet.
The design is inspired by quiet snowy mornings, traditional Christmas decorations, rustic wooden cabins, and the simple beauty of handmade gifts.
Each granny square features a miniature forest-green Christmas tree against a soft ivory background. A rich burgundy border frames the square, creating a beautiful contrast that makes the evergreen design stand out.
Once the squares are joined, they form an inviting winter blanket that's perfect for decorating a sofa, draping over an armchair, or wrapping up as a thoughtful Christmas gift.
Best of all, you can customize this project to suit your home. Make a smaller lap blanket, a Christmas table runner, or a full-sized cozy throw.
In this free tutorial, I'll guide you through the entire process, from choosing yarn and making your first granny square to crocheting the Christmas tree motif, adding the burgundy border, joining the squares, and finishing your blanket.
You'll find detailed round-by-round and row-by-row instructions, stitch counts, sizing guidance, color ideas, tips for neat sewing and joining, troubleshooting advice, frequently asked questions, and plenty of cozy styling inspiration.
Let's gather our yarn and create something beautiful for the winter season!
What Is the Forest Cabin Crochet Blanket?
The Forest Cabin Crochet Blanket is a handmade afghan constructed from individual Christmas-tree granny squares.
Instead of crocheting the entire blanket in long continuous rows, you'll create multiple square motifs and join them together.
Each square has four main elements:
- A warm ivory granny-square background.
- A forest-green crocheted Christmas tree.
- A small chocolate-brown tree trunk.
- A deep burgundy outer border.
The finished squares are sewn or crocheted together to form the blanket.
For this original version, the Christmas tree is crocheted separately and sewn onto the ivory square before joining. This method creates a slightly raised, textured tree motif and avoids complicated multicolor shaping within the granny-square rounds.
It's also a helpful method for crocheters who enjoy traditional granny squares and want to try decorative appliqué techniques.
The final blanket has a beautiful combination of soft texture, festive color, and vintage cabin charm.
Why You'll Love This Christmas Tree Granny Square Blanket
There are many reasons this project deserves a place on your winter crochet list.
It's beautifully festive without being overly bright. The forest-green, burgundy, and ivory palette creates a traditional Christmas feeling that also works as rustic winter decor.
It's easy to customize. Once you know how to make one granny square, you can repeat it to create almost any blanket size.
It's a portable project. Work on individual squares while traveling, relaxing, or watching your favorite Christmas movies.
It makes a thoughtful handmade gift. A blanket filled with little Christmas trees is a lovely present for someone who enjoys cozy winter evenings.
It offers plenty of creative options. You can turn the same motifs into pillows, table runners, wall hangings, and decorative blankets.
It's satisfying to assemble. Watching your individual squares become one finished blanket is one of the most rewarding parts of the project.
If you've been looking for a Christmas crochet project with classic farmhouse charm, this is a wonderful option.
Forest Cabin Crochet Blanket: Project Details
| Project Detail | Information |
|---|---|
| Pattern Name | Forest Cabin Crochet Blanket |
| Project Type | Christmas granny-square blanket |
| Skill Level | Confident beginner to intermediate |
| Crochet Terms | US terminology |
| Yarn Weight | Medium worsted-weight (#4) |
| Recommended Hook | 5.0 mm (H/8), adjusted to gauge |
| Main Colors | Ivory, forest green, burgundy, brown |
| Construction | Individual squares joined together |
| Motif | Crocheted Christmas tree appliqué |
| Joining Technique | Whip stitch or slip-stitch joining |
| Suggested Throw Layout | 6 columns × 8 rows |
| Suggested Square Count | 48 |
| Finishing | Border, weaving ends, blocking |
The suggested blanket layout is an example rather than a fixed requirement. Your finished dimensions depend on your blocked square size.
Materials and Supplies
Before starting, gather your supplies and choose your favorite yarn colors.
Yarn Colors
Color A – Warm Ivory
Use ivory or soft cream for the main granny-square background.
A slightly warm shade works beautifully with the rustic woodland theme.
Color B – Forest Green
Choose a deep, natural evergreen shade for the Christmas tree motifs.
Avoid neon green if you're trying to achieve the traditional cabin aesthetic.
Color C – Burgundy Red
Use a rich burgundy, cranberry, or deep wine-red yarn for the outer borders and joining.
This color provides the strong contrast that makes the entire blanket look cohesive.
Color D – Chocolate Brown
Use a small amount of brown yarn for the Christmas tree trunks.
A warm walnut or dark cocoa shade works nicely.
How Much Yarn Will You Need?
Yarn quantity depends on the final size of your squares, your tension, and your chosen yarn.
For the most accurate estimate, make one complete square using all four colors.
Weigh the amount of each color used, then multiply by your planned number of squares.
Add approximately 10–15% extra yarn for the joining, blanket border, and possible variations in tension.
For example, if one complete square uses 12 grams of ivory yarn and you're making 48 squares:
12 × 48 = 576 grams of ivory yarn for the squares.
Then add extra yarn for any ivory finishing and a small contingency.
Repeat this calculation for the other colors.
This method gives you a much more useful estimate than relying on an untested blanket-wide yarn quantity.
Additional Tools
You'll also need:
- 5.0 mm crochet hook or another suitable size.
- Yarn needle.
- Scissors.
- Stitch markers.
- Measuring tape.
- Blocking mats.
- Rust-resistant blocking pins.
- Optional crochet blocking board.
- Optional ribbon for gift presentation.
Crochet Abbreviations
This pattern uses standard US crochet terminology.
| Abbreviation | Meaning |
|---|---|
| MR | Magic ring |
| ch | Chain |
| sc | Single crochet |
| hdc | Half double crochet |
| dc | Double crochet |
| sl st | Slip stitch |
| inc | Increase: two stitches in one stitch |
| st / sts | Stitch / stitches |
| sp | Space |
| rep | Repeat |
| RS | Right side |
| WS | Wrong side |
Important Granny-Square Notes
A classic granny square uses groups of three double crochet stitches, often called granny clusters.
These clusters are separated by chain spaces.
The corners are formed by working two granny clusters into the same corner space with chain stitches between them.
In this pattern, ch 3 counts as the first dc when beginning a granny round.
All other instructions will specify whether a turning chain counts as a stitch.
Use a stitch marker at the first corner if you find it helpful.
Understanding the Blanket Construction
We'll create one complete square before making enough motifs for the blanket.
The construction follows these steps:
- Crochet the ivory granny-square background.
- Add the burgundy outer rounds.
- Crochet a separate green Christmas tree.
- Make the small brown trunk.
- Sew the tree and trunk onto the square.
- Block the completed motif.
- Repeat until you have enough squares.
- Arrange and join the squares.
- Add the final blanket border.
- Weave in ends and complete the finishing.
Working in this order helps keep the project organized.
Part 1: Crochet the Ivory Granny Square
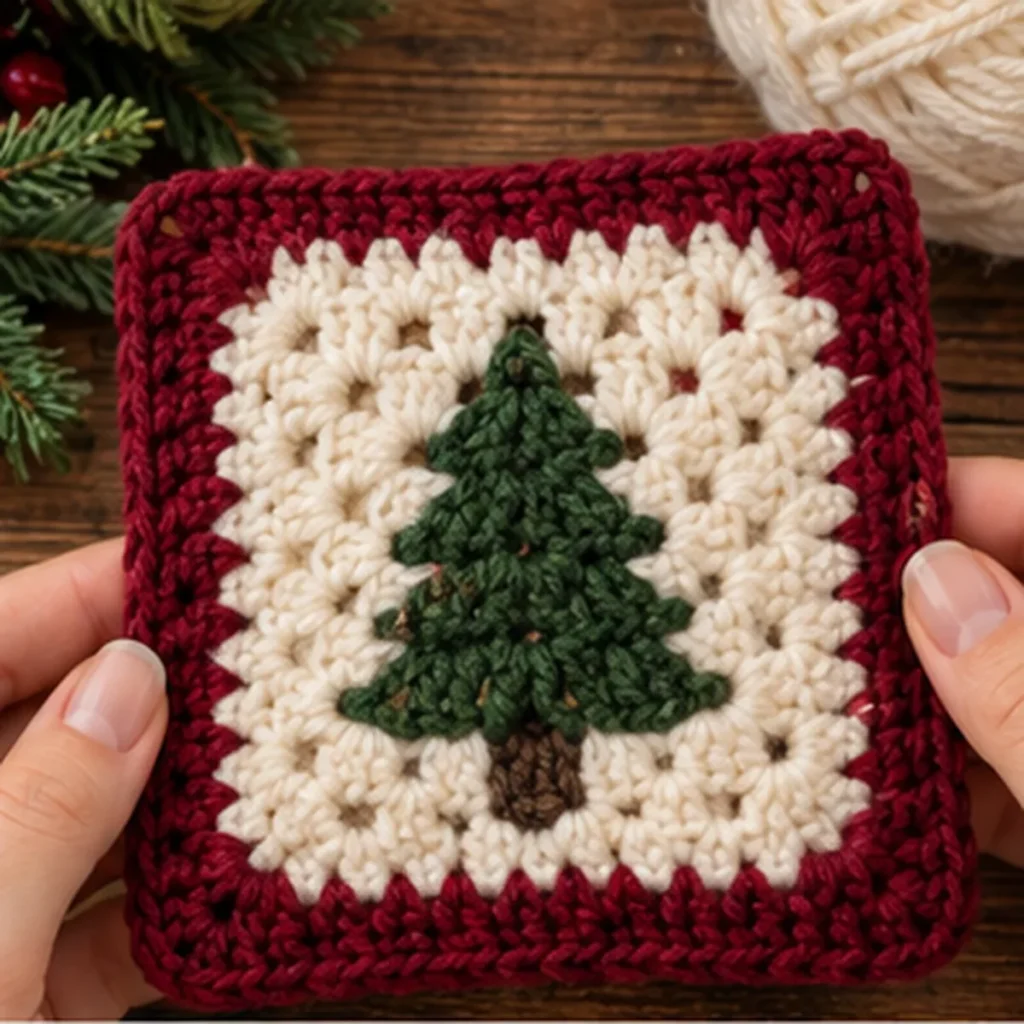
We'll begin by crocheting a traditional granny square using warm ivory yarn.
The first five rounds will form the background.
Round 1 – Make the Center
Using ivory yarn, create a magic ring.
Chain 3. This counts as your first double crochet.
Work 2 dc into the ring.
Chain 2.
Repeat the following three times:
(3 dc into the ring, ch 2).
You should now have four groups of three double crochet stitches, separated by four corner spaces.
Slip stitch into the top of the beginning ch 3 to join.
Pull the magic ring closed.
Stitch count: 12 dc and four ch-2 corner spaces.
Round 2 – Create the Square Shape
Slip stitch into the nearest corner space.
Chain 3, then work 2 dc into that same corner.
Chain 2.
Work 3 more dc into the same corner space.
Chain 1.
Move to the next corner space.
Work:
(3 dc, ch 2, 3 dc) into the corner.
Chain 1.
Repeat this process in each remaining corner space.
Slip stitch into the beginning ch 3 to join.
Stitch count: 24 dc arranged in eight granny clusters.
Your work should now have a recognizable square shape.
Round 3 – Expand the Granny Square
Slip stitch into the nearest corner space.
Work your beginning corner:
(ch 3, 2 dc, ch 2, 3 dc).
Chain 1.
Work 3 dc into the next ch-1 side space.
Chain 1.
In the next corner, work:
(3 dc, ch 2, 3 dc).
Chain 1.
Work 3 dc into the next side space.
Continue around, working the same corner groups and one side cluster on each side.
Join with a slip stitch.
Stitch count: 36 dc arranged in twelve granny clusters.
Round 4 – Continue the Ivory Background
Begin in a corner space.
Work:
(ch 3, 2 dc, ch 2, 3 dc).
Chain 1.
Work 3 dc into the next ch-1 space.
Chain 1.
Work 3 dc into the following ch-1 space.
Chain 1.
Continue to the next corner and work:
(3 dc, ch 2, 3 dc).
Repeat this sequence around the square.
Each side now contains two ordinary side clusters between the corner groups.
Slip stitch to join.
Stitch count: 48 dc arranged in sixteen granny clusters.
Round 5 – Complete the Ivory Section
Start in a corner space.
Work the beginning corner:
(ch 3, 2 dc, ch 2, 3 dc).
Chain 1.
Work 3 dc into each of the three ch-1 side spaces, with ch 1 between consecutive clusters.
At the next corner, work:
(3 dc, ch 2, 3 dc).
Continue around the square.
Slip stitch into the beginning chain to join.
Stitch count: 60 dc arranged in twenty granny clusters.
Fasten off the ivory yarn.
Weave in the end securely.
Check Your Square
Lay the finished ivory square on a flat surface.
Check that:
- You have four clearly defined corners.
- The clusters are evenly spaced.
- The square lies reasonably flat.
- There are no unintended increases along the sides.
- The center is closed neatly.
A little curling is normal before blocking, but the square shouldn't be severely ruffled.
Part 2: Add the Burgundy Granny-Square Border
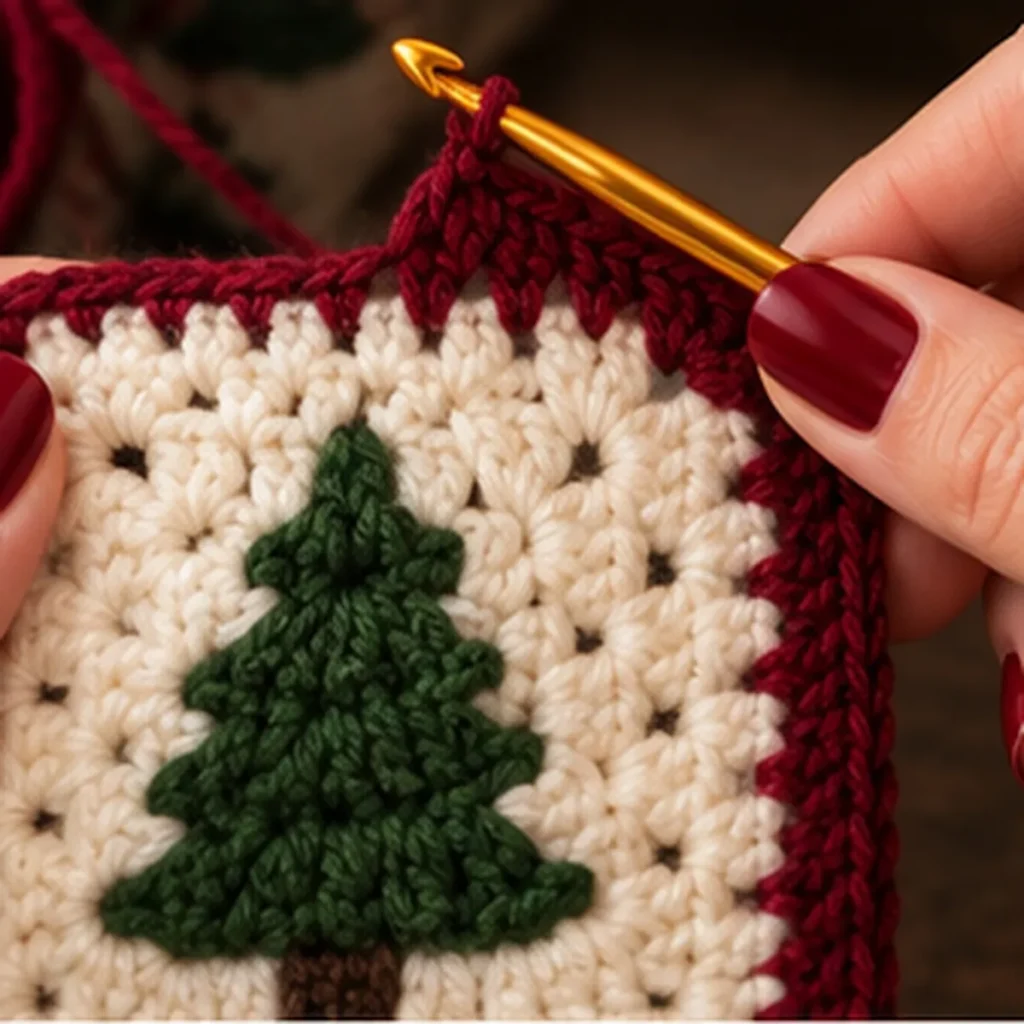
The burgundy border gives the Forest Cabin Blanket its beautiful festive contrast.
We'll add one burgundy granny round followed by a smooth finishing round.
Round 6 – Burgundy Granny Round
Join your burgundy yarn into any corner ch-2 space.
Chain 3, then work 2 dc into the same corner.
Chain 2.
Work 3 dc into the same corner.
Chain 1.
Work 3 dc into each of the four ch-1 side spaces, placing ch 1 between consecutive granny clusters.
At the next corner, work:
(3 dc, ch 2, 3 dc).
Continue around all four sides.
Slip stitch into the beginning ch 3.
Stitch count: 72 dc arranged in twenty-four granny clusters.
Round 7 – Smooth Burgundy Edge
Continue using burgundy yarn.
Chain 1. This chain does not count as a stitch.
Work 1 sc into the top of every dc around the square.
Work 1 sc into each ch-1 side space.
In each ch-2 corner space, work 3 sc.
Continue around the entire square.
Join with a slip stitch to the first sc.
Stitch count: 104 sc total.
Fasten off, leaving a short tail for weaving in.
Why Use a Smooth Outer Round?
A single crochet edging gives the blanket squares a more structured shape.
It also provides consistent stitches for sewing or joining.
The burgundy border becomes even more attractive when the squares are assembled into a blanket.
At this stage, you have completed the base square.
Next, we'll make the little Christmas tree that gives this project its woodland personality.
Part 3: Crochet the Forest-Green Christmas Tree
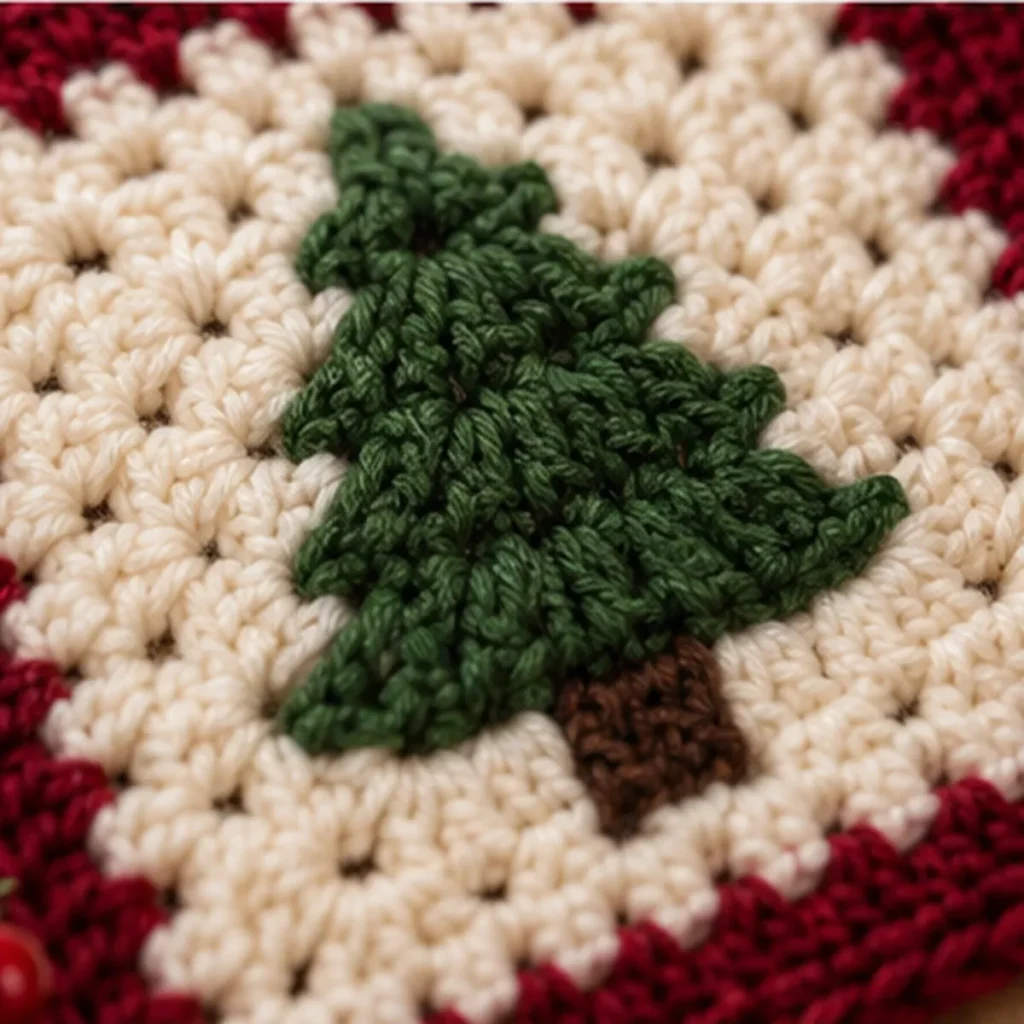
The Christmas tree is the centerpiece of each granny square.
For this version, we'll work a flat triangular tree using rows of single crochet.
We'll widen the tree gradually to create its traditional evergreen shape.
Then we'll add small optional branch points along the edges.
Using forest-green yarn:
Row 1 – Tree Top
Chain 3.
Work 1 sc into the second chain from the hook.
Work 1 sc into the next chain.
2 sc.
Row 2 – First Increase
Chain 1 and turn.
Work 2 sc into the first stitch.
Work 2 sc into the second stitch.
4 sc.
Row 3
Chain 1 and turn.
Work 1 sc in each stitch.
4 sc.
Row 4
Chain 1 and turn.
Work 2 sc into the first stitch.
Work 1 sc into each of the next two stitches.
Work 2 sc into the last stitch.
6 sc.
Row 5
Chain 1 and turn.
Work 1 sc in each stitch.
6 sc.
Row 6
Chain 1 and turn.
Increase in the first stitch.
Work 1 sc into every middle stitch.
Increase in the final stitch.
8 sc.
Row 7
Chain 1 and turn.
Work 1 sc in every stitch.
8 sc.
Row 8
Chain 1 and turn.
Increase at the beginning and end of the row.
Work 1 sc into each middle stitch.
10 sc.
Row 9
Chain 1 and turn.
Work 1 sc in every stitch.
10 sc.
Row 10
Chain 1 and turn.
Increase at the beginning and end of the row.
Work 1 sc into each middle stitch.
12 sc.
Row 11
Chain 1 and turn.
Work 1 sc in every stitch.
12 sc.
Row 12
Chain 1 and turn.
Increase at the beginning and end of the row.
Work 1 sc into each middle stitch.
14 sc.
Row 13
Chain 1 and turn.
Work 1 sc in every stitch.
14 sc.
Row 14
Chain 1 and turn.
Increase at the beginning and end of the row.
Work 1 sc into each middle stitch.
16 sc.
Row 15
Chain 1 and turn.
Work 1 sc in every stitch.
16 sc.
Row 16
Chain 1 and turn.
Increase at the beginning and end of the row.
Work 1 sc into each middle stitch.
18 sc.
Row 17 – Complete the Tree
Chain 1 and turn.
Work 1 sc in every stitch.
18 sc.
Fasten off and leave a sewing tail.
Your tree now has a narrow pointed top and a wide lower edge.
Optional Branch-Point Edging
For a more defined pine-tree silhouette, add a few small pointed branches along the sloping sides.
Join green yarn near a lower corner.
Work one single crochet into each row-end space as you travel up the side.
At selected row ends—such as Rows 4, 8, 12, and 16—work the following little branch point:
- Chain 3.
- Slip stitch into the second chain from the hook.
- Slip stitch into the next chain.
- Continue with the next side stitch.
Repeat these small points in corresponding locations along the opposite edge.
Keep the branch points short.
This optional edging helps create the little stepped branches often seen in crocheted Christmas-tree motifs.
Part 4: Crochet the Little Brown Tree Trunk
The brown trunk adds a small but important detail.
Using chocolate-brown yarn:
Row 1
Chain 5.
Work 1 sc in the second chain from the hook and in every remaining chain.
4 sc.
Rows 2–4
Chain 1 and turn.
Work 1 sc in each stitch.
4 sc per row.
Fasten off, leaving a sewing tail.
The trunk should resemble a small rectangular strip.
Attach the Trunk to the Tree
Position the trunk behind the lower center of the green tree.
Let approximately half of its length extend below the foliage.
Sew it securely to the back of the green tree.
Avoid pulling the stitches too tightly.
The trunk should remain flat.
Part 5: Sew the Christmas Tree Onto the Granny Square
Now we'll bring the two parts together.
Lay the completed ivory-and-burgundy granny square on your work surface.
Position the green Christmas tree in the center of the ivory section.
The tree should point toward one of the square's edges.
Make sure the upper tip and brown trunk both remain within the ivory area.
Leave a little space between the tree and the burgundy border.
Step-by-Step Appliqué Attachment
- Place the green tree onto the front of the square.
- Use removable pins to hold the tree in place.
- Thread the green yarn tail through your tapestry needle.
- Begin sewing near the lower corner of the tree.
- Work small, even stitches around the outer edge.
- Catch the underlying ivory stitches without pulling the square out of shape.
- Continue sewing around the tree branches and top.
- Secure the thread on the wrong side.
- Sew down the visible brown trunk using matching brown yarn.
- Weave the yarn ends neatly into the wrong side of the square.
Should the Tree Be Flat or Raised?
Both approaches can look beautiful.
If you sew around the entire edge, the tree will sit more securely and lie relatively flat.
If you attach the central body and leave a few branch tips free, the motif will have a more dimensional appearance.
For a frequently washed blanket, I recommend attaching the tree securely around the edges.
This helps prevent the branches from catching during use.
Part 6: Block the Finished Granny Square
Blocking is especially helpful when making a blanket from multiple individual squares.
It helps the motifs become more consistent in shape and size.
How to Block Your Square
Check that your yarn can be safely dampened and blocked.
Lightly mist the square with water, or use a blocking method appropriate for the fiber.
Place it on a blocking mat.
Gently shape the four corners until the square is even.
Use rust-resistant pins to hold the corners in position.
Allow the square to dry completely.
Avoid stretching the appliqué out of shape.
Why Is Blocking Important?
When every square has the same dimensions, joining is much easier.
The finished blanket also tends to lie flatter.
Try to block all your squares to the same measurements.
Measure from one outer burgundy edge to the opposite edge.
Write the measurement down so you can use it while planning your blanket.
Part 7: How Many Squares Do You Need for a Blanket?
One of the best features of this design is that you can make it in different sizes.
The first step is to measure one completed, blocked square.
For the following examples, we'll assume each square measures approximately seven inches across.
Your own result may be different.
| Blanket Style | Layout | Number of Squares | Approximate Size Before Final Border |
|---|---|---|---|
| Small lap blanket | 5 × 6 | 30 | 35 × 42 inches |
| Cozy throw | 6 × 8 | 48 | 42 × 56 inches |
| Large throw | 7 × 9 | 63 | 49 × 63 inches |
| Generous blanket | 8 × 10 | 80 | 56 × 70 inches |
The final border adds a little extra width and length.
For a rustic cabin throw, the 6 × 8 layout is a lovely starting point.
How to Calculate Your Own Blanket Size
Multiply the blocked width of one square by the number of columns.
Then multiply the blocked height of one square by the number of rows.
For example:
7-inch square × 6 columns = 42 inches wide.
7-inch square × 8 rows = 56 inches long.
This calculation allows you to plan different sizes without rewriting the motif instructions.
Part 8: Arrange Your Christmas Tree Granny Squares
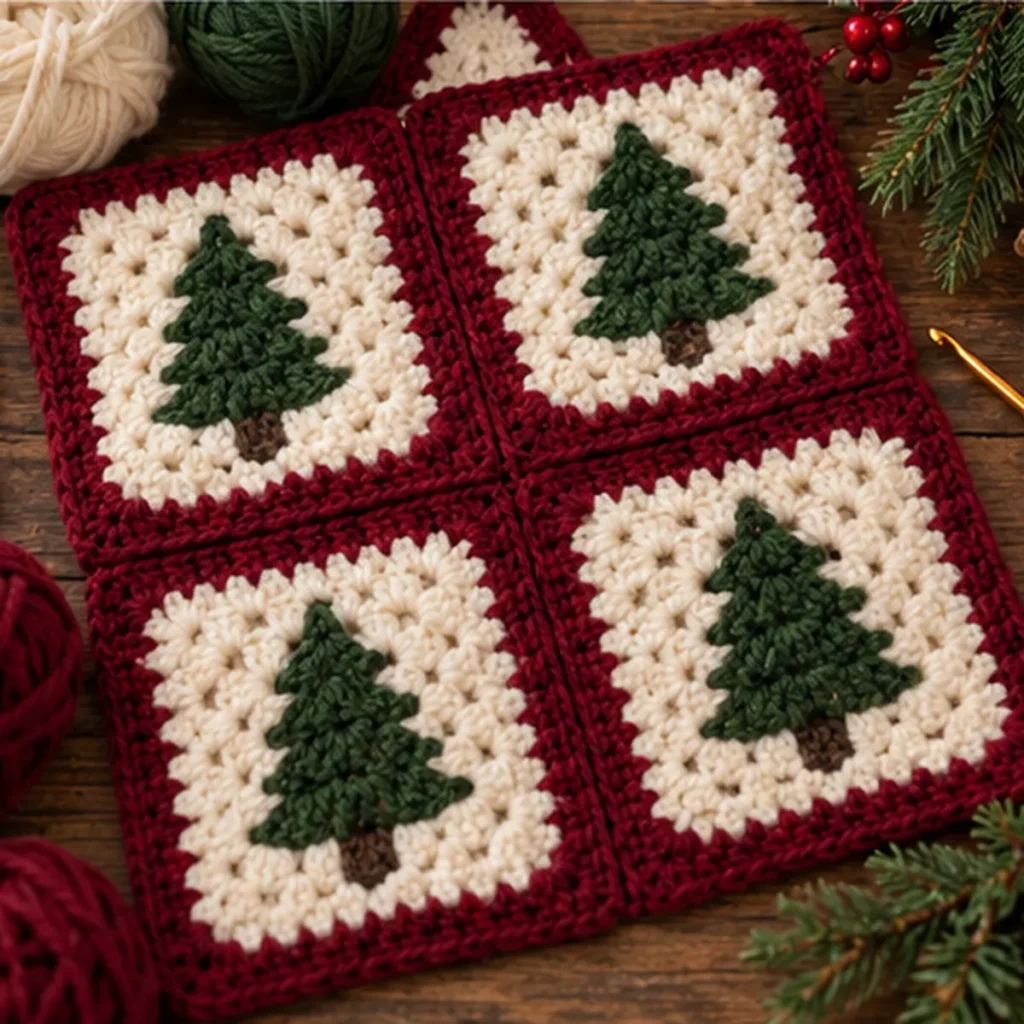
Once you've made the required number of squares, arrange them before joining.
Lay the squares on a clean floor, bed, or large table.
Make sure all the trees are facing the same direction.
You can also experiment with alternating the orientation of some trees, but a consistent upright design creates the most traditional Christmas blanket appearance.
Recommended Layout
For a 48-square throw:
Arrange six squares across each row.
Create eight rows.
Try to keep the burgundy borders aligned.
Check the overall color balance and make sure all the tree motifs are visible.
Helpful Assembly Tip
Stack each row separately after arranging.
Use a small paper label to identify Row 1, Row 2, and so on.
This helps prevent mistakes when joining the blanket.
Part 9: How to Join the Granny Squares
There are several ways to connect granny squares.
For this project, I recommend a simple whip-stitch seam or a crocheted slip-stitch join.
Both methods work well with the burgundy borders.
Method 1 – Whip-Stitch Joining
This method creates a relatively flat, flexible seam.
You'll need a tapestry needle and matching burgundy yarn.
Step 1: Place two granny squares together with their right sides facing each other.
Step 2: Line up the corners and corresponding stitches along one edge.
Step 3: Thread your tapestry needle with burgundy yarn.
Step 4: Insert the needle through corresponding stitches on both squares.
Step 5: Continue making small whip stitches along the edge.
Step 6: Keep the tension even, without pulling the seam too tightly.
Step 7: Secure the yarn at the corner.
Step 8: Open the squares and check that the seam lies flat.
Repeat until all squares are connected.
Method 2 – Slip-Stitch Joining
If you prefer using your crochet hook for assembly, try a slip-stitch join.
Place two squares together with their right sides facing.
Insert your hook through matching stitches along both edges.
Yarn over with burgundy and pull through the stitches and the loop on your hook.
Continue working slip stitches across the edge.
Keep your stitches loose enough that the seam doesn't gather.
Once finished, open the joined squares to check the appearance.
Which Joining Method Should You Choose?
Whip stitching is an excellent option if you prefer a flat, less noticeable join.
Slip-stitch joining is convenient if you'd rather keep crocheting.
For a blanket with strong burgundy grid lines, either method can look beautiful.
Joining the Full Blanket
For a six-column, eight-row layout:
First, join the six squares in each row.
Repeat for all eight rows.
Then join the completed rows together, working across the width of the blanket.
After the rows are connected, weave in the joining ends securely.
Part 10: Crochet the Final Blanket Border
The final border gives your Forest Cabin Blanket a polished, finished appearance.
We'll create a simple burgundy border around the entire blanket.
Using burgundy yarn:
Border Round 1 – Single Crochet Foundation
Join the yarn at any outer corner.
Work single crochet stitches evenly around the blanket edges, placing stitches into the available edge stitches and spaces.
At each blanket corner, work 3 sc into the corner.
Continue around all four sides.
Slip stitch to join.
If your edge begins to ripple, you may have added too many stitches.
If it begins to pull inward, you may need a few more stitches along the edge.
Border Round 2 – Soft Textured Edge
Chain 2. This chain does not count as a stitch.
Work 1 hdc into each stitch around.
At each corner, work 3 hdc into the center stitch of the previous corner group.
Continue around the blanket.
Slip stitch to join.
Border Round 3 – Final Neat Edge
Chain 1.
Work 1 sc into each stitch around.
At every corner, work 3 sc into the center stitch of the preceding corner group.
Continue around the entire blanket.
Slip stitch to join.
Fasten off and weave in the yarn tail.
Optional Decorative Edging
If you want a slightly more ornate finish, you can add a simple scalloped edging.
However, I recommend keeping the border relatively plain.
The Christmas trees and deep burgundy squares are already the main design features.
A simple border helps them stand out.
Part 11: Final Blanket Finishing

Your blanket is almost finished!
Before using or gifting it, take a little time to inspect the seams and edges.
Finishing Checklist
Make sure:
- Every Christmas tree is securely attached.
- All brown trunks are properly sewn down.
- The granny squares are evenly joined.
- No seams are pulling or gathering.
- All yarn ends are securely woven in.
- The outer border lies flat.
- The blanket has been blocked if needed.
How to Weave in Yarn Ends
Thread a yarn tail through a tapestry needle.
Work it through several stitches on the wrong side of the fabric.
Change direction and work back through another section of stitches.
Trim the remaining tail.
Repeat for each loose end.
Avoid tying large knots that may create uncomfortable bumps in the blanket.
Final Blocking
Depending on your yarn, you may lightly block the completed blanket to smooth the seams.
Follow the yarn manufacturer's care recommendations.
Allow the blanket to dry completely before folding or storing it.
How to Make Your Forest Cabin Blanket Look More Rustic
The traditional cabin appearance comes from the combination of yarn colors, textures, and styling choices.
Choose Warm Ivory Instead of Bright White
Warm ivory creates a softer, vintage appearance.
It also complements natural wooden furniture and cozy winter decorations.
Use Deep Forest Green
A rich evergreen shade helps the tree motifs look natural.
This gives the blanket a timeless winter aesthetic.
Select Burgundy Instead of Bright Red
Burgundy creates a more refined, farmhouse-inspired appearance.
It pairs especially well with dark wood and neutral textiles.
Keep the Stitch Texture Visible
Traditional granny clusters add warmth and character.
Don't worry if the blanket looks distinctly handmade.
That texture is part of its charm.
Add a Velvet Ribbon for Gifting
Fold the blanket neatly.
Wrap a burgundy velvet ribbon around it and tie a generous bow.
Add a kraft-paper gift tag.
For everyday use, remove the decorative ribbon.
Creative Forest Cabin Crochet Project Ideas
Once you've learned how to make the Christmas tree granny square, you can use the same motif for other seasonal projects.
Christmas Tree Crochet Pillow
Make several matching squares and join them into a decorative cushion cover.
Use a coordinating plain crochet panel for the back.
Rustic Christmas Table Runner
Arrange three or four Christmas tree squares in a row.
Join them together and add a burgundy border.
This creates a charming handmade centerpiece.
Winter Wall Hanging
Join a few squares vertically.
Attach the top to a wooden dowel and add a hanging cord.
Crochet Christmas Gift Bag
Use two larger squares as the front and back panels of a small handmade gift bag.
Add side seams and sturdy handles.
Christmas Blanket for a Reading Chair
Make a smaller version sized for your favorite armchair.
It can become a beautiful seasonal accent for a cozy reading corner.
Woodland Cabin Color Variations
You can also change the original color palette.
Try ivory with pine green and brown for a natural woodland look.
Use cream, cranberry, and gold for a traditional festive design.
Or choose soft gray, spruce green, and deep navy for a snowy winter cabin aesthetic.
Common Crochet Problems and How to Fix Them
Why Is My Granny Square Curling?
Curling can happen when your tension is too tight or your stitch and chain spacing are inconsistent.
Check that you're using the correct number of corner spaces and granny clusters.
You may also need to adjust your hook size.
Blocking can help correct minor curling.
Why Is My Square Turning Into a Rectangle?
Check that you're working the same number of granny clusters along all four sides.
Every corner should be formed consistently.
Missing a side cluster can distort the square.
Why Does My Christmas Tree Look Uneven?
Check your increase rows.
Each widening row should increase by two stitches total—one at each end.
Count the stitches before moving to the next row.
How Can I Keep the Tree Appliqué Flat?
Don't pull the sewing yarn too tightly.
Pin the tree in place before sewing.
Use small, even stitches around the edges.
Why Are My Squares Different Sizes?
Your tension may change between crochet sessions.
Different yarn brands can also produce different dimensions, even when labeled as the same weight.
Try to use the same yarn type and hook size throughout.
Blocking the motifs to matching dimensions can help.
Why Are My Blanket Seams Bulky?
You may be pulling the joining yarn too tightly or catching too much fabric in each stitch.
Try a looser whip stitch or use the outer loops rather than working deeply through the fabric.
Why Is My Blanket Border Wavy?
A wavy border often means there are too many stitches along the edge.
Remove the round and distribute the stitches more evenly.
If the border pulls inward instead, you may need additional stitches.
How to Wash and Care for Your Crochet Blanket
Proper care helps maintain the shape and color of your handmade blanket.
Always follow the washing instructions for your chosen yarn.
Washing
If your yarn is machine washable, use a gentle cycle and cool water.
Place the blanket in a large mesh laundry bag if appropriate.
For delicate fibers, hand washing may be safer.
Drying
Lay the blanket flat to dry whenever possible.
Gently reshape the corners and seams.
Avoid excessive heat, which can damage some yarn fibers.
Storage
Store the blanket in a clean, dry location.
Make sure it is completely dry before folding.
Avoid storing it in direct sunlight for long periods, as this may cause some yarn colors to fade.
Maintaining the Appliqués
Check the Christmas tree motifs periodically.
If a branch edge begins to loosen, reinforce it using matching green yarn.
Frequently Asked Questions
1. Is the Forest Cabin Crochet Blanket beginner-friendly?
The granny-square sections are suitable for crocheters familiar with basic double crochet stitches.
The separate Christmas tree appliqué and blanket assembly require additional attention, making the overall project suitable for confident beginners or intermediate crocheters.
2. Can I use acrylic yarn?
Yes.
Worsted-weight acrylic is a practical choice for blankets because it is available in many colors and often has straightforward care instructions.
Always check the manufacturer's recommendations.
3. Do I have to sew the tree onto the square?
This particular version uses a sewn appliqué.
However, more advanced crocheters can experiment with colorwork or tapestry crochet techniques to create integrated motifs.
Those techniques would require a different set of instructions.
4. How many squares do I need for a throw blanket?
For an example layout using seven-inch squares, six columns by eight rows requires 48 squares.
Your required count will change depending on your square size and preferred blanket dimensions.
5. Can I make the blanket larger?
Absolutely.
Simply increase the number of rows or columns.
Use your blocked square measurement to calculate the desired size.
6. What colors work best for a traditional Christmas blanket?
Warm ivory, forest green, burgundy, and brown create a classic Christmas color palette.
These colors also suit rustic farmhouse and woodland cabin decor.
7. Can I make the Christmas trees more dimensional?
Yes.
You can leave small branch points free or use a slightly textured yarn for the green appliqués.
For an everyday blanket, make sure the appliqués remain securely attached.
8. Is this blanket suitable for a Christmas gift?
Yes.
A handmade winter blanket makes a thoughtful gift, especially when paired with a simple ribbon and gift tag.
Use washable yarn if easy care is important to the recipient.
9. Can I use the pattern for a pillow or table runner?
Yes.
The individual square can be adapted into many projects.
Only the final layout and assembly need to change.
10. How can I make the finished blanket look professional?
Use consistent yarn, check stitch counts, block the squares to matching measurements, sew even seams, and finish with a neat outer border.
Taking time with the finishing makes a noticeable difference.
Conclusion: Bring Cozy Forest Cabin Charm Into Your Home
There's something special about a handmade blanket that captures the feeling of a quiet winter cabin.
The Forest Cabin Crochet Blanket Pattern brings together classic granny stitches, beautiful Christmas-tree motifs, deep forest-green yarn, warm ivory backgrounds, and rich burgundy borders to create a cozy project filled with seasonal charm.
Each square becomes a little piece of the forest.
And as you join the motifs together, you'll see a lovely woodland-inspired blanket begin to take shape.
Although this project takes time, the repeating construction makes it enjoyable to work on throughout the winter season.
You can crochet a few squares each evening, take the project along when traveling, or work on it while enjoying your favorite holiday movies.
Once complete, the blanket is perfect for decorating a sofa, warming your favorite reading chair, or wrapping up as a thoughtful handmade Christmas gift.
And don't forget that the same tree granny square can become a pillow, table runner, wall hanging, or another festive crochet creation.
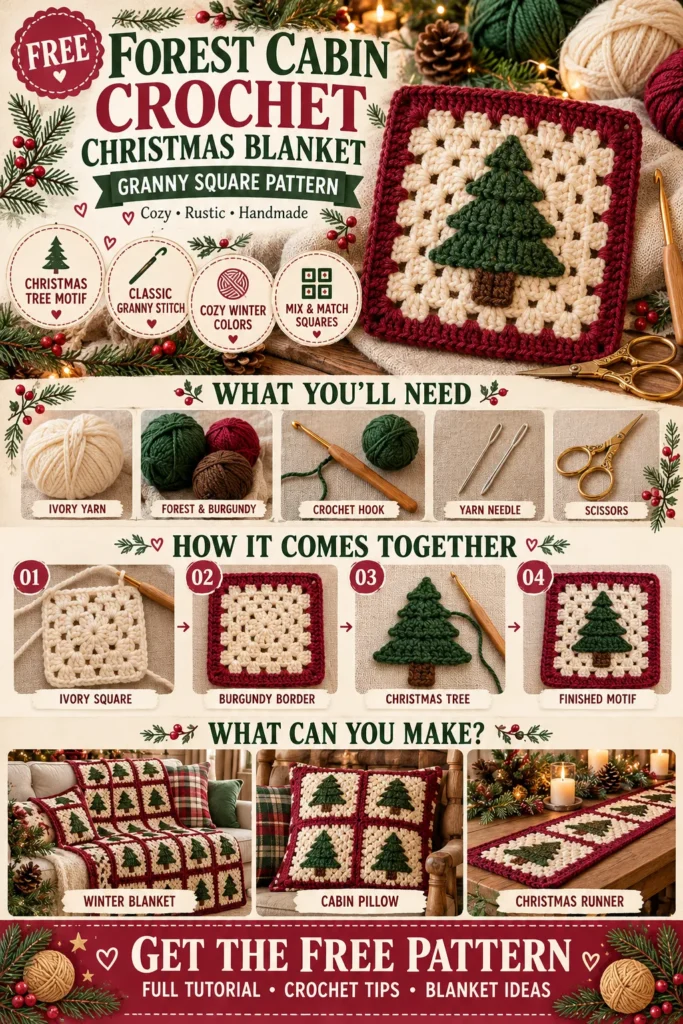
If you enjoyed this tutorial, save the Forest Cabin Crochet Blanket Pattern to your favorite Pinterest board so you can find it again when you're ready to begin your next cozy winter project.
Explore more Christmas crochet patterns here at Crochet Petal Studio for even more handmade holiday inspiration.
Happy crocheting, and may your winter be filled with warmth, creativity, and a little handmade magic!
Crochet Petal Studio — A Little Yarn. A Little Wonder. Something Made by Hand.