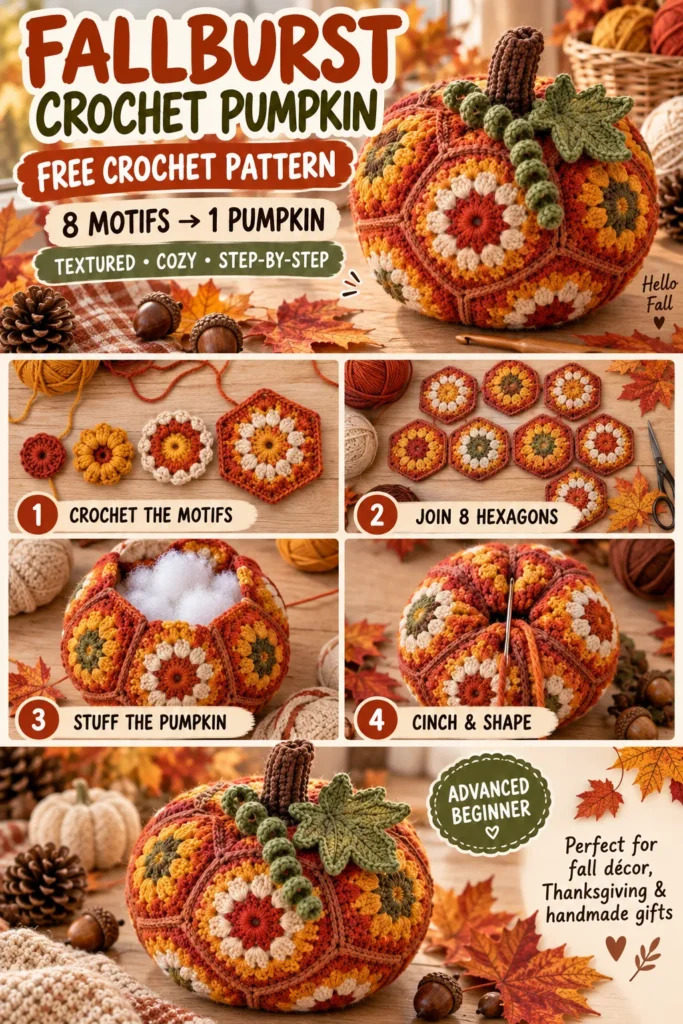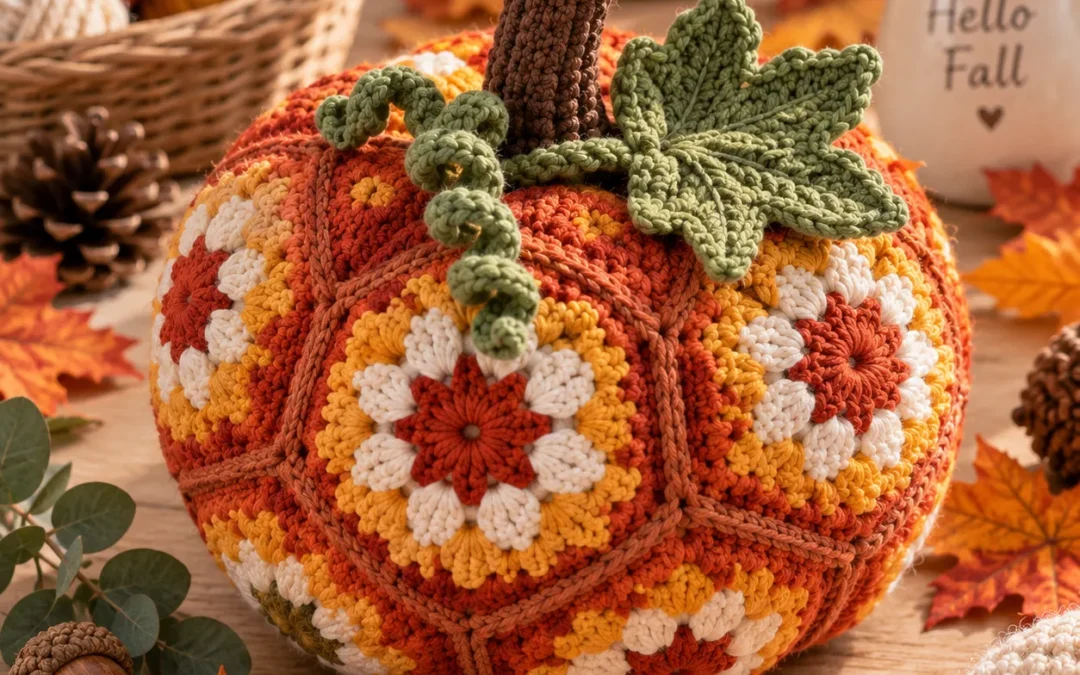
Turn colorful crochet motifs into cozy seasonal décor with this Crochet Fall Pumpkin free pattern.
Instead of working the pumpkin in ordinary ribbed rows, this design is assembled from textured Fallburst hexagon motifs in rich autumn colors. Puff stitches and crochet clusters give each motif dimension, while the joined hexagons naturally create the ridges and sections of a real pumpkin.
A small crochet stem, curly vine, and handmade maple leaf complete the woodland-inspired look.
Use burnt orange, golden yellow, rust, cream, olive green, or deep brown for a traditional autumn palette—or use softer neutrals for a modern farmhouse pumpkin.
Fallburst Crochet Pumpkin Pattern at a Glance
| Pattern Detail | Information |
|---|---|
| Skill Level | Advanced Beginner / Intermediate |
| Crochet Terms | US terminology |
| Yarn Weight | DK / Light #3 |
| Hook Size | 3.5 mm |
| Construction | 8 textured hexagon motifs |
| Approx. Finished Width | 8–9 in / 20–23 cm |
| Approx. Height | 6–7 in / 15–18 cm |
| Main Techniques | Puff stitch, cluster stitch, motif joining |
| Motifs Needed | 8 |
| Main Colors | Rust, orange, mustard, cream |
| Finishing | Stem, vine and maple leaf |
The finished measurements will vary slightly depending on yarn, hook size, stuffing, and tension.
Why You’ll Love This Crochet Pumpkin
Traditional crochet pumpkins are usually made from rectangles or continuous rounds.
This one has a completely different look.
Each hexagon creates its own burst of texture and color, while the seams between the motifs naturally become pumpkin ridges after stuffing.
It is also an excellent project for using leftover autumn yarn.
Make just one for a coffee table centerpiece or crochet several in different sizes and color combinations for a complete fall display.
The design works especially well for:
- Thanksgiving décor
- Fall table decorations
- Mantel displays
- Farmhouse décor
- Autumn gift baskets
- Craft-fair decorations
- Crochet centerpieces
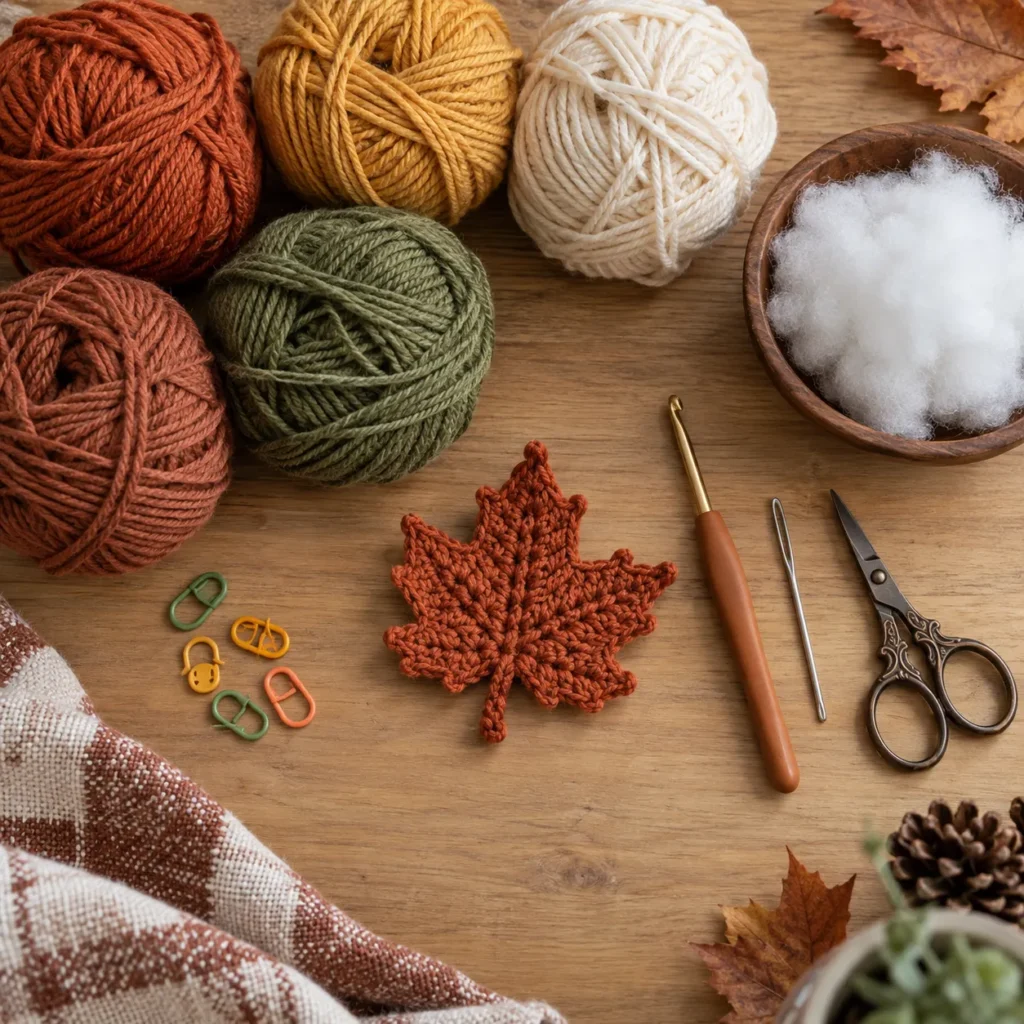
Materials
For one medium pumpkin:
- Approximately 200–250 yards DK weight yarn total
- Rust or burnt-orange yarn
- Golden-yellow or mustard yarn
- Cream or oatmeal yarn
- Terracotta yarn
- Small amount of olive or sage-green yarn
- Brown yarn for the stem
- 3.5 mm crochet hook
- Fiberfill stuffing
- Yarn needle
- Scissors
- Stitch markers
- Blocking pins, optional
A cotton or cotton-acrylic blend works particularly well because it keeps the motifs defined after stuffing.
Suggested Fall Color Palette
A strong classic combination is:
Round 1: deep rust
Round 2: burnt orange
Round 3: golden mustard
Round 4: warm cream
Border: terracotta
You do not need to make all eight motifs identical.
For a more handmade patchwork appearance, rotate the colors from motif to motif.
For example, one hexagon can begin in rust while the next begins in mustard.
As long as the same general autumn palette is used, the finished pumpkin will remain cohesive.
Crochet Abbreviations
| Abbreviation | Meaning |
|---|---|
| MR | Magic ring |
| ch | Chain |
| sc | Single crochet |
| hdc | Half double crochet |
| dc | Double crochet |
| sl st | Slip stitch |
| st / sts | Stitch / stitches |
| sp | Space |
| puff | Puff stitch |
| cl | Cluster |
| rep | Repeat |
Special Stitch: Puff Stitch
Yarn over.
Insert the hook into the indicated stitch or space and pull up a loop.
Repeat this process three more times.
You should now have several loops on the hook.
Yarn over and pull through all loops.
Ch 1 to secure the puff.
Special Stitch: 3-Double-Crochet Cluster
Yarn over and insert the hook into the indicated space.
Pull up a loop.
Yarn over and pull through two loops, leaving the final two loops on the hook.
Repeat twice more in the same space.
Yarn over and pull through all remaining loops.
Pattern Notes
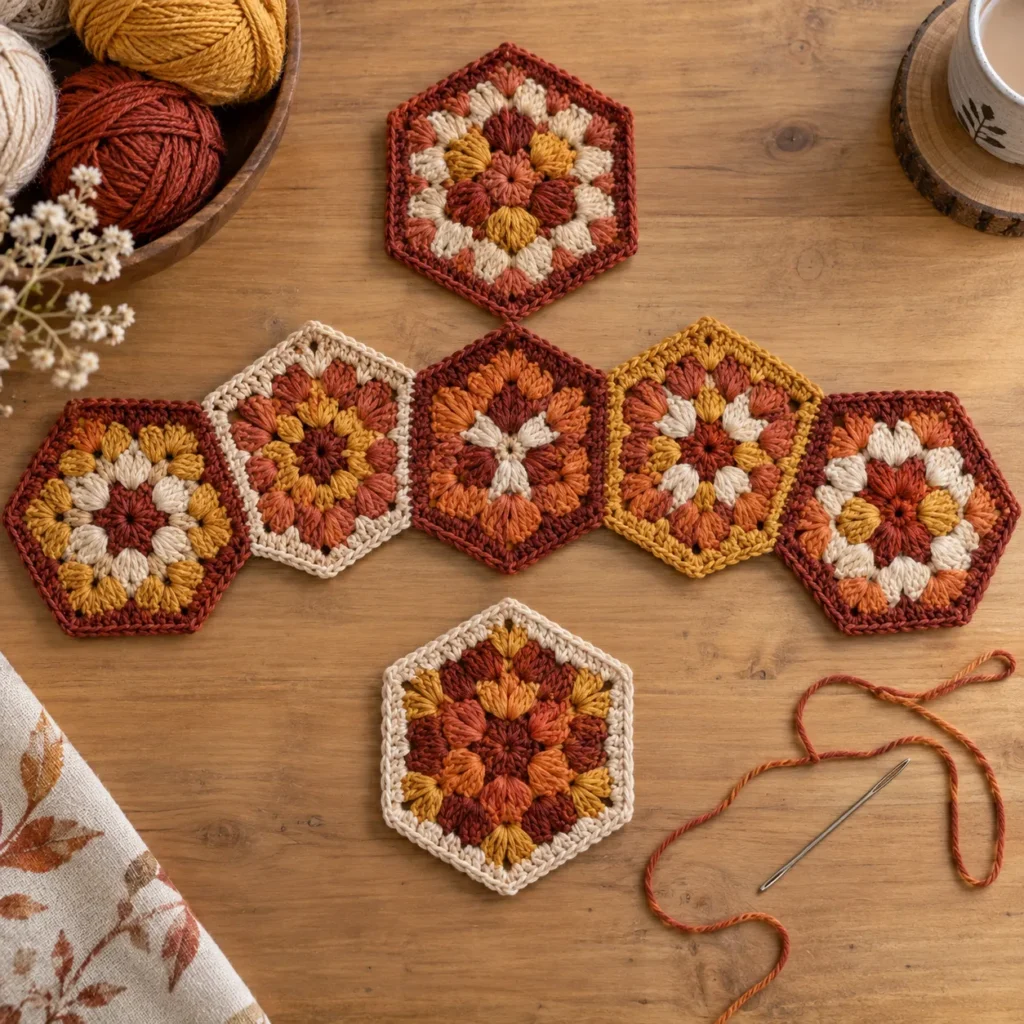
Make 8 Fallburst hexagon motifs.
Six motifs create the main side body.
One motif closes the top.
One motif closes the bottom.
The pumpkin is stuffed before the final section is completely closed.
A long strand of yarn is then passed through the center to pull the top and bottom inward and emphasize the pumpkin shape.
Part 1: Crochet the Fallburst Hexagon Motif
Make 8.
Round 1 – Center
Using the first color, create a magic ring.
Ch 2.
Work 11 hdc into the ring.
Join with a sl st to the top of the beginning chain.
12 sts
Pull the magic ring closed.
Fasten off.
Round 2 – Puff Stitch Round
Join the second color in any stitch.
Ch 1.
Work:
1 puff stitch, ch 1
in every stitch around.
Join with a sl st.
You should have:
12 puff stitches
Fasten off.
The motif should now have a raised flower-like center.
Round 3 – Cluster Round
Join the third color in any ch-1 space.
Ch 2.
Work one 3-dc cluster into the same space.
Ch 2.
In every remaining ch-1 space work:
3-dc cluster, ch 2
Join.
You should have:
12 clusters and 12 ch-2 spaces.
Fasten off.
Round 4 – Turn the Circle into a Hexagon
Join the fourth color in any ch-2 space.
In the first space work:
3 dc, ch 2, 3 dc
This forms the first corner.
In the next space work:
3 dc
In the following space work:
3 dc, ch 2, 3 dc
Continue alternating:
corner → regular 3-dc group
around.
You should finish with:
6 corners
Join with a sl st.
Fasten off.
Round 5 – Stabilizing Border
Join the border color in any corner.
Ch 1.
Sc evenly across each side.
Inside each corner space work:
sc, ch 1, sc
Continue around all six sides.
Join and fasten off.
This final round helps make the motifs easier to seam.
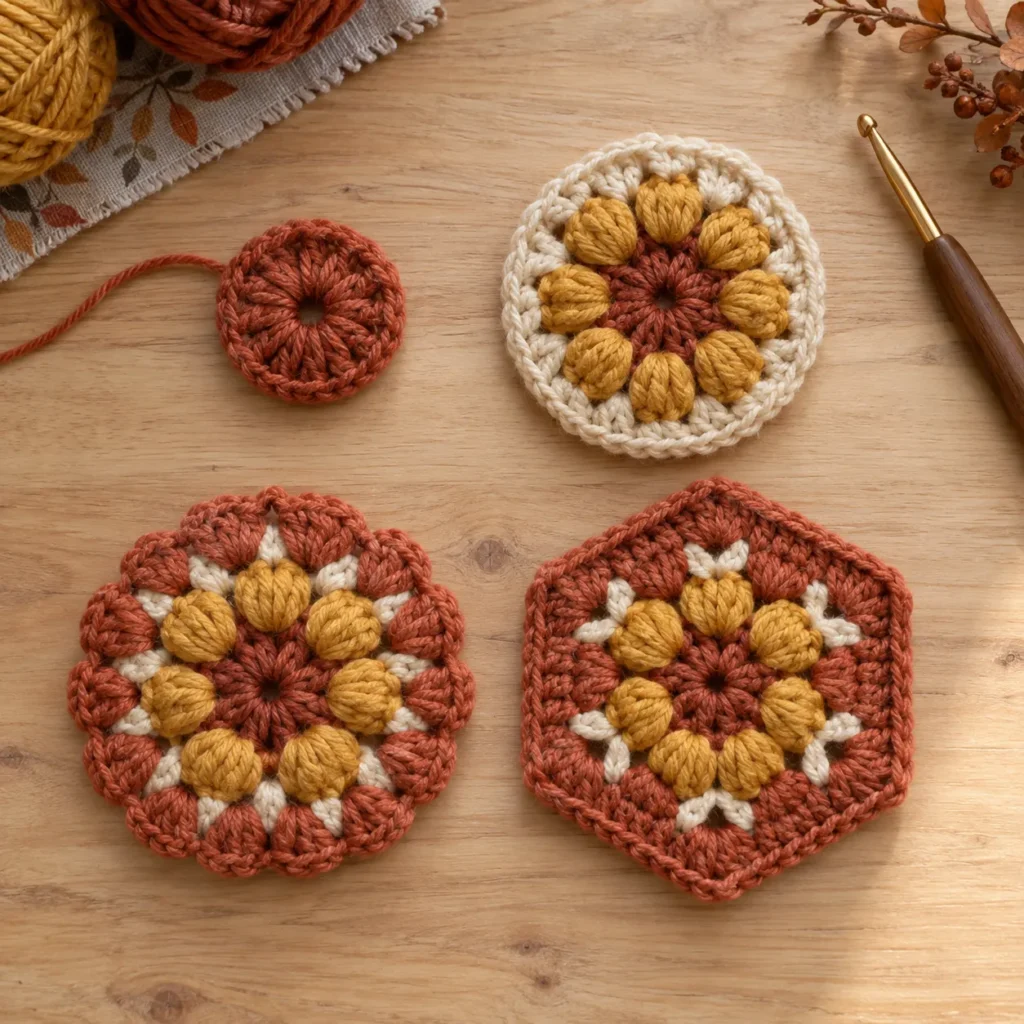
Blocking the Hexagons
Blocking the motifs before assembly makes the edges easier to join.
Lightly dampen each hexagon.
Arrange them so all six sides have approximately the same length.
Pin into shape.
Allow them to dry completely.
All eight motifs should be close to the same dimensions before joining.
Part 2: Arrange the Pumpkin Motifs
Choose six motifs for the sides.
Place them in a row.
Arrange the colors until the combination feels balanced.
Join the right edge of the first motif to the left edge of the second.
Continue until all six motifs form one long strip.
Finally join the first and sixth motifs together to form a ring.
The structure will already begin to curve naturally.
How to Join the Motifs
Place two motifs with right sides facing outward.
Using a matching or contrasting yarn, insert the hook through the corresponding edge stitches.
Work slip stitches through both layers.
Continue from corner to corner.
A loose slip-stitch seam works particularly well because it leaves a subtle raised line that becomes part of the pumpkin texture.
Do not pull the joining yarn too tightly.
Add the Bottom Hexagon
Take one remaining motif.
Position it underneath the six-motif ring.
Each of its six sides should align approximately with one of the side motifs.
Use stitch markers to hold the pieces together first.
Slip stitch around each section until the bottom motif is attached to the entire ring.
Because crochet fabric is flexible, the structure will begin bending inward and taking on a rounded shape.
Part 3: Attach the Top Motif
Position the final hexagon across the top opening.
Join five of its six edges to the side motifs.
Leave the last section open.
This opening will be used for stuffing.
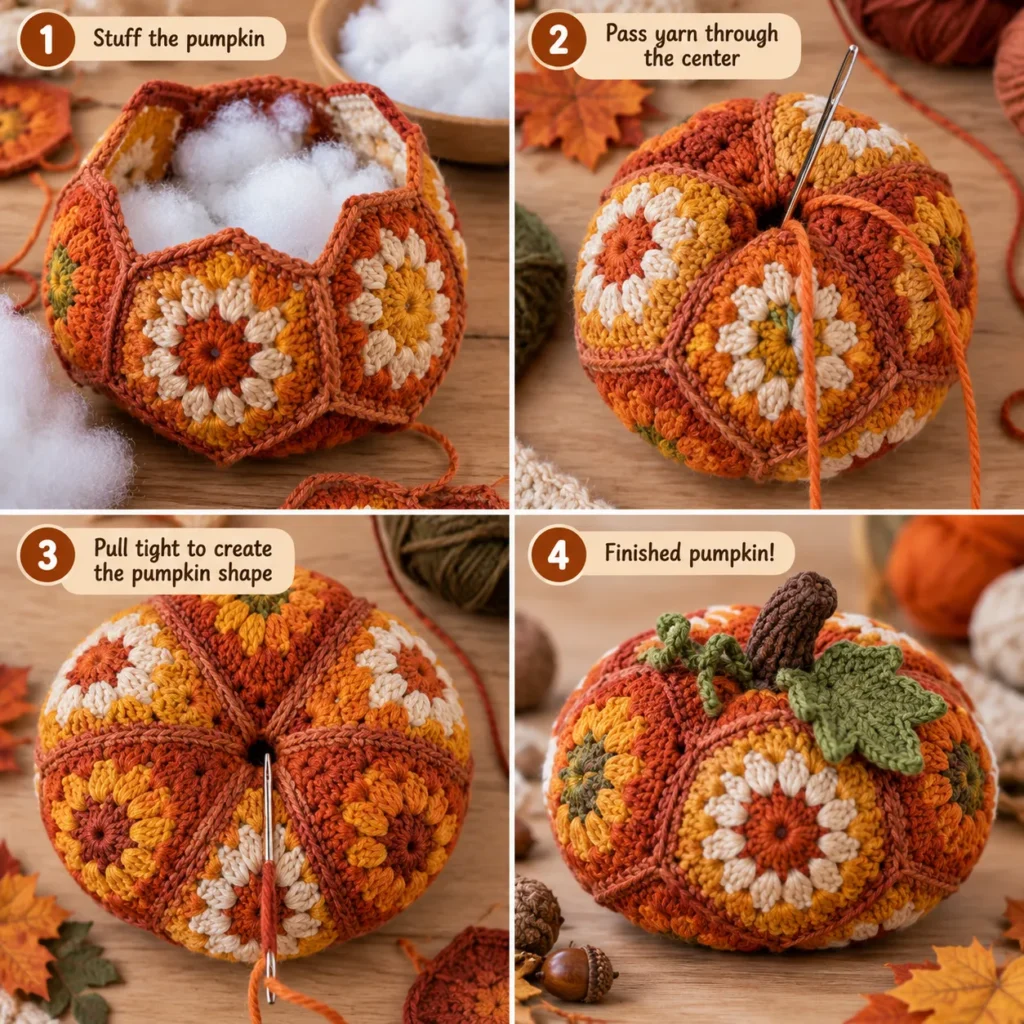
Stuff the Pumpkin
Fill the pumpkin gradually with fiberfill.
Push stuffing into the outer edges and around the motif seams.
Do not overstuff.
Too much filling can flatten the beautiful texture of the puff stitches.
The pumpkin should feel full but still compress when squeezed.
Once satisfied with the shape, join the final open seam.
Fasten off securely.
Part 4: Create the Pumpkin Indent
The center cinch transforms the stuffed shape into a recognizable pumpkin.
Thread a long strand of strong matching yarn through a yarn needle.
Insert the needle into the center of the top motif.
Push it completely through the pumpkin and bring it out through the center of the bottom motif.
Pull firmly.
Bring the yarn back around the outside and pass through the center again.
Repeat this several times.
As the yarn tightens, the top and bottom should sink inward.
Do not pull so tightly that the stitches become distorted.
Secure with several strong knots.
Hide the yarn tails inside the pumpkin.
Part 5: Crochet the Pumpkin Stem
Using brown yarn:
Round 1
Create a magic ring.
Work:
6 sc into MR
Round 2
Sc in each stitch around.
Rounds 3–7
Continue sc around.
Do not increase.
The stem should form a narrow tube approximately 2 inches tall.
Stuff lightly.
Fasten off with a long yarn tail.
Position the stem inside the top indentation.
Sew firmly around its base.
Optional Cinnamon-Stick Stem
For a decorative pumpkin that will remain out of reach of children and pets, a short cinnamon stick can be inserted into the center instead of the crochet stem.
The original viral project also uses a cinnamon-style stem for its rustic finish.
Part 6: Crochet the Curly Vine
Use green yarn.
Ch 22.
Beginning in the second chain from the hook:
Work 2 hdc in each chain.
The crochet will naturally curl into a spiral.
Fasten off.
Sew one end beside the pumpkin stem.
Part 7: Crochet the Maple Leaf
Use rust, olive green, mustard, or deep red yarn.
Create a magic ring.
The leaf is formed from five pointed lobes of different lengths.
First Small Lobe
Ch 5.
Starting in the second chain:
sl st, sc, hdc, dc.
Sl st into the magic ring.
First Medium Lobe
Ch 6.
Starting in the second chain:
sl st, sc, hdc, dc, tr.
Sl st into the ring.
Center Lobe
Ch 8.
Starting in the second chain:
sl st, sc, hdc, dc, tr, tr, dc.
Sl st into the ring.
Second Medium Lobe
Repeat the first medium lobe.
Final Small Lobe
Repeat the first small lobe.
Pull the magic ring tight.
Maple Leaf Stem
Without cutting the yarn:
Ch 10.
Sl st back along the chain.
Fasten off.
Gently block the leaf so the five points spread outward.
Sew the maple leaf beside the pumpkin stem.
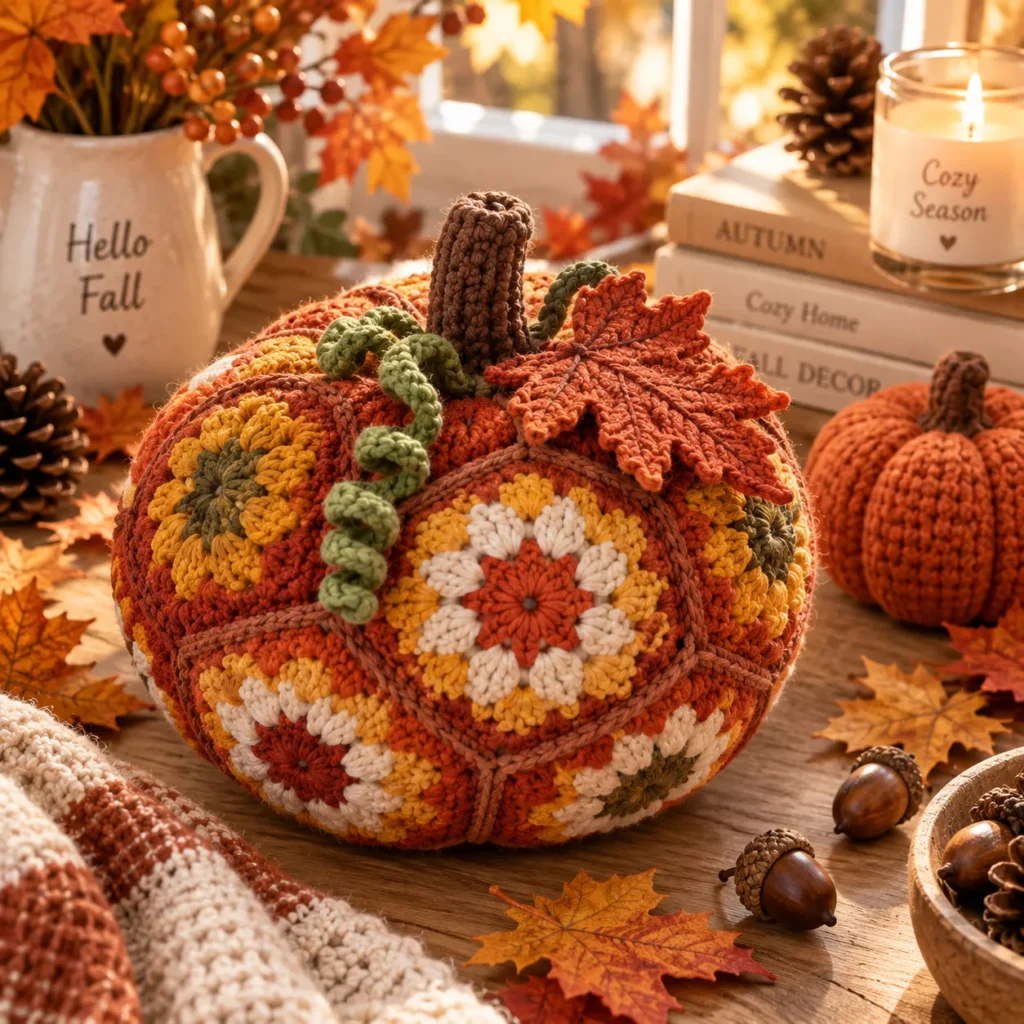
Finishing the Fall Pumpkin
Arrange the maple leaf and curly vine naturally around the stem.
Use a few hidden stitches to keep them in position.
Gently massage the stuffing so the pumpkin is symmetrical.
Adjust the six outer seams so they resemble natural pumpkin ridges.
The finished motif pumpkin should have a soft rounded shape with a visible dip at the top and bottom.
Fallburst Pumpkin Color Ideas
Classic Autumn
Rust
Pumpkin orange
Mustard
Cream
Brown stem
Olive leaf
Harvest Neutral
Oatmeal
Camel
Cream
Warm beige
Dark brown
Cottagecore
Terracotta
Dusty rose
Mustard
Sage
Ivory
Woodland
Burnt orange
Forest green
Brown
Golden yellow
Cream
Modern Fall
Cream
Caramel
Muted rust
Taupe
Olive
How to Make a Larger Pumpkin
There are two easy options.
The simplest is to use a heavier yarn and larger crochet hook while keeping the same stitch counts.
A worsted-weight yarn with a 4–4.5 mm hook will produce noticeably larger motifs.
You can also add another border round to every hexagon before assembly.
Just make sure all eight motifs remain identical in size.
How to Make a Mini Pumpkin
Use fingering or sport-weight yarn with a smaller hook.
The same eight-motif construction will produce a much smaller finished pumpkin.
Mini versions look especially cute grouped in sets of three.
Tips for Beautiful Motif Pumpkins
Block every motif before joining.
Rotate the colors between hexagons instead of placing identical motifs side-by-side.
Keep the joining tension relaxed.
Stuff gradually and check the shape from every angle.
Do not overstuff the puff stitches.
Use a strong yarn for the center cinch because it will carry quite a bit of tension.
Add the leaf and vine only after the final pumpkin shape is complete.
Frequently Asked Questions
Is this Fallburst pumpkin beginner friendly?
The individual stitches are manageable, but puff stitches, clusters, motif joining, stuffing, and shaping add a little complexity.
A confident beginner or intermediate crocheter should be comfortable with the project.
How many motifs are needed?
This version uses 8 hexagon motifs.
Six form the sides, one forms the top, and one forms the bottom.
Can all the motifs be one color?
Yes.
A single-color cream, rust, or orange pumpkin can look beautiful.
The textured stitches will still create plenty of visual interest.
Can acrylic yarn be used?
Yes.
Cotton provides slightly sharper stitch definition, while acrylic creates a softer pumpkin.
Does the pumpkin need a cinnamon stick?
No.
The pattern includes a fully crocheted stem.
Can the maple leaf be removed?
Yes.
The pumpkin can be finished with just a stem and vine for a simpler design.
Can the pumpkin be washed?
If all components are crocheted and the yarn is washable, gentle hand washing is usually suitable.
A pumpkin using a real cinnamon-stick stem should be spot cleaned instead.
More Free Fall Crochet Patterns
As your seasonal content grows, internally link this article to patterns such as Crochet Pumpkin Granny Square, Fall Crochet Garland, Crochet Maple Leaf, Pumpkin Amigurumi, Crochet Acorn, and Autumn Granny Square.
This can help build a strong Pinterest cluster around fall crochet patterns and crochet autumn décor.
Save This Fall Crochet Pumpkin on Pinterest
Save this Fallburst Motif Crochet Pumpkin free pattern for your next autumn project.
The combination of textured hexagons, warm fall colors, a curly vine, and a crochet maple leaf makes it especially eye-catching for Thanksgiving and seasonal home décor.