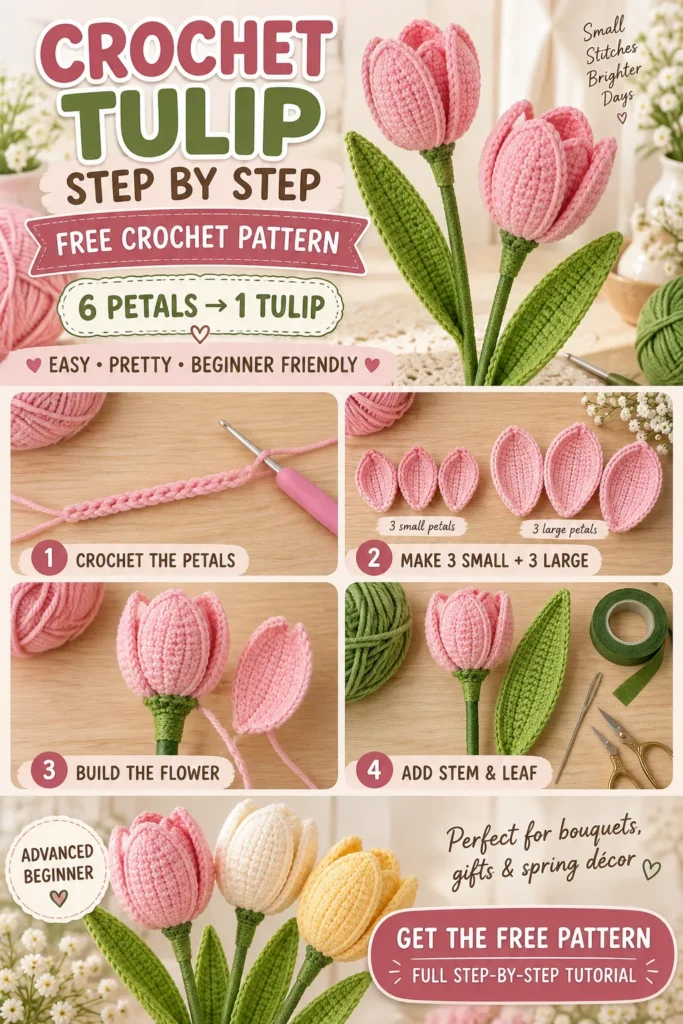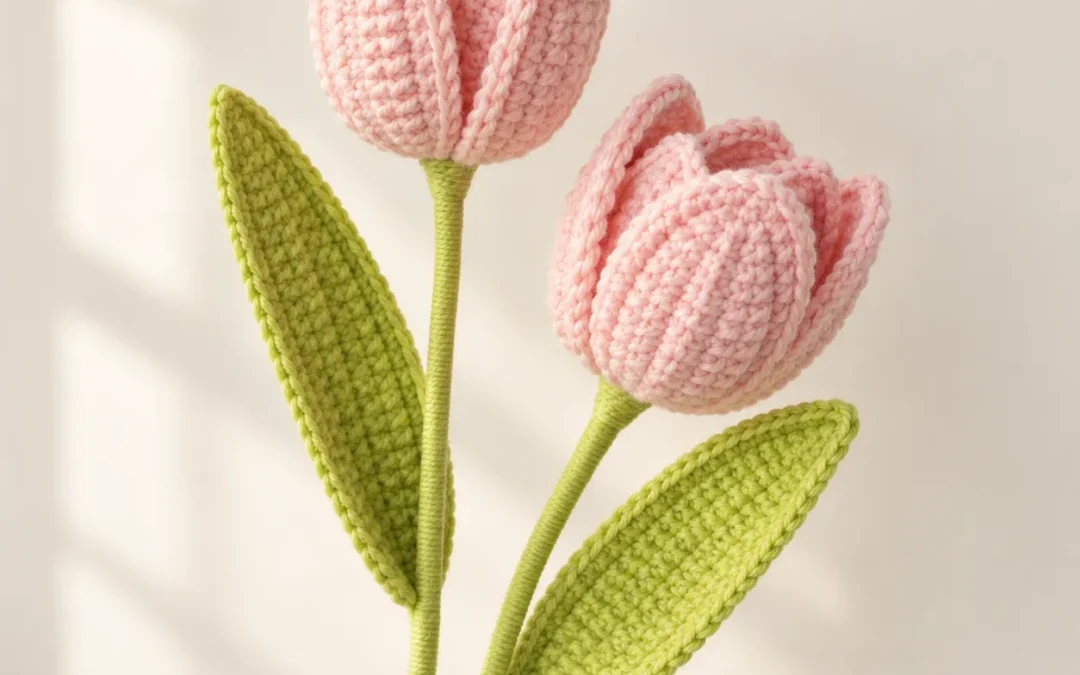
Create an everlasting spring bouquet with this Crochet Tulip Flower Step By Step free pattern.
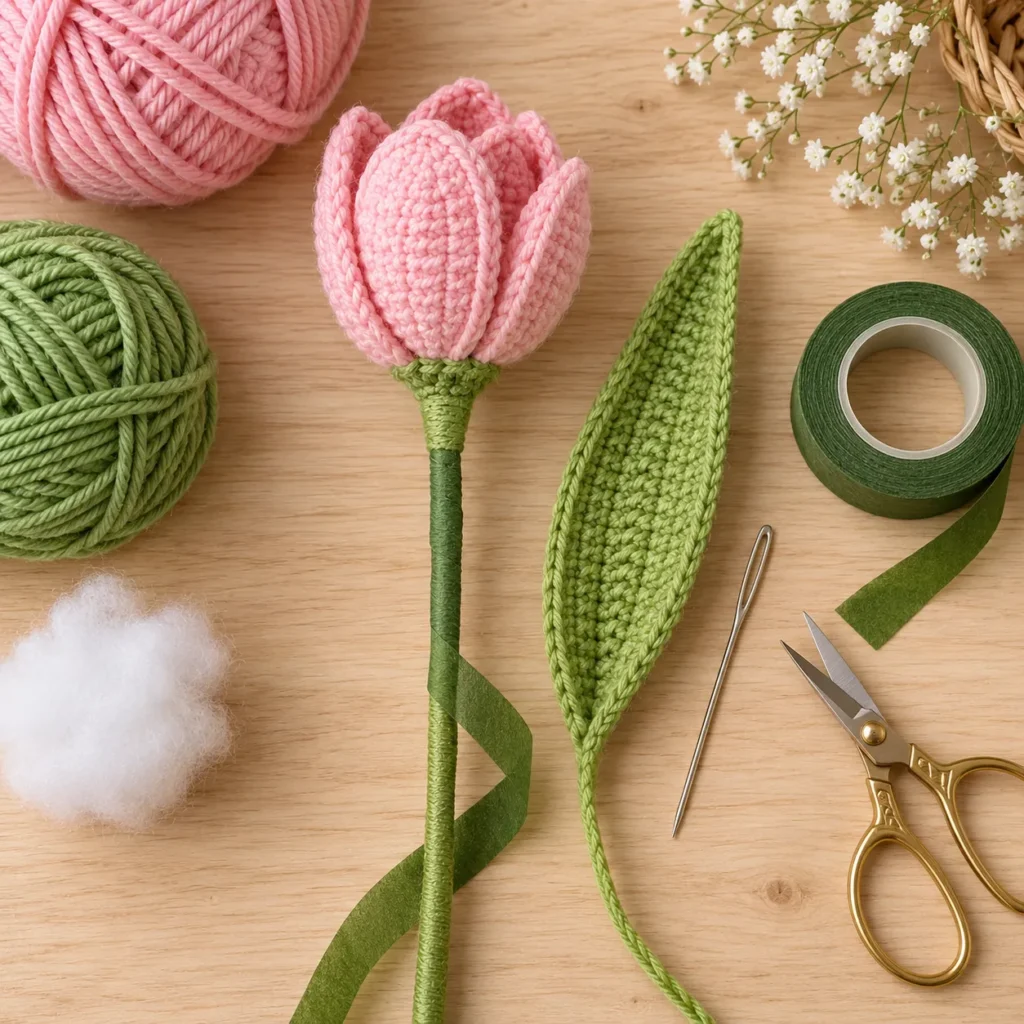
This handmade tulip features six softly shaped crochet petals arranged into a realistic closed flower bud, a long slender green stem, and an elegant pointed crochet leaf.
The finished flower has a simple, clean look that works beautifully for spring décor, handmade bouquets, Mother’s Day gifts, birthdays, wedding arrangements, or a small vase on your desk.
Make the classic version in blush pink, or combine cream, pale yellow, lavender, peach, dusty rose, and red tulips to create your own colorful bouquet.
Crochet Tulip Pattern at a Glance
| Pattern Detail | Information |
|---|---|
| Skill Level | Advanced Beginner |
| Crochet Terms | US terminology |
| Yarn Weight | DK / Light #3 |
| Hook Size | 3 mm |
| Finished Height | Approx. 9–10 in / 23–25 cm |
| Flower Diameter | Approx. 2.5–3 in / 6–7.5 cm |
| Inner Petals | 3 |
| Outer Petals | 3 |
| Leaf | 1 long pointed leaf |
| Stem | Wrapped floral wire |
| Main Stitches | sc, hdc, dc |
| Construction | Separate petals assembled around stem |
Separate-petal tulips are a common 3D crochet-flower construction because they allow the bloom to be shaped more naturally during assembly.
Why You’ll Love This Crochet Tulip
Crochet tulips are surprisingly versatile.
One flower makes a sweet little handmade gift, while five to seven tulips can create a beautiful decorative bouquet.
Because each petal is crocheted separately, you can also control the final flower shape.
For a young tulip bud, curve the petals tightly toward the center.
For a slightly open tulip, let the three outer petals lean gently outward.
You can also use the exact same pattern in different colors.
Some beautiful combinations include:
- Blush pink + fresh green
- Cream + sage
- Pale yellow + olive
- Lavender + moss
- Peach + eucalyptus green
- Deep red + forest green

Materials
For one flower you will need:
- Approx. 30–40 yards DK yarn in your chosen tulip color
- Approx. 15–20 yards green DK yarn
- 3 mm crochet hook
- Floral wire approximately 10–12 in / 25–30 cm
- Green floral tape
- Yarn needle
- Scissors
- Wire cutters
- Small amount of fiberfill, optional
- Stitch markers, optional
Cotton or cotton-acrylic yarn works especially well because it gives the petals enough structure without making them overly stiff.
Crochet Abbreviations
| Abbreviation | Meaning |
|---|---|
| ch | Chain |
| sl st | Slip stitch |
| sc | Single crochet |
| hdc | Half double crochet |
| dc | Double crochet |
| inc | 2 stitches in one stitch |
| st / sts | Stitch / stitches |
| RS | Right side |
Pattern Notes
This tulip uses:
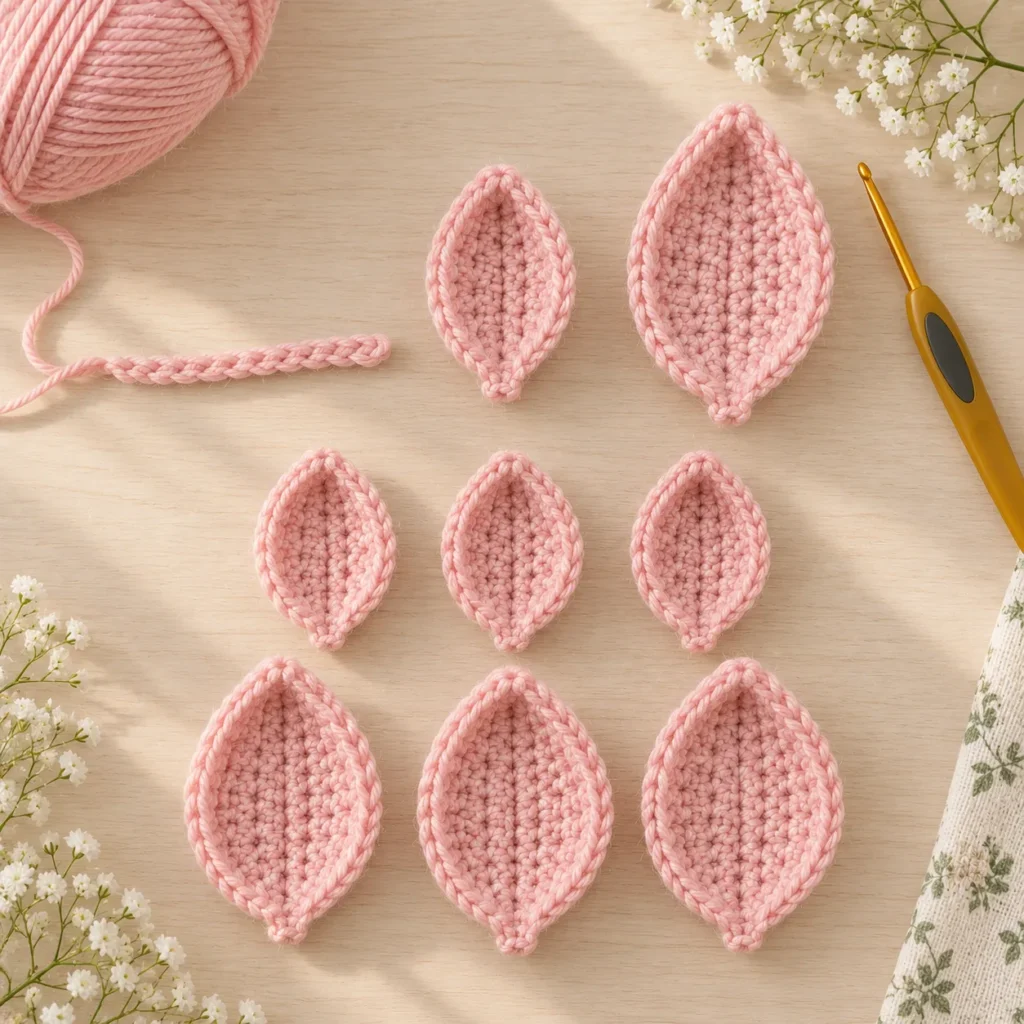
3 small inner petals
and
3 larger outer petals
The petals are crocheted around both sides of a foundation chain, giving them a smooth oval shape.
The small petals form the inner bud.
The large petals overlap them from the outside.
The stem and leaf are added after the flower head has been assembled.
Part 1: Crochet the Small Inner Petals
Make 3.
Using your flower color:
Ch 10.
Starting in the second chain from the hook, work:
1 sl st
1 sc
2 hdc
3 dc
1 hdc
1 sc
Work 3 sc into the final chain.
Now rotate the work and crochet along the opposite side of the foundation chain.
Work:
1 sc
1 hdc
3 dc
2 hdc
1 sc
1 sl st
Join.
Small Petal Edging
Ch 1.
Sc evenly around the entire outer edge.
At the very top of the petal work:
sc, ch 1, sc
Continue around.
Join and fasten off.
Leave approximately 8 in / 20 cm of yarn for assembly.
Repeat until you have 3 matching petals.
Shape the Inner Petals
Hold each petal vertically.
Pinch the lower third gently between your fingers.
Use the yarn tail to make two or three small hidden stitches across the lower edge.
This will create a shallow cup shape.
Do not crease the upper half.
The petal should remain rounded and soft.
Part 2: Crochet the Larger Outer Petals
Make 3.
Using the same flower color:
Ch 12.
Starting in the second chain from the hook, work:
1 sl st
1 sc
2 hdc
5 dc
1 hdc
1 sc
Work 3 sc into the final chain.
Continue along the opposite side:
1 sc
1 hdc
5 dc
2 hdc
1 sc
1 sl st
Join.
Large Petal Edging
Ch 1.
Sc evenly around.
At the upper point work:
sc, ch 1, sc
Continue to the base.
Join.
Fasten off with a long tail.
The large petals should be slightly longer and wider than the first three.
Part 3: Prepare the Flower Stem
Cut a piece of floral wire approximately:
10–12 inches / 25–30 cm
Bend the top ½ inch / 1 cm into a small closed loop.
This helps prevent the wire from pushing through the flower.
Wrap the loop with a little green yarn.
For a slightly fuller bud, wrap a tiny amount of fiberfill around the upper wire before covering it.
Do not use too much.
The center only needs enough volume to help the petals hold their shape.
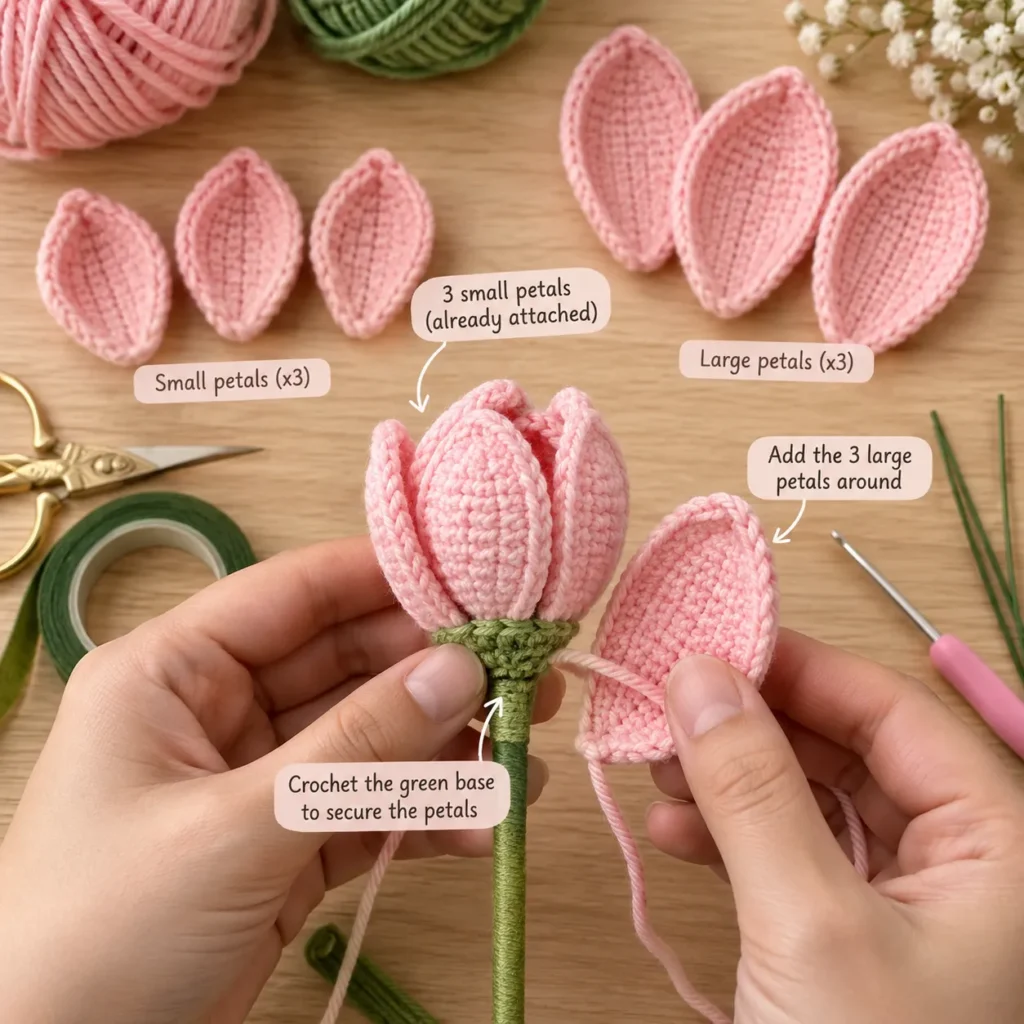
Part 4: Assemble the Three Inner Petals
Take the first small petal.
Position its base around the top of the stem.
The petal should curve inward.
Secure its lower edge tightly using the yarn tail.
Place the second small petal so that it overlaps approximately one-third of the first.
Secure it.
Position the third petal in the remaining opening.
When viewed from above, the three petals should form a tight triangular bud.
Sew through all three petal bases several times.
Tie securely.
Part 5: Add the Outer Petals
Take one large petal.
Position it slightly lower than the inner petals.
Place its center directly between two inner petals.
Sew the lower section around the stem.
Add the second large petal in the next gap.
Repeat with the third.
You should now have alternating petals around the flower:
small → large → small → large → small → large
This layered placement creates a more natural tulip shape.
Shape the Tulip Head
For a closed bloom, gently curve all six petals inward.
Allow the tips of the inner petals to almost touch.
The larger petals should partially overlap the small ones.
For a slightly more open flower, move only the three outer petals outward.
Avoid making all six petals sit at exactly the same angle.
Slight differences make the flower look more natural.
Part 6: Crochet the Green Flower Base
Using green yarn, join around the lower edge of the flower.
Work several tight sc stitches around the base.
Continue for approximately 2 small rounds.
The green section should hide:
- petal seams
- yarn knots
- the wire connection
Fasten off.
This creates the small green section beneath the tulip bloom.
Part 7: Crochet the Tulip Leaf
Use green yarn.
Ch 26.
Starting in the second chain from the hook:
Work:
2 sl st
3 sc
4 hdc
10 dc
3 hdc
2 sc
Work 3 sc into the final chain.
Now crochet along the opposite side of the foundation chain.
Work:
2 sc
3 hdc
10 dc
4 hdc
3 sc
2 sl st
Join.
Fasten off, leaving a long yarn tail.
The leaf should be long, narrow, and slightly pointed.
Optional Leaf Wire
If you want a leaf that can be shaped:
Cut a thin piece of floral wire slightly shorter than the finished leaf.
Lay the wire along the wrong side.
Using green yarn, sew it down with small whip stitches.
Fully cover both wire ends.
This allows the finished leaf to curve naturally away from the stem.
Part 8: Wrap the Stem
Start immediately below the tulip head.
Stretch a small amount of green floral tape.
Wrap it firmly around the wire.
Overlap each turn slightly.
Continue downward approximately 3–4 inches / 7–10 cm.
Stop where you want the leaf to begin.
Attach the Leaf
Position the base of the leaf against the stem.
Angle it outward slightly.
Using the remaining green yarn tail, sew or wrap the base around the wire.
Resume wrapping the floral tape over the attachment.
Continue all the way to the bottom of the wire.
Press the final tape edge firmly against the stem.
Part 9: Final Flower Shaping
This is the step that turns the project from a crochet piece into a realistic flower.
Hold the tulip upright.
Gently curve each petal lengthwise.
Pinch the petal tips slightly inward.
Rotate the three outer petals so that they sit between the inner petals.
Bend the stem very slightly.
Curve the leaf outward.
Avoid making the flower perfectly symmetrical.
Real tulips have subtle differences between their petals.
Crochet Tulip Color Ideas
Soft Spring Bouquet
Blush pink
Cream
Pale yellow
Lavender
Romantic Bouquet
Dusty rose
Ivory
Mauve
Soft peach
Bright Spring
Yellow
Orange
Coral
Pink
Classic Tulips
Red
Yellow
White
Cottagecore
Dusty pink
Muted peach
Cream
Sage accents
Wedding Bouquet
Ivory
Champagne
Pale blush
Eucalyptus green
Make a Crochet Tulip Bouquet
One flower is pretty.
A small bouquet is even better.
For a balanced vase arrangement, make:
2 blush-pink tulips
2 cream tulips
1 pale-yellow tulip
1 lavender tulip
Then add several extra green leaves.
Vary the stem lengths slightly.
Place the tallest flowers in the center.
Keep the outer tulips a little shorter.
You can also make some blooms tightly closed and others slightly open.
Crochet tulips are widely used for decorative bouquets and handmade gifts because the finished flowers can be arranged much like artificial florals.
Make a Smaller Tulip
Use sport-weight yarn.
Use approximately a 2–2.5 mm hook.
Shorten each petal foundation chain by two chains.
Use thinner floral wire.
Mini tulips work beautifully for:
- small vases
- gift toppers
- wreaths
- brooches
- miniature bouquets
Make a Larger Tulip
Use worsted-weight yarn.
Try a 3.5–4 mm crochet hook.
Increase the petal chains by approximately 2–3 chains.
Use thicker floral wire for additional support.
Large tulips work especially well as single statement flowers.
Tips for More Realistic Crochet Tulips
Use a hook slightly smaller than your yarn label recommends.
Firm stitches help petals maintain their shape.
Keep inner petals more tightly curved than outer petals.
Do not flatten petals with heavy blocking.
Position outer petals between the inner ones.
Hide every assembly stitch underneath the green flower base.
Vary flower angles when making a bouquet.
Safety Note
Floral wire should always be completely covered.
Make sure no sharp wire ends remain exposed.
These flowers are intended primarily for decorative use rather than as toys for babies or young children.
Washing and Care
Crochet flowers usually need very little maintenance.
Dust them gently with a clean soft brush.
For small marks, spot clean the yarn using cool water and mild detergent.
Avoid soaking the entire stem if it contains floral wire, tape, or glue.
Allow petals to air dry.
Reshape them gently while still slightly damp.

Frequently Asked Questions
Is this Crochet Tulip Flower beginner friendly?
The stitches are basic, but assembling and shaping six individual petals requires some patience.
It is ideal for an advanced beginner.
How many petals do I need for one tulip?
This version uses six petals:
3 small inner petals + 3 larger outer petals.
What yarn should I use?
DK cotton or cotton-blend yarn gives the petals excellent structure.
Soft acrylic can also work.
Do I need floral wire?
No, but wire creates the long upright stem seen in realistic crochet flower bouquets.
Can I make the tulip without stuffing?
Yes.
The small amount of fiberfill is completely optional.
Can I change the flower shape?
Yes.
Pull the outer petals inward for a closed bud or bend them outward for a more open flower.
How tall is the finished crochet tulip?
Approximately 9–10 inches / 23–25 cm, depending mainly on your wire length.
Save This Crochet Tulip Flower Pattern
Save this Crochet Tulip Flower Step By Step free pattern to Pinterest so you can come back to it whenever you are ready to make your own everlasting spring bouquet.
These flowers work beautifully for home décor, handmade gifts, Mother’s Day, birthdays, wedding arrangements, and colorful spring displays.