

Add a little handmade charm to your home with this Crochet Cute Little Basket.
This small crochet storage basket is made with chunky cotton yarn, simple single crochet stitches, a sturdy round base, two little handles, and an optional decorative bow on the front.
The soft pink-and-cream color combination gives it a sweet cottagecore look, but the pattern is easy to customize with any colors you love.
Use the finished basket for crochet notions, jewelry, hair accessories, nursery essentials, wrapped candy, desk supplies, small gifts, or simply as pretty handmade décor.
Best of all, the construction is simple enough for an adventurous beginner.
Crochet Little Basket Pattern at a Glance
| Pattern Detail | Information |
|---|---|
| Skill Level | Beginner / Advanced Beginner |
| Crochet Terms | US terminology |
| Yarn Weight | Chunky / Bulky cotton |
| Hook Size | 5 mm |
| Finished Width | Approx. 6–7 in / 15–18 cm |
| Finished Height | Approx. 5 in / 13 cm |
| Construction | Round base + continuous walls |
| Main Stitch | Single crochet |
| Handles | 2 separate crochet handles |
| Decoration | Optional crochet bow |
| Best Uses | Storage, gifts, nursery, craft room |
Exact measurements will vary depending on yarn and tension.
Why You’ll Love This Cute Crochet Basket
This pattern is simple, practical, and easy to personalize.
The flat circular base gives the basket stability, while the chunky cotton yarn helps the sides hold their shape without complicated reinforcement.
You can use the basket for:
- Stitch markers
- Crochet hooks
- Yarn scraps
- Jewelry
- Hair ties
- Nursery accessories
- Makeup
- Wrapped candy
- Small toys
- Gift baskets
- Desk organization
The finished basket is also small enough to make in an afternoon.
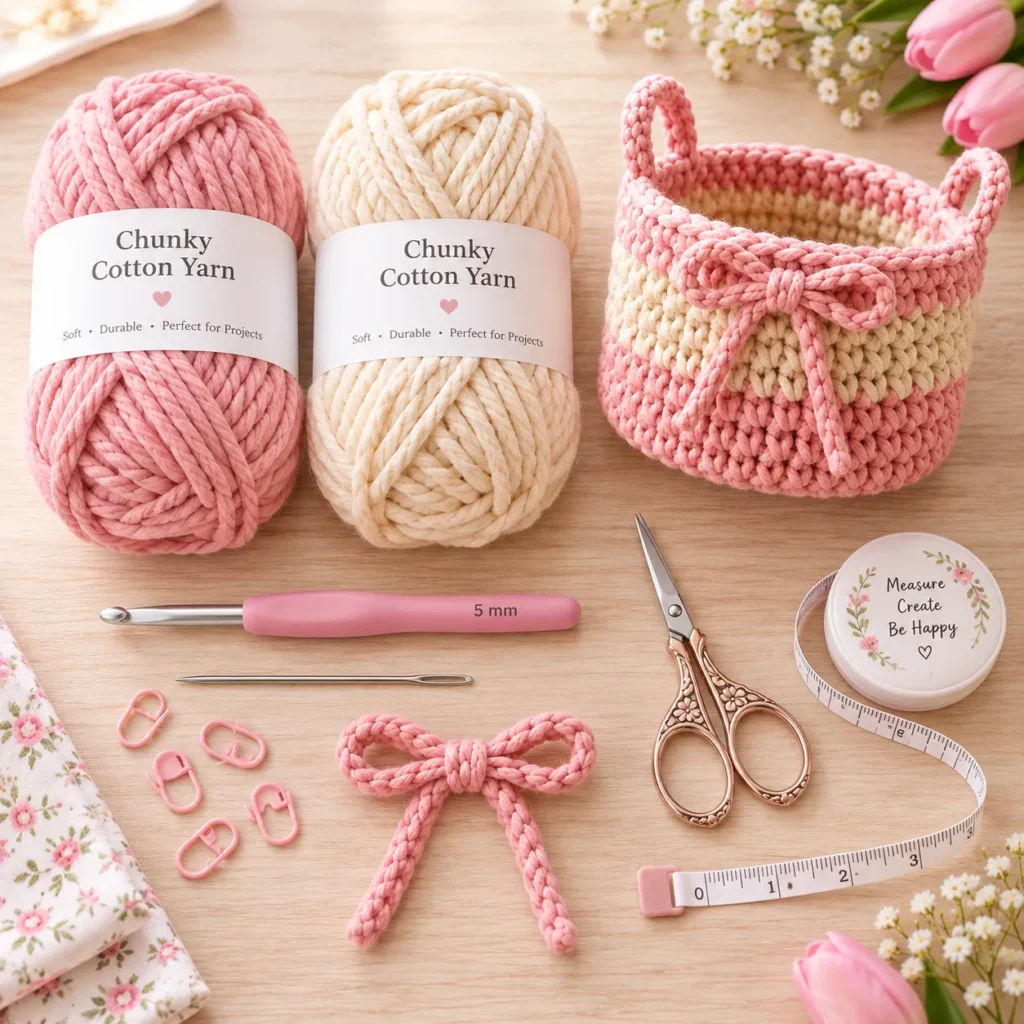
Materials
You will need:
- Approx. 100–120 yd / 91–110 m blush-pink chunky cotton yarn
- Approx. 60–80 yd / 55–73 m cream chunky cotton yarn
- 5 mm crochet hook
- Yarn needle
- Scissors
- Stitch markers
- Measuring tape
Optional:
- Plastic canvas circle for extra base support
- Fabric lining
- Wooden tag
- Decorative button
Cotton yarn works especially well because it creates firm, defined stitches.
A cotton-acrylic blend can also be used if you prefer a softer basket.
Crochet Abbreviations
| Abbreviation | Meaning |
|---|---|
| MR | Magic ring |
| ch | Chain |
| sc | Single crochet |
| inc | 2 sc in same stitch |
| sl st | Slip stitch |
| BLO | Back loop only |
| st / sts | Stitch / stitches |
| FO | Fasten off |
Pattern Notes
The base is worked in continuous rounds.
Use a stitch marker to mark the first stitch of every round.
The walls are created directly from the final base round.
A BLO round forms a clean turning edge between the base and the side walls.
The handles and bow are crocheted separately and sewn on after the basket is complete.
Part 1: Crochet the Pink Basket Base
Use blush-pink yarn.
Round 1
Create a magic ring.
Work:
6 sc into MR
6 sts
Round 2
Inc in every stitch.
12 sts
Round 3
Repeat:
sc, inc
around.
18 sts
Round 4
Repeat:
2 sc, inc
around.
24 sts
Round 5
Repeat:
3 sc, inc
around.
30 sts
Round 6
Repeat:
4 sc, inc
around.
36 sts
Round 7
Repeat:
5 sc, inc
around.
42 sts
The base should now lie flat.
If it begins to curl, your tension may be too tight.
If it becomes wavy, your tension may be too loose.

Part 2: Turn the Base Into Basket Walls
Round 8
Work:
sc BLO around
42 sts
This back-loop-only round creates the sharp bend between the flat base and the upright walls.
Rounds 9–13
Sc around.
42 sts
Continue using pink yarn.
The basket sides should now begin standing upright.
Try to keep your tension firm and consistent.
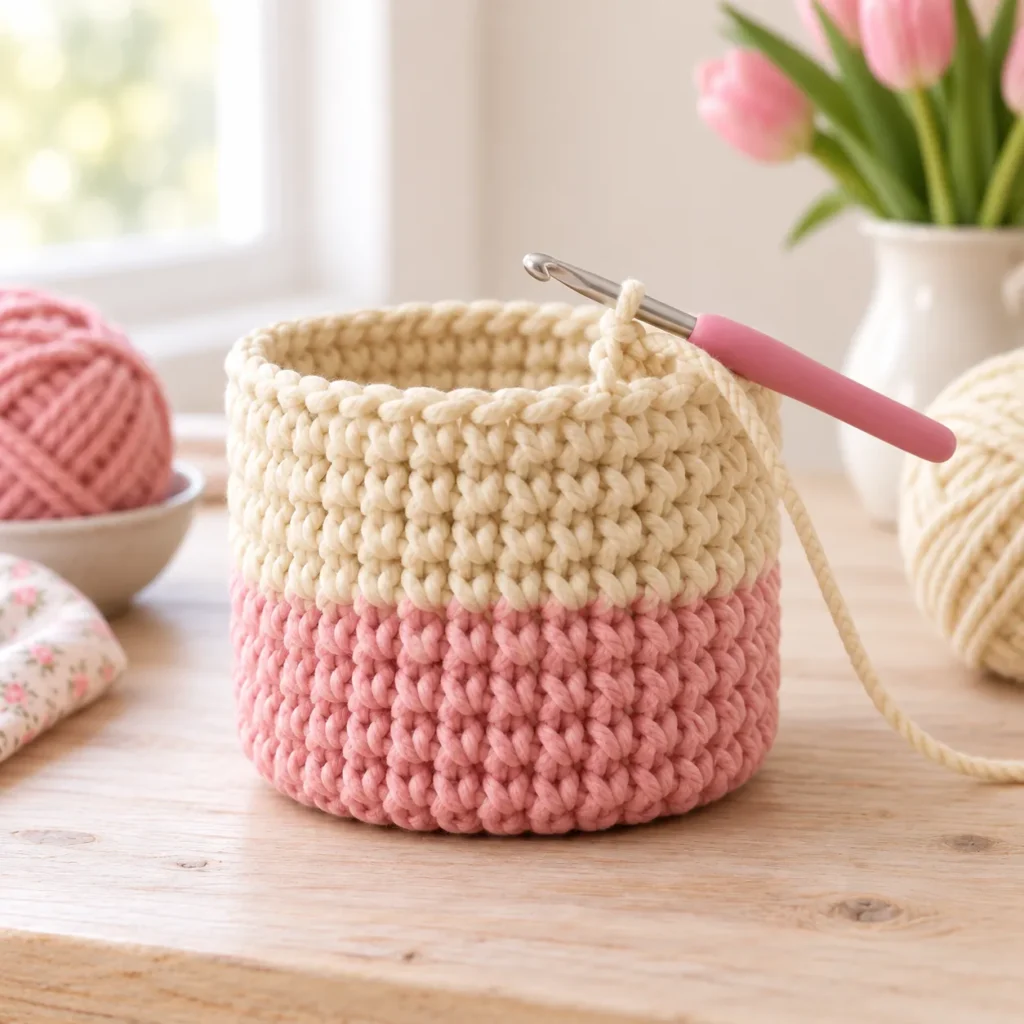
Part 3: Add the Cream Stripe
Change to warm-cream yarn.
Rounds 14–17
Sc around.
42 sts
Work four full cream rounds.
For a clean color change, complete the last stitch of the previous round with the new color.
The cream section creates the soft contrasting stripe through the middle of the basket.
Part 4: Finish the Pink Top
Change back to blush-pink yarn.
Rounds 18–20
Sc around.
42 sts
Round 21
Sl st loosely in every stitch around.
Fasten off.
Weave in the ends.
The basket body is now complete.
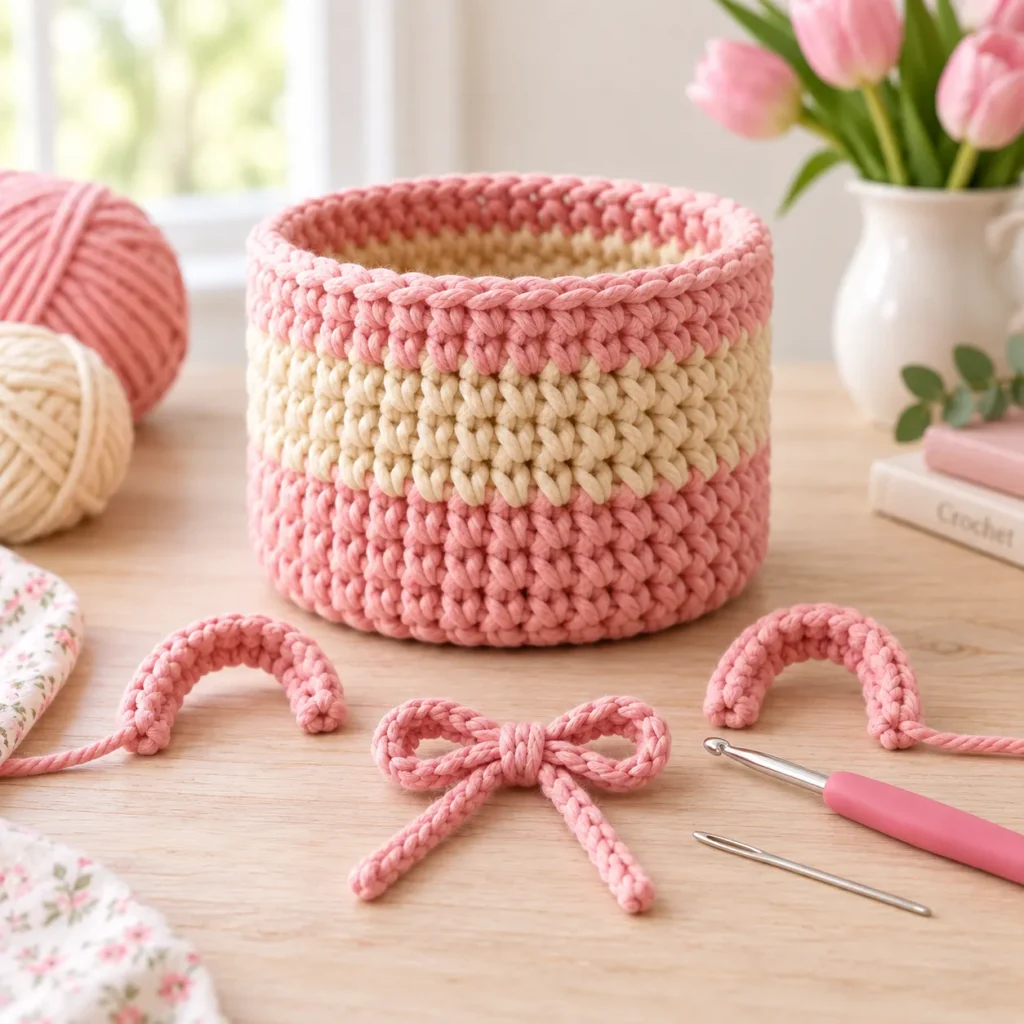
Part 5: Crochet the Handles
Make 2 using pink yarn.
Ch 18.
Starting in the second chain from the hook:
sc in each chain across
You should have:
17 sc
Fasten off, leaving a long tail at both ends.
For thicker handles, repeat the row once more before fastening off.
Attach the Handles
Flatten the basket gently so you can identify opposite sides.
Position one handle on the left side and one on the right.
Each handle should form a small upright loop.
Place the handle ends approximately:
3–4 stitches apart
Sew each end securely through several basket stitches.
Repeat with the second handle on the opposite side.
Check that both handles are the same height before weaving in the tails.
Part 6: Make the Decorative Crochet Bow
Using pink yarn:
Ch 45.
Starting in the second chain:
Sl st in every chain across.
Fasten off.
This creates a long flexible crochet cord.
Fold the cord into two loops to form a bow.
Cross the center sections.
Wrap a short piece of matching yarn several times around the middle.
Secure at the back.
Leave the two bow tails hanging naturally.
Attach the Bow
Position the bow at the center front of the basket.
Sew only through the wrapped middle section.
Avoid sewing down the loops.
This allows the bow to remain dimensional.
You can also skip the bow if you prefer a cleaner minimalist basket.
Optional Extra-Firm Basket
If you want the basket to hold heavier objects, add support to the base.
Cut a circle of plastic canvas slightly smaller than the inside bottom.
Place it inside.
You can cover the plastic canvas with:
- Felt
- Fabric
- Crochet circle
This helps the basket stay flat and prevents sagging.
Optional Fabric Lining
A fabric lining gives the basket an even more polished finish.
Measure the inside circumference and height.
Cut:
- One fabric circle for the bottom
- One rectangular strip for the sides
Sew the fabric pieces together.
Insert the lining.
Hand stitch it around the upper inside edge.
A lining is especially helpful if you plan to store jewelry, needles, buttons, or other tiny objects.
Make the Basket Smaller
For a mini basket, stop the base after:
30 stitches
Then work the wall rounds normally.
This smaller version is ideal for:
- Rings
- Earrings
- Stitch markers
- Wrapped chocolates
- Small gifts
Make the Basket Larger
Continue increasing after 42 stitches.
Next Round
Repeat:
6 sc, inc
around.
48 sts
Next Round
Repeat:
7 sc, inc
around.
54 sts
Then begin the BLO wall round.
For a larger basket, consider using thicker yarn or adding plastic canvas to the base.
Color Ideas
Soft Romantic
Blush pink + cream
Cottagecore
Sage green + ivory
Baby Girl
Dusty pink + white
Baby Boy
Baby blue + cream
Neutral Home
Taupe + oatmeal
Sunny
Pale yellow + cream
Lavender
Dusty lavender + ivory
Autumn
Rust + warm beige
You can also make the entire basket in one solid color.
Ways to Use Your Crochet Little Basket
Use it in your craft room for:
- Hooks
- Stitch markers
- Measuring tape
- Yarn needles
Use it in the bedroom for:
- Jewelry
- Hair clips
- Scrunchies
Use it in a nursery for:
- Pacifiers
- Small socks
- Hair bows
Or turn it into a handmade gift basket.
Fill it with:
- Yarn
- Tea
- Chocolates
- Soap
- Small beauty products
- Baby accessories
The basket itself becomes part of the gift.

Tips for a Professional Finish
Keep the base increases evenly spaced.
Use a stitch marker when working in continuous rounds.
Keep the wall tension slightly firm.
Do not pull your color-change stitches too tightly.
Measure both handles before sewing them on.
Attach handles with several strong stitches.
Center the bow before permanently attaching it.
Steam lightly if necessary, but do not flatten the basket.
Washing and Care
If using washable cotton yarn, gently hand wash the basket in cool water.
Press out excess moisture with a towel.
Do not wring.
Reshape while damp.
Place a clean towel inside the basket while it dries to help maintain the round shape.
If you added plastic canvas or cardboard, check whether the insert can safely get wet before washing.
Frequently Asked Questions
Is this Crochet Cute Little Basket beginner friendly?
Yes.
The pattern mainly uses single crochet, increases, chains, and slip stitches.
How big is the finished basket?
Approximately 6–7 inches / 15–18 cm wide and around 5 inches / 13 cm tall, depending on yarn and tension.
What yarn works best?
Chunky cotton is ideal because it creates a firm basket with good stitch definition.
Can I use worsted-weight yarn?
Yes, but your basket will be smaller and softer.
You can hold two strands together for extra structure.
Are the handles functional?
Yes, but they are designed mainly for light storage.
Avoid carrying very heavy objects by the handles.
Can I make it without the bow?
Absolutely.
The bow is purely decorative.
Can I change the stripe colors?
Yes.
Use as many colors as you like while keeping the stitch counts unchanged.
Save This Crochet Cute Little Basket Pattern
Save this Crochet Cute Little Basket pattern to Pinterest for your next easy storage project.
It is quick, customizable, beginner friendly, and useful for craft rooms, nurseries, bedrooms, gifts, bathrooms, and everyday organization.
