
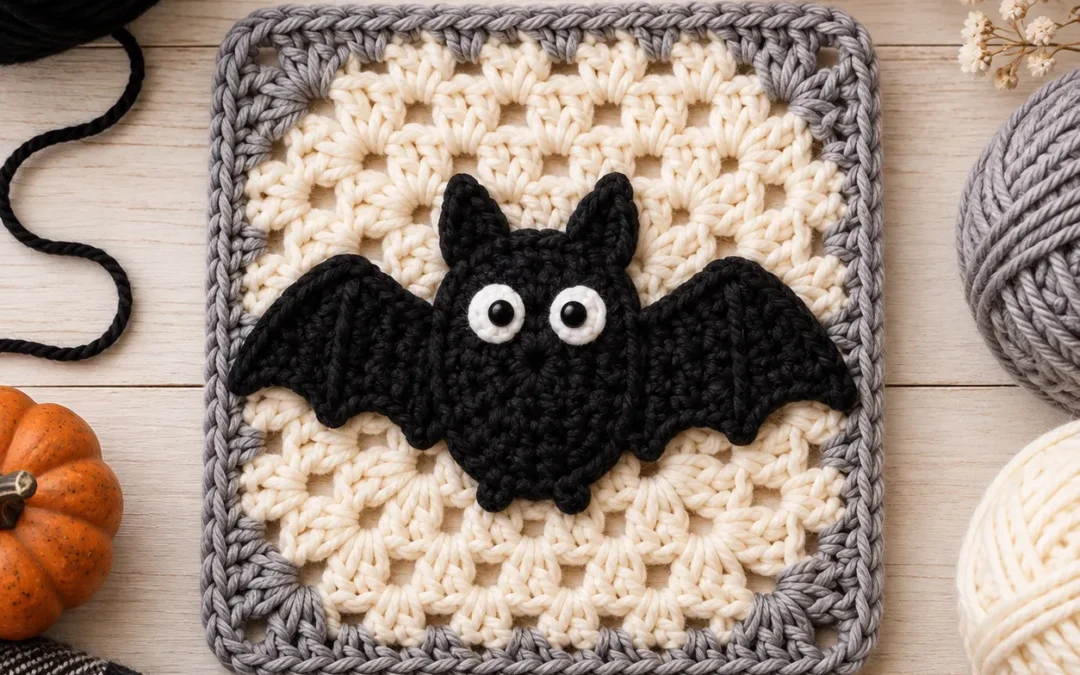
Add a playful spooky touch to your fall projects with this Cute Bat Granny Square Crochet Pattern.
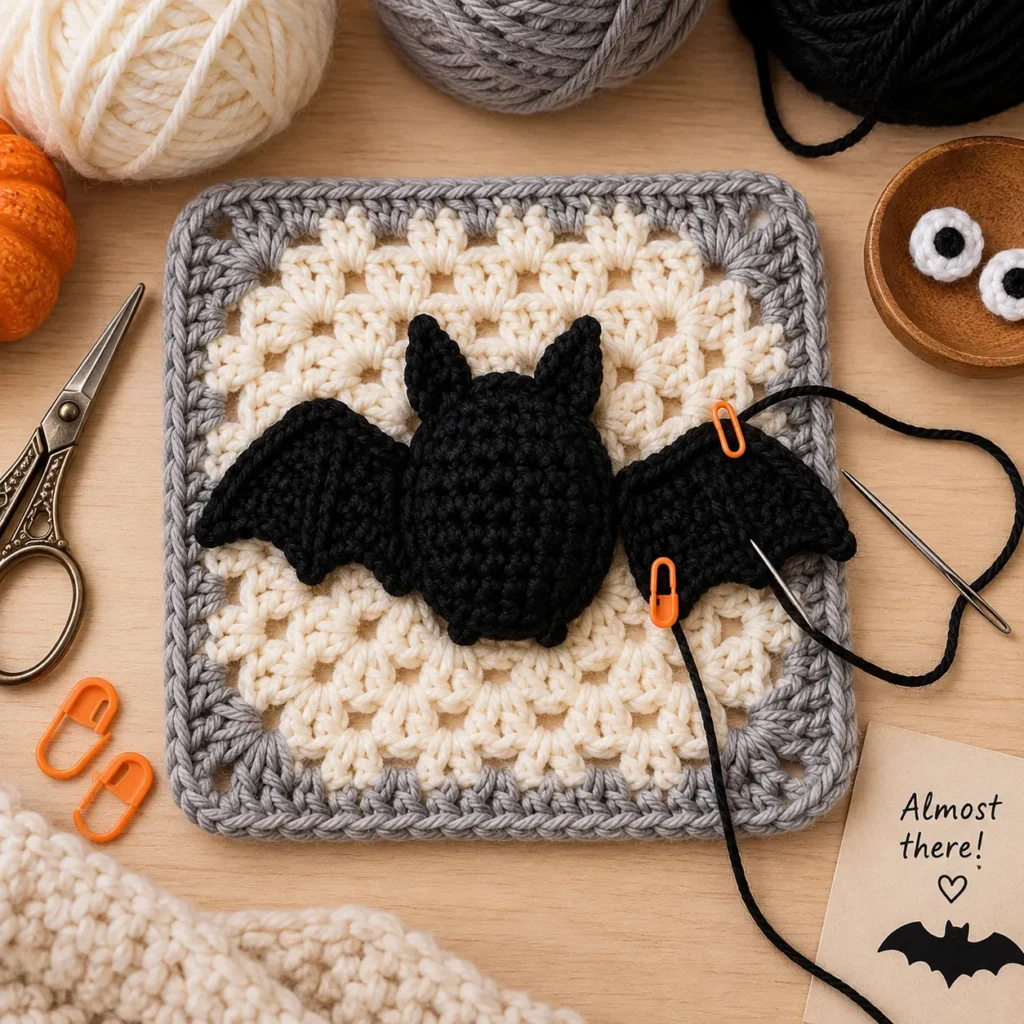
This Halloween-inspired square combines a warm cream granny-square background with a soft gray border and a dimensional black crochet bat stitched across the center.
The little bat has pointed ears, spread wings, a rounded body, and optional white-and-black crochet eyes for an extra-cute expression.
Use a single square for an appliqué project, or crochet a whole collection for blankets, pillows, tote bags, cardigans, Halloween bunting, and seasonal home décor.
Bat Granny Square Pattern at a Glance
| Pattern Detail | Information |
|---|---|
| Skill Level | Advanced Beginner |
| Crochet Terms | US terminology |
| Yarn Weight | Worsted / Medium #4 |
| Hook Size | 4 mm |
| Finished Size | Approx. 6–7 in / 15–18 cm |
| Construction | Granny square + separate bat appliqué |
| Main Stitches | sc, hdc, dc, tr |
| Bat Pieces | Body + 2 wings + eyes |
| Assembly | Sew appliqué to square |
| Best For | Blankets, pillows, bags, Halloween décor |
Why You’ll Love This Bat Granny Square
This project combines two very Pinterest-friendly crochet ideas:
granny squares + cute Halloween motifs.
The square is easy to customize, and the bat appliqué can be reused on other projects.
Try it on:
- Crochet tote bags
- Blankets
- Cushion covers
- Cardigans
- Halloween garlands
- Trick-or-treat bags
- Wall hangings
- Mug rugs
Because the bat is crocheted separately, you can also use it by itself as an appliqué.
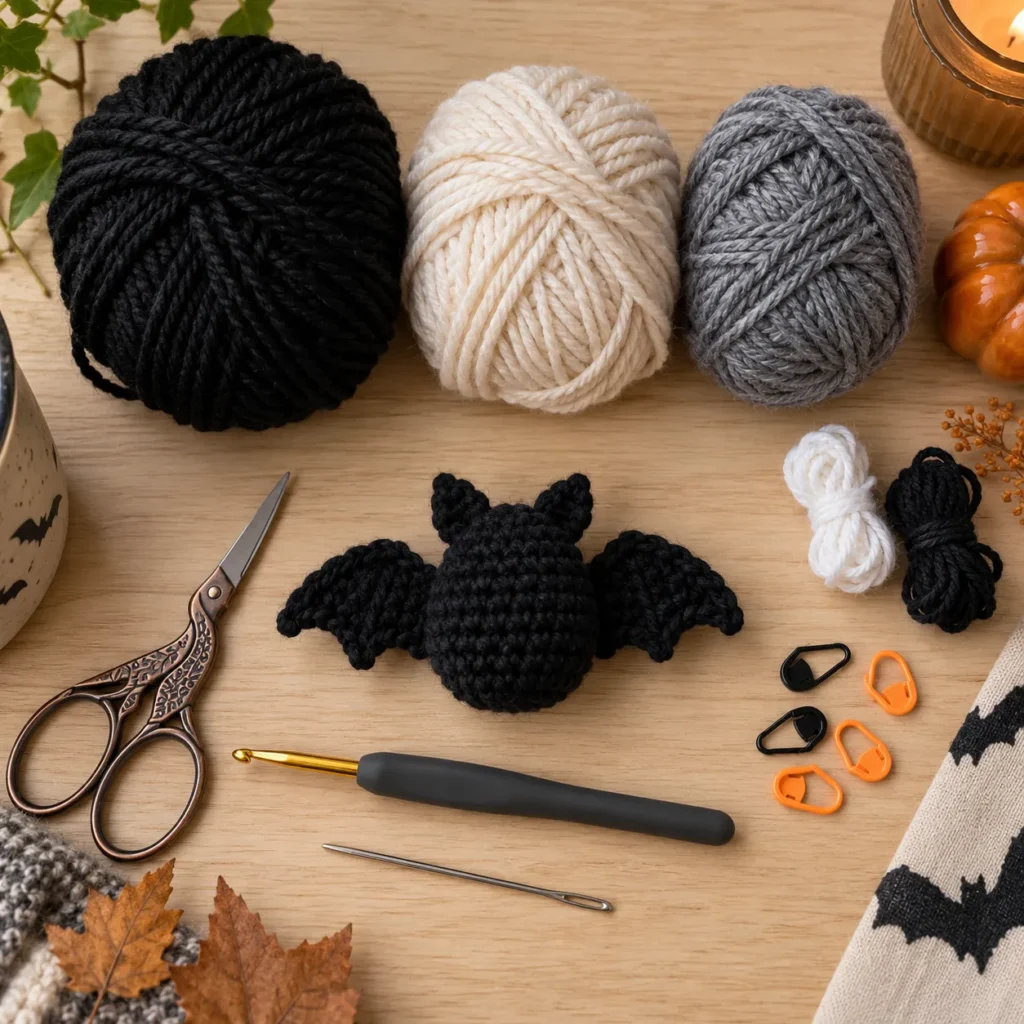
Materials
For one square:
- Approx. 35–45 yd warm-cream worsted yarn
- Approx. 10–15 yd medium-gray worsted yarn
- Approx. 15–20 yd black worsted yarn
- Small amount white yarn
- Small amount black embroidery floss
- 4 mm crochet hook
- Yarn needle
- Scissors
- Stitch markers
- Blocking pins, optional
Crochet Abbreviations
| Abbreviation | Meaning |
|---|---|
| MR | Magic ring |
| ch | Chain |
| sc | Single crochet |
| hdc | Half double crochet |
| dc | Double crochet |
| tr | Treble crochet |
| sl st | Slip stitch |
| st / sts | Stitch / stitches |
| FO | Fasten off |
Pattern Notes
The granny square is crocheted first.
The bat is made separately and sewn to the front.
Work the square in joined rounds.
Ch-2 spaces form the corners.
The bat should sit flat enough for blankets but remain slightly dimensional for visual interest.
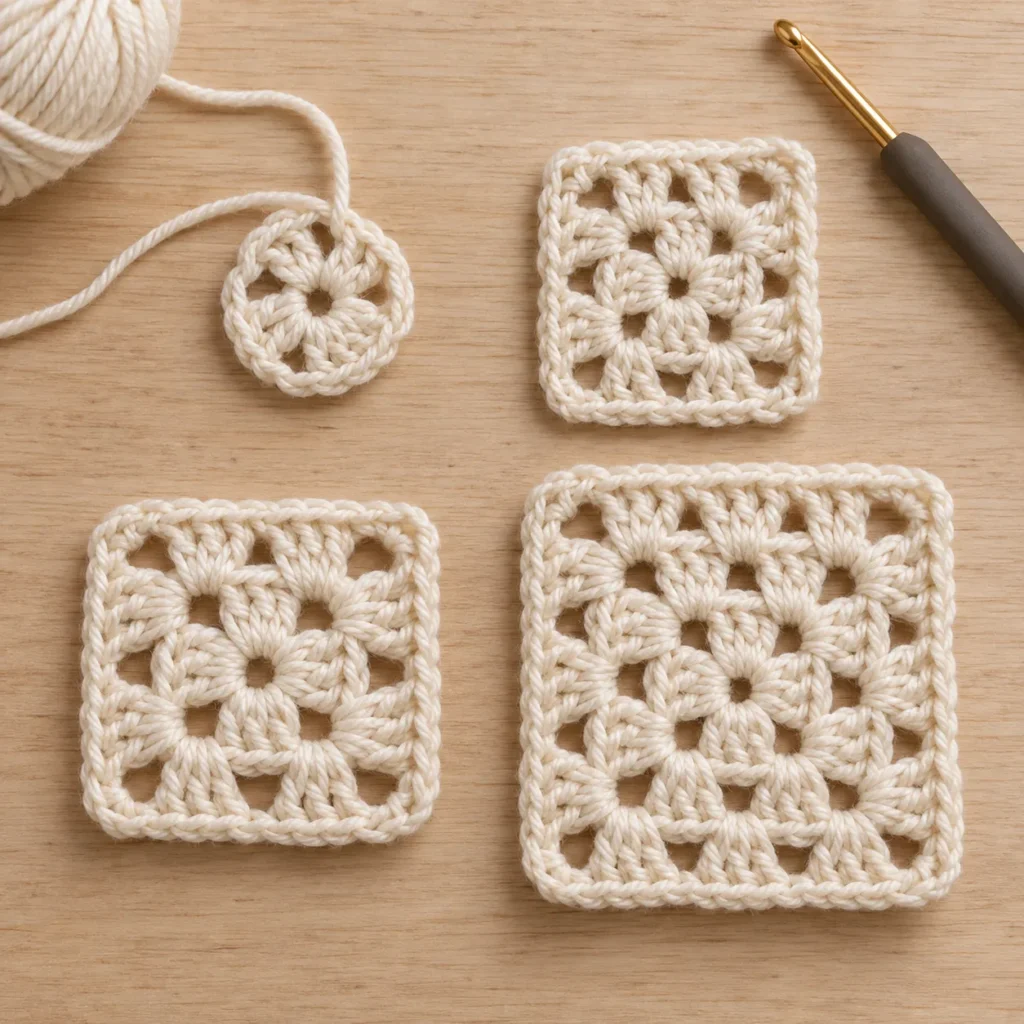
Part 1: Crochet the Cream Granny Square
Using cream yarn:
Round 1
Create a magic ring.
Into the ring work:
ch 3, 2 dc, ch 2
Then repeat:
3 dc, ch 2
three more times.
You should have:
4 groups of 3 dc
Join with sl st to the top of the beginning ch 3.
Pull the ring closed.
Round 2
Sl st into the next corner space.
In the corner work:
ch 3, 2 dc, ch 2, 3 dc
In each remaining corner work:
3 dc, ch 2, 3 dc
Join.
You now have four defined corners.
Round 3
Sl st to the corner.
Work:
3 dc, ch 2, 3 dc
in the corner.
Then:
3 dc in the next side space
Repeat around.
Join.
Round 4
Continue the same granny-square construction.
In every corner:
3 dc, ch 2, 3 dc
In each side space:
3 dc
Join at the end.
The square should now be large enough to hold the bat motif comfortably.
Part 2: Add the Gray Border
Change to medium-gray yarn.
Join in any corner.
Border Round
Ch 1.
Work:
sc, ch 2, sc
into each corner.
Work 1 sc in each stitch and space along every side.
At each corner repeat:
sc, ch 2, sc
Join with sl st.
Fasten off.
For a thicker border, work one additional round of sc.
The gray edging gives the cream square a framed Halloween look without overpowering the black bat.
Block the Square
Lightly dampen the square.
Pin it into a neat square shape.
Allow it to dry completely before attaching the bat.
This makes appliqué placement much easier.
Part 3: Crochet the Bat Body
Using black yarn:
Round 1
6 sc into MR.
Round 2
Inc around.
12 sts
Round 3
Repeat:
sc, inc
around.
18 sts
Round 4
Sc around.
18 sts
Now lightly flatten the circle into an oval shape.
Do not stuff.
Fasten off with a long sewing tail.
The slightly rounded body will form the center of the bat.
Add the Bat Ears
Join black yarn near the upper-left edge of the body.
Work:
sc, hdc, ch 2, sl st in second ch from hook, hdc
into the same general area.
Fasten off.
Repeat on the upper-right side.
The two points should angle slightly outward.
Alternatively, crochet the ears separately and sew them on.
Part 4: Crochet the Bat Wings
Make 2.
Using black yarn:
Ch 8.
Starting in the second chain from hook:
- sl st
- sc
- hdc
- dc
- tr
- dc
- hdc
This creates the upper wing edge.
Turn slightly and work back along the lower edge with a scalloped shape.
Work:
sl st, 3 dc in next st, sl st, 3 dc in next st, sl st
Adjust the spacing as necessary so the lower wing has two or three soft points.
Fasten off with a long tail.
For the second wing, mirror the first wing so the two pieces face opposite directions.
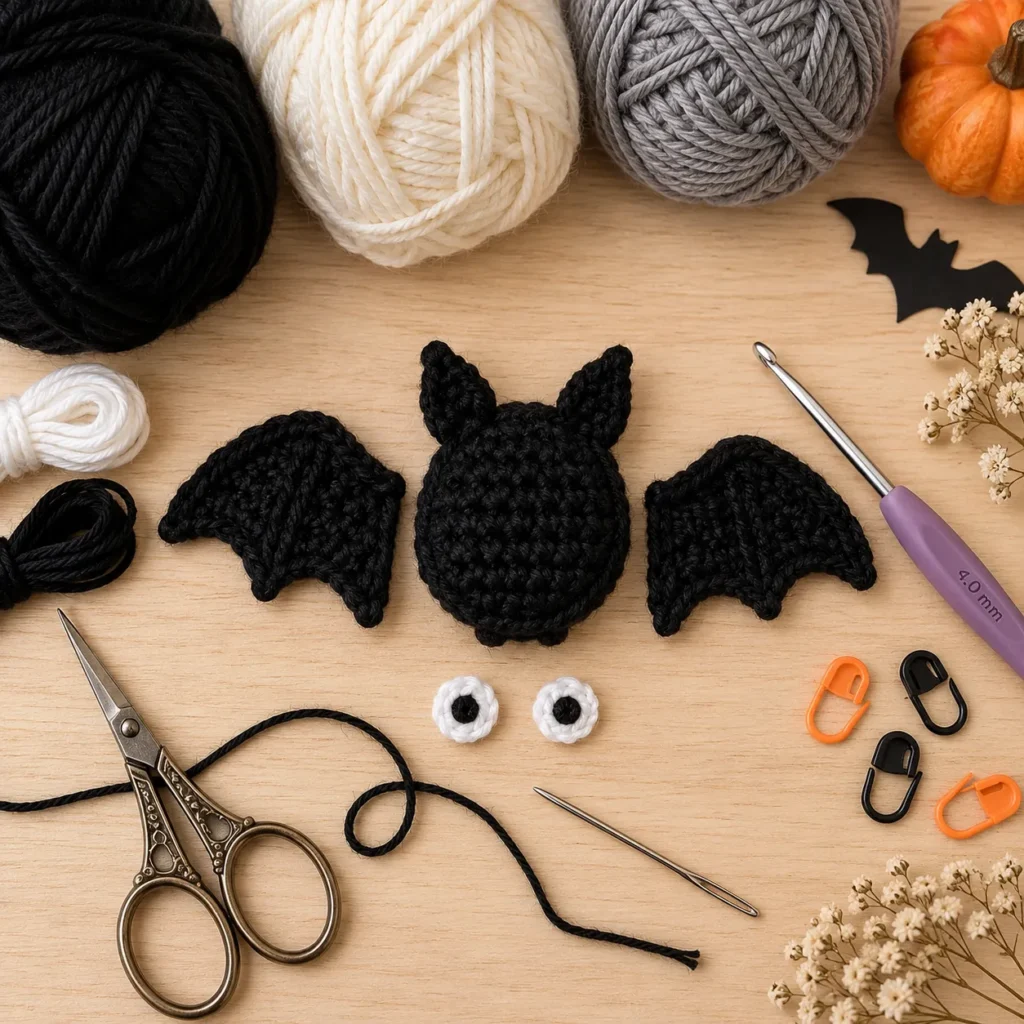
Part 5: Crochet the Eyes
Make 2 using white yarn.
Round 1
Work 5 sc into MR.
Join.
Fasten off.
Using black embroidery floss, add one tiny black stitch or knot in the center of each white eye.
For a simpler square, embroider the eyes directly onto the bat body instead.
Optional Sleepy Bat
Instead of round eyes, embroider two curved lines.
This creates an adorable sleepy Halloween bat.
Part 6: Assemble the Bat
Lay the square flat.
Place the bat body in the center.
Position one wing on each side.
The wings should stretch horizontally across the middle of the square without touching the gray border.
Pin all pieces before sewing.
Sew the body first.
Then sew each wing around the upper and outer edges.
Leave a little of the lower scalloped edge loose if you want extra dimension.
Sew the eyes near the top-center of the body.
Optional Tiny Fangs
For an extra-cute Halloween detail, use white embroidery floss.
Add two tiny downward stitches beneath the eyes.
Keep them very small.
Optional Blush Cheeks
Use dusty-pink yarn to make one tiny stitch beneath each eye.
This creates a softer kawaii look.
Make the Bat More Dramatic
Use black chenille yarn for the bat while keeping the square in worsted cotton.
The different textures make the bat stand out.
Make sure the chenille yarn is not too bulky for the square.
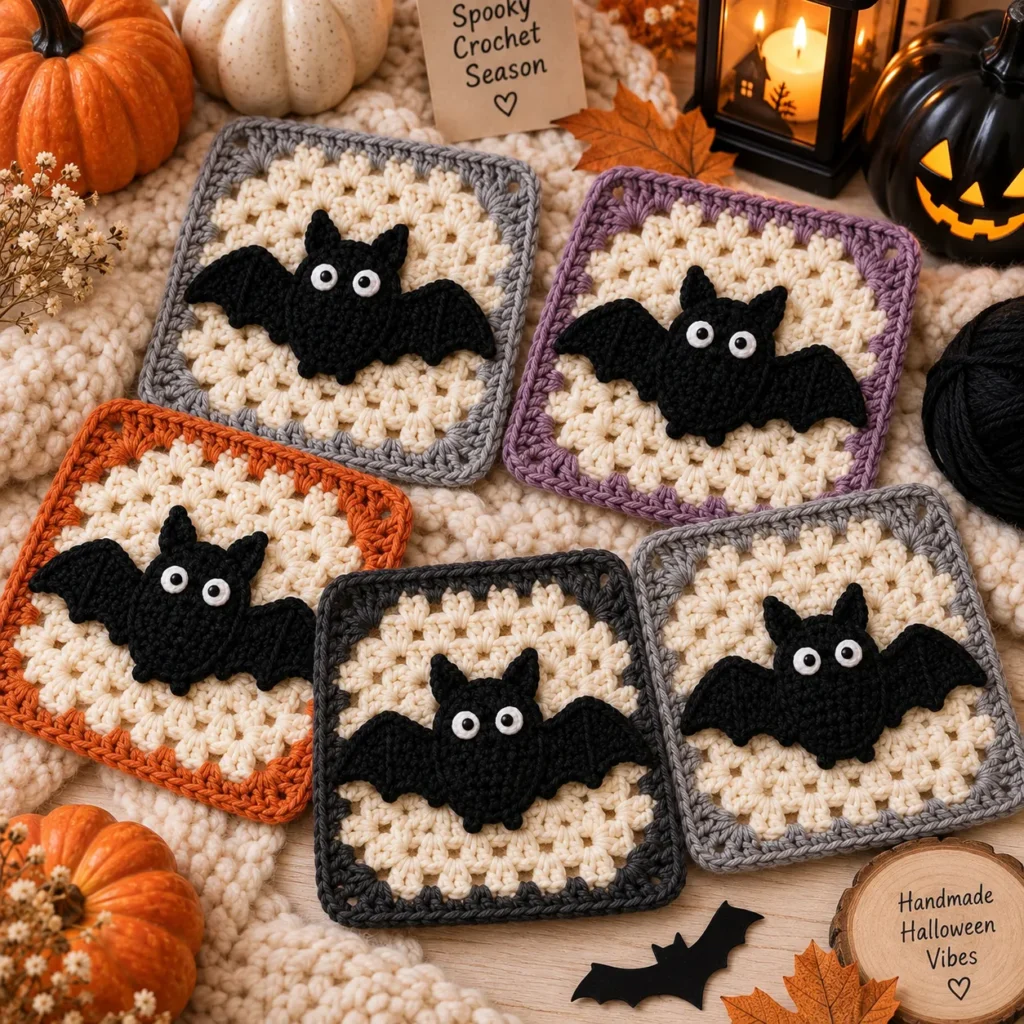
Color Variations
Classic Halloween
Cream square
Gray border
Black bat
Midnight
Charcoal square
Black border
Purple bat
Pastel Halloween
Lavender square
Cream border
Black bat
Pumpkin Patch
Warm cream square
Burnt-orange border
Black bat
Gothic
Deep gray square
Black border
Burgundy bat
Cute Pink Halloween
Cream square
Dusty-pink border
Black bat with pink cheeks
Make a Bat Granny Square Blanket
Crochet approximately:
20–36 squares
depending on your desired blanket size.
Mix bat squares with plain squares.
A beautiful layout could use:
- Bat squares
- Pumpkin squares
- Ghost squares
- Moon squares
- Plain cream squares
Join them using black, gray, or cream yarn.
Make a Halloween Tote Bag
Crochet:
8–12 Bat Granny Squares
Join them into two rectangular panels.
Add a solid crochet base and handles.
A black or gray lining makes the finished tote especially polished.
Make a Pillow Cover
Crochet:
9 squares
Arrange them in a 3 × 3 grid.
Use one central bat square surrounded by plain cream-and-gray granny squares.
This creates a simple Halloween statement pillow.
Make Halloween Bunting
Make several squares using a lighter yarn weight.
Attach them to a long crochet chain.
Alternate:
bat • ghost • pumpkin • bat
Hang across a mantel or shelf.
Tips for a Professional Finish
Block the square before attaching the bat.
Pin all appliqué pieces before sewing.
Keep both wings symmetrical.
Do not stretch the bat body while sewing.
Use matching black yarn for assembly.
Leave the lower wing points slightly loose for dimension.
Center the eyes carefully.
Weave all ends into the back of the square.
Frequently Asked Questions
Is this Cute Bat Granny Square beginner friendly?
It is best for an advanced beginner because it combines a traditional granny square with simple appliqué construction and sewing.
How large is the finished square?
Approximately 6–7 inches / 15–18 cm, depending on yarn and tension.
Is the bat worked directly into the square?
No.
The bat is crocheted separately and sewn onto the finished square.
Can I make the bat without eyes?
Yes.
A simple black silhouette looks more minimalist and slightly spookier.
Can I use cotton yarn?
Yes.
Cotton gives excellent stitch definition and helps the square hold its shape.
Can I use acrylic yarn?
Absolutely.
Acrylic works especially well for blankets and wearable projects.
Do I need to block the square?
Blocking is strongly recommended because it helps the square stay flat and makes the bat easier to center.
Can I make a whole Halloween blanket?
Yes.
Mix Bat Granny Squares with pumpkins, ghosts, moons, stars, and plain squares.
Save This Cute Bat Granny Square Pattern
Save this Cute Bat Granny Square Crochet Pattern to Pinterest for your Halloween crochet list.
It is cute, customizable, scrap-friendly, and perfect for blankets, bags, cushions, cardigans, bunting, Halloween décor, and seasonal handmade gifts.
