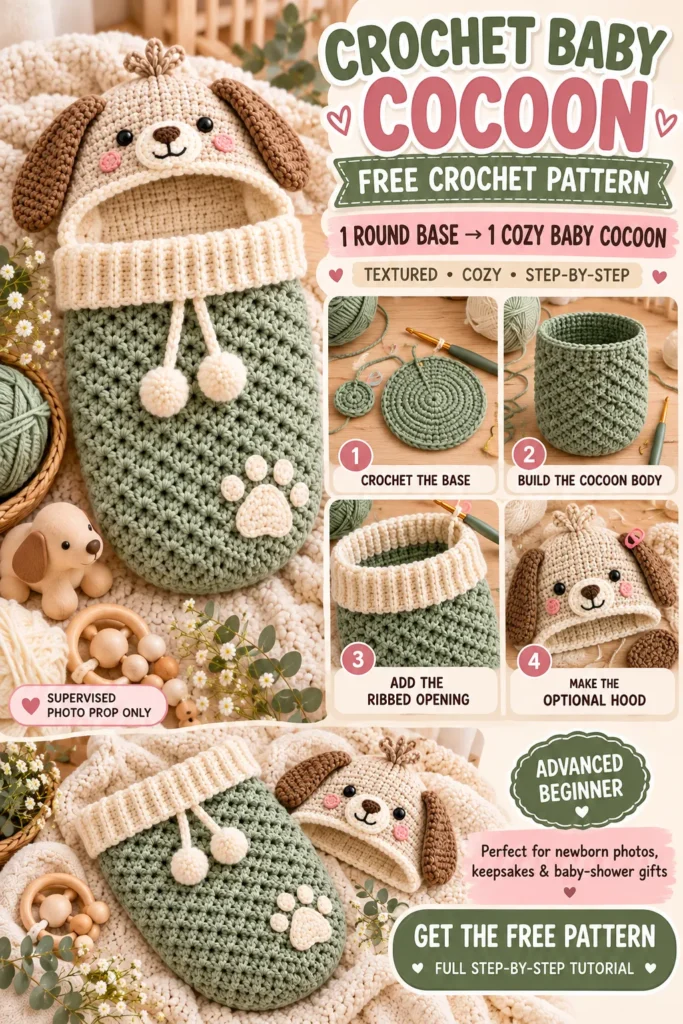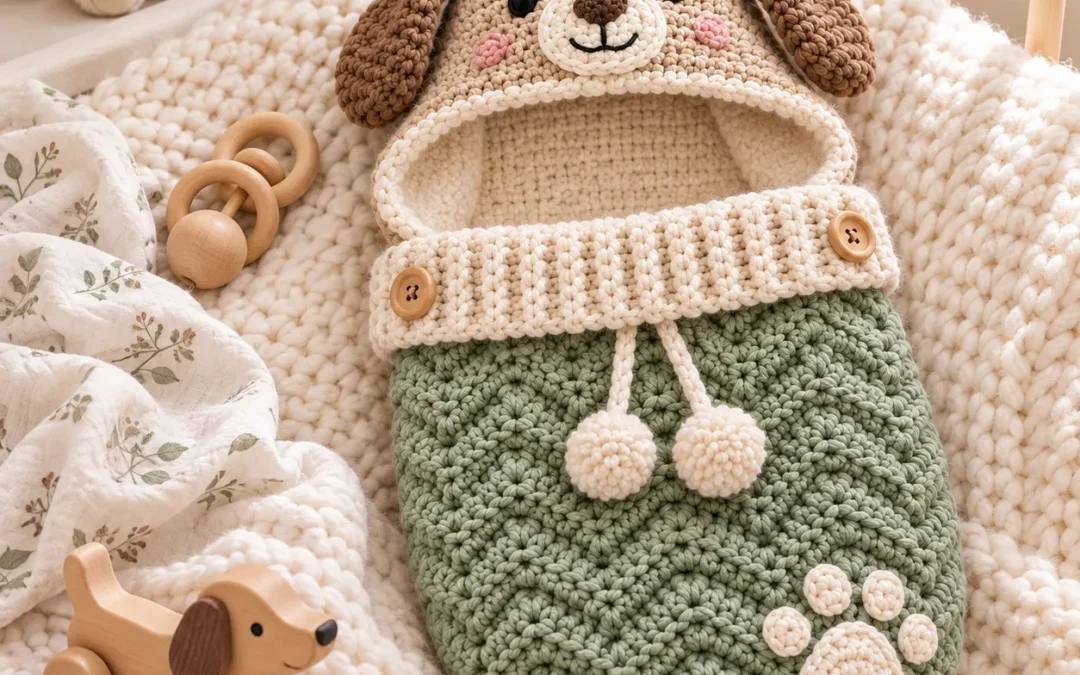
Create a cozy handmade keepsake with this Crochet Baby Cocoon Pattern.
This design combines a soft textured cocoon body with a deep ribbed fold-over edge and an optional animal-inspired hood for an adorable newborn photography look.
The sample uses muted sage green with warm cream accents, but the pattern is easy to customize in dusty rose, oatmeal, powder blue, lavender, or other soft nursery shades.
The finished cocoon is designed for awake, directly supervised use and newborn photography only. It should never be used for unattended or routine infant sleep.
Crochet Baby Cocoon Pattern at a Glance
| Pattern Detail | Information |
|---|---|
| Skill Level | Advanced Beginner |
| Crochet Terms | US terminology |
| Yarn Weight | Worsted / Medium #4 |
| Hook Size | 5 mm |
| Construction | Bottom-up in rounds |
| Main Stitches | sc, hdc, shell texture |
| Opening | Deep ribbed fold-over edge |
| Hood | Optional animal-style photo prop |
| Sample Length | Approx. 20–22 in / 51–56 cm |
| Intended Use | Supervised newborn photography / cuddling prop |
Why You’ll Love This Crochet Baby Cocoon
This project is:
- Soft and cozy-looking
- Beautiful for newborn photos
- Easy to customize
- Suitable for neutral nursery palettes
- A memorable baby-shower gift
- Easy to coordinate with hats and booties
- A great way to practice textured crochet
The construction is simpler than it looks because the main cocoon is worked continuously from the bottom upward.
Materials
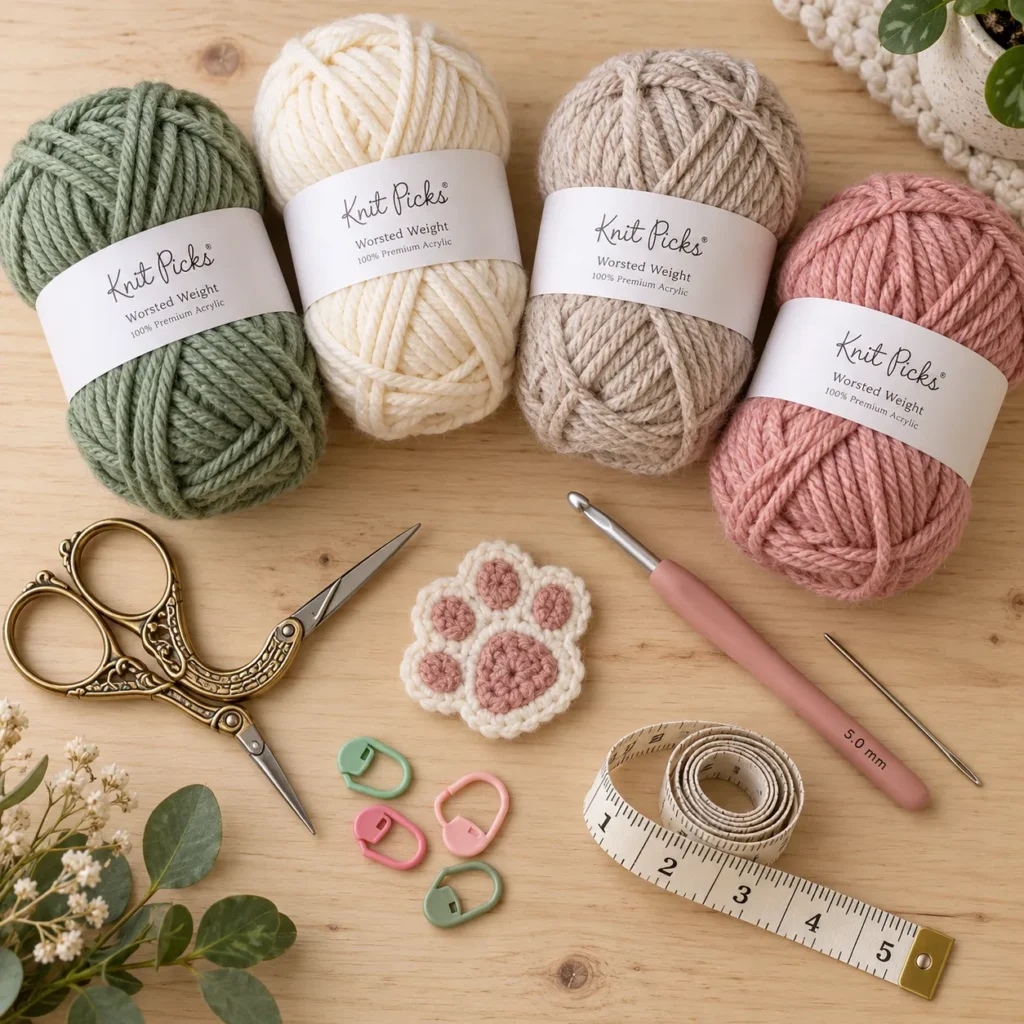
For one newborn-size cocoon:
- Approx. 450–550 yd worsted-weight yarn
- Main color: muted sage
- Contrast color: warm cream
- Small amount taupe or brown for optional animal details
- 5 mm crochet hook
- Yarn needle
- Scissors
- Stitch markers
- Measuring tape
Optional:
- Smaller hook for tighter ribbing
- Contrast yarn for hood
- Blocking mats
Choose a soft, washable yarn that does not shed excessively.
Good options include:
- Soft baby acrylic
- Cotton-acrylic blend
- Superwash wool blend
- Soft worsted cotton
Crochet Abbreviations
| Abbreviation | Meaning |
|---|---|
| MR | Magic ring |
| ch | Chain |
| sc | Single crochet |
| hdc | Half double crochet |
| dc | Double crochet |
| inc | 2 sts in same stitch |
| dec | Crochet 2 sts together |
| BLO | Back loop only |
| sl st | Slip stitch |
| st / sts | Stitch / stitches |
| FO | Fasten off |
Finished Measurements
For a newborn photography prop:
Length: approximately 20–22 in / 51–56 cm
Flat width: approximately 10–11 in / 25–28 cm
The cocoon should have gentle ease and should never fit tightly around the baby's chest, neck, or face.
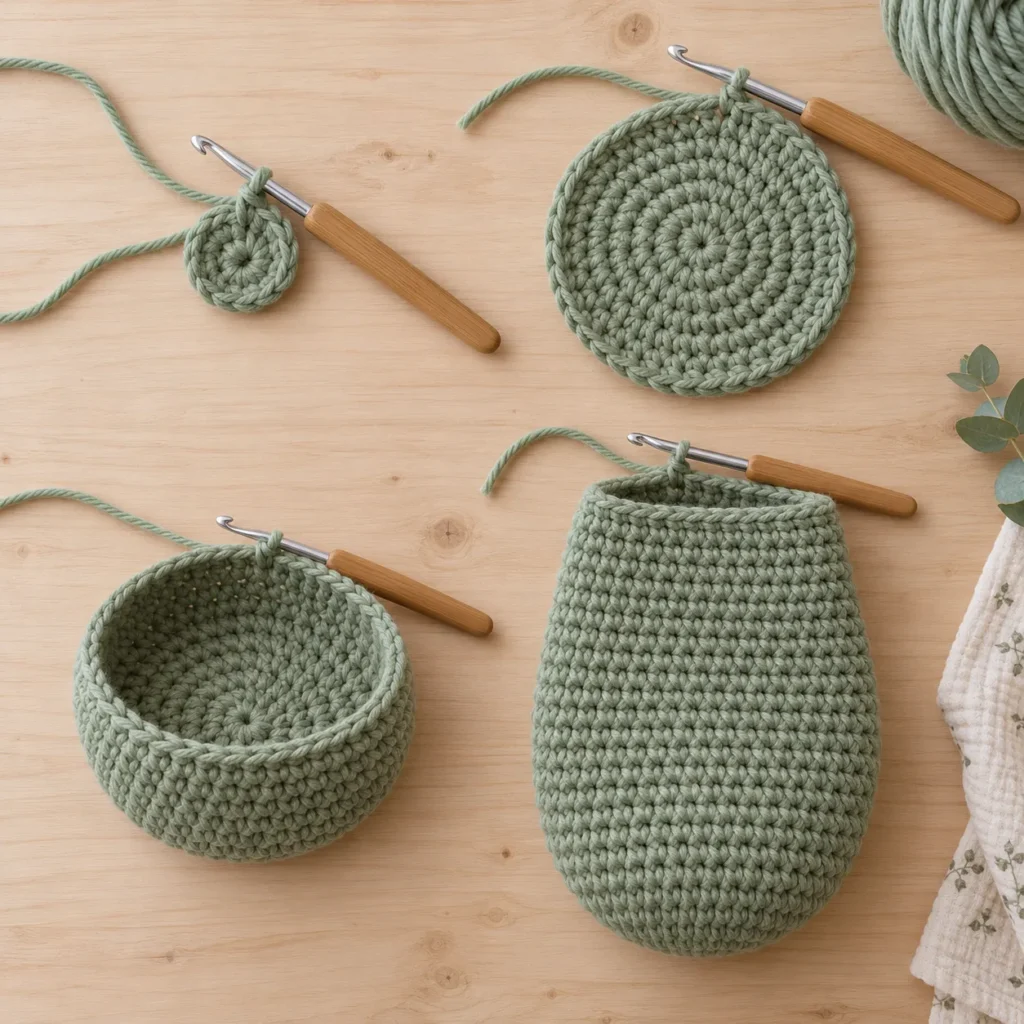
Part 1: Crochet the Cocoon Base
Using sage yarn:
Round 1
Create a magic ring.
Work:
10 hdc into MR
Pull closed.
Join with sl st.
Round 2
Work:
2 hdc in each stitch around
20 sts
Round 3
Repeat:
hdc, inc
around.
30 sts
Round 4
Repeat:
2 hdc, inc
around.
40 sts
Continue increasing evenly until the base measures approximately:
7–8 in / 18–20 cm across
The base should lie flat without rippling.
Part 2: Build the Cocoon Body
Once the base reaches the desired width:
Stop increasing.
Work:
1 hdc in each stitch around
Continue until the cocoon measures approximately:
13–15 in / 33–38 cm
from the bottom.
The shape should gradually become a soft tube with a rounded closed base.
Add Texture
For a more decorative body, work alternating textured rounds.
Example:
Texture Round
Skip 1 stitch.
Work:
5 dc in next stitch
Skip 1 stitch.
Sl st in next stitch.
Repeat around.
Plain Round
Work hdc evenly around.
Alternate these rounds every few rows to create a soft shell-like texture.
Keep the upper section smoother so the ribbed opening sits neatly.
Part 3: Shape the Upper Opening
Work several plain hdc rounds near the top.
If the opening is too wide, work a few evenly spaced decreases.
Avoid reducing too aggressively.
The upper opening should remain loose and easy to place around the baby's lower body during supervised photography.
Transition Round
Work:
1 sc in each stitch around
This creates a stable base for the ribbed cuff.
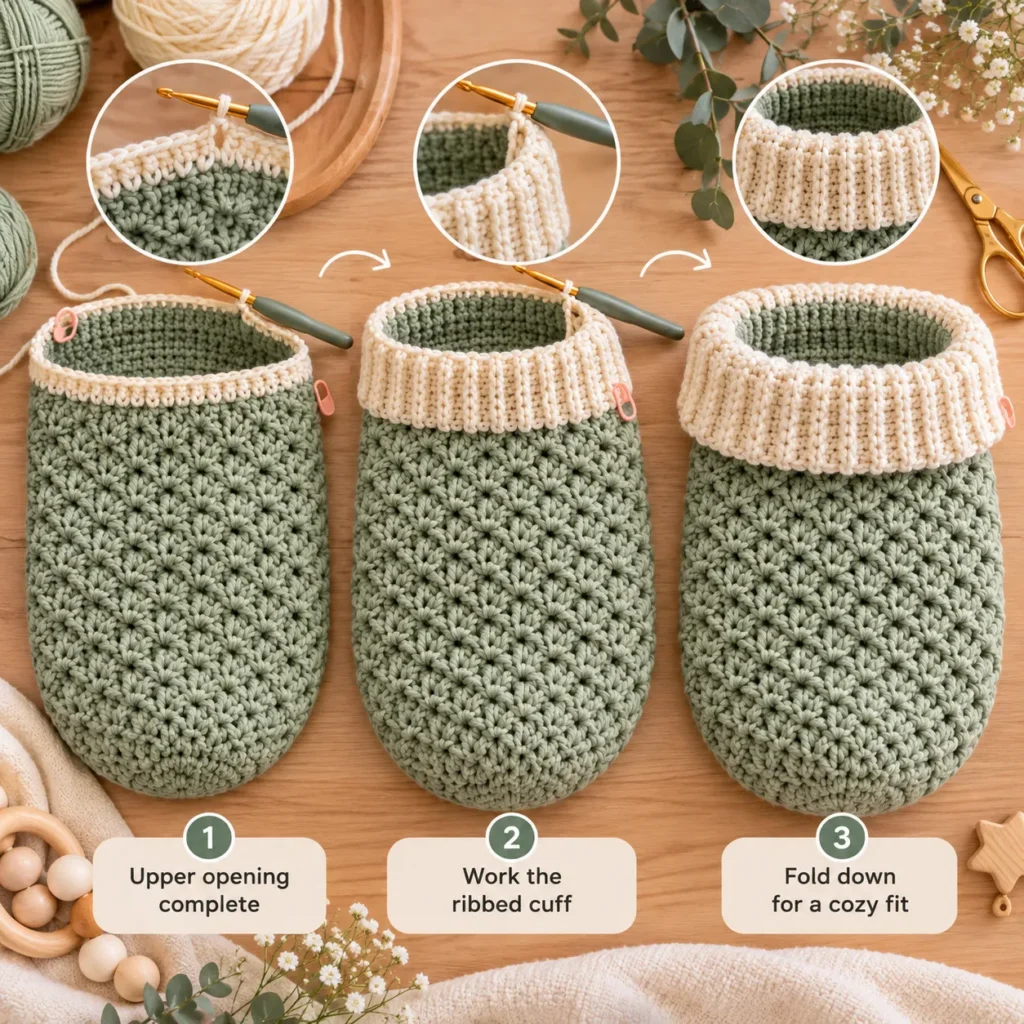
Part 4: Crochet the Ribbed Cuff
Using warm-cream yarn:
Join at the upper edge.
Ch 9.
Starting in the second chain:
Sc across.
Sl st into the next 2 stitches along the cocoon opening.
Turn.
Skip the slip stitches.
Work:
sc BLO across the ribbing
Ch 1, turn.
Continue around the entire opening.
When the ribbing reaches the beginning:
Sew or slip stitch the first and last ribbing rows together.
Fold the cuff outward.
The finished ribbing should be deep, soft, and stretchy.
Part 5: Optional Puppy Hood
The hood is optional and intended only as a removable supervised photo prop.
Using oatmeal or cream yarn:
Hood Crown
Create a magic ring.
Work hdc increases until the crown measures approximately:
5.5–6 in / 14–15 cm across
Stop increasing.
Work hdc in even rounds until the hood reaches the desired depth.
Create the Face Opening
Switch to working back and forth instead of continuously.
Leave the front section open.
Continue until the hood frames the face comfortably without extending over the baby's forehead or cheeks.
Add the Border
Using cream:
Work one round of sc around the opening.
Add a second round if desired.
Part 6: Crochet the Puppy Ears
Make 2.
Using taupe or brown yarn:
Ch 12.
Starting in second chain:
Sc, hdc, dc across.
Work several stitches into the final chain.
Rotate.
Work back along the opposite side.
Continue for another round if you want thicker ears.
The finished ears should be:
- Long
- Soft
- Slightly rounded
- Completely flat
Fasten off with long sewing tails.
Sew one ear securely to each side of the hood.
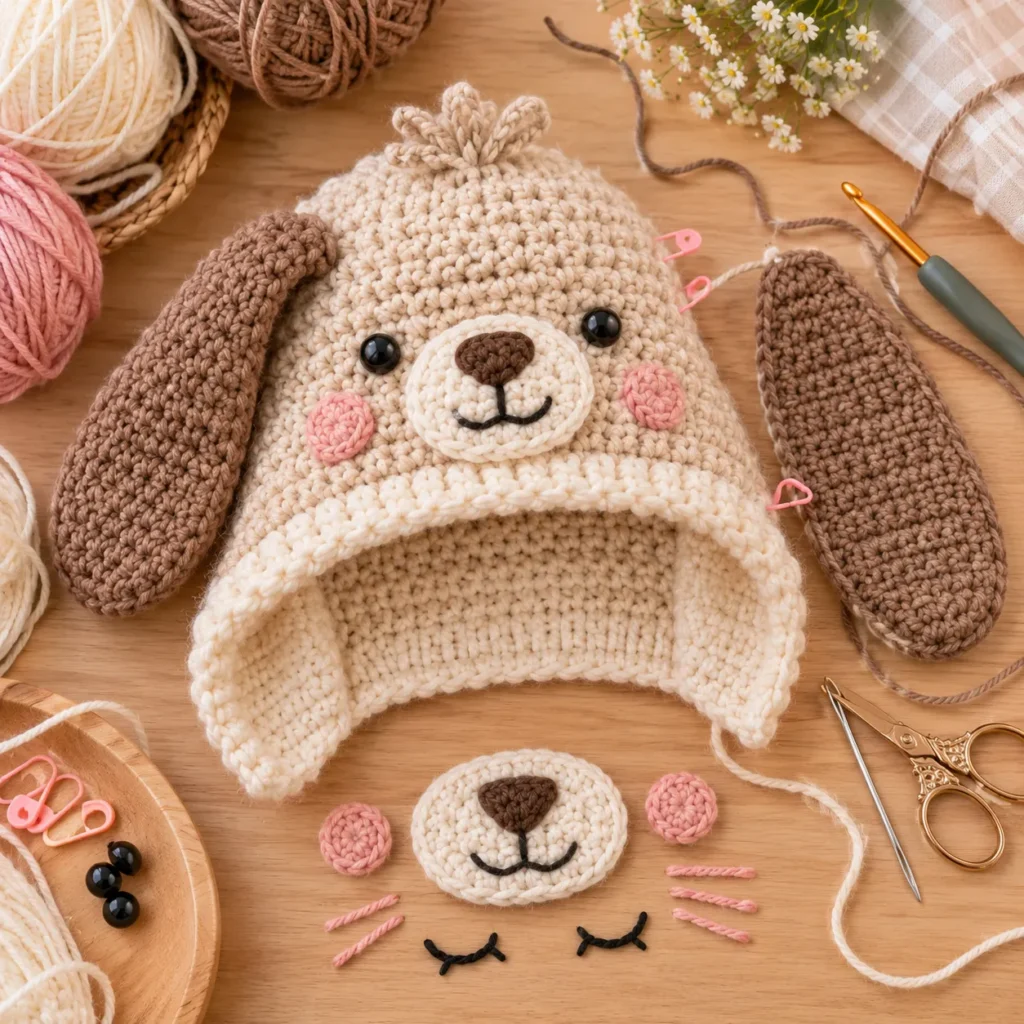
Add the Puppy Face
Use embroidered details rather than buttons or plastic parts.
Add:
- Two small embroidered eyes
- Small brown nose
- Short curved mouth
- Optional pale-pink cheeks
Crochet the Muzzle
Using cream:
Create a small oval.
Sew it to the front of the hood.
Embroider the nose and mouth directly onto the muzzle.
Optional Puppy Tuft
Crochet a few small loops or short textured stitches at the crown.
Keep everything firmly attached.
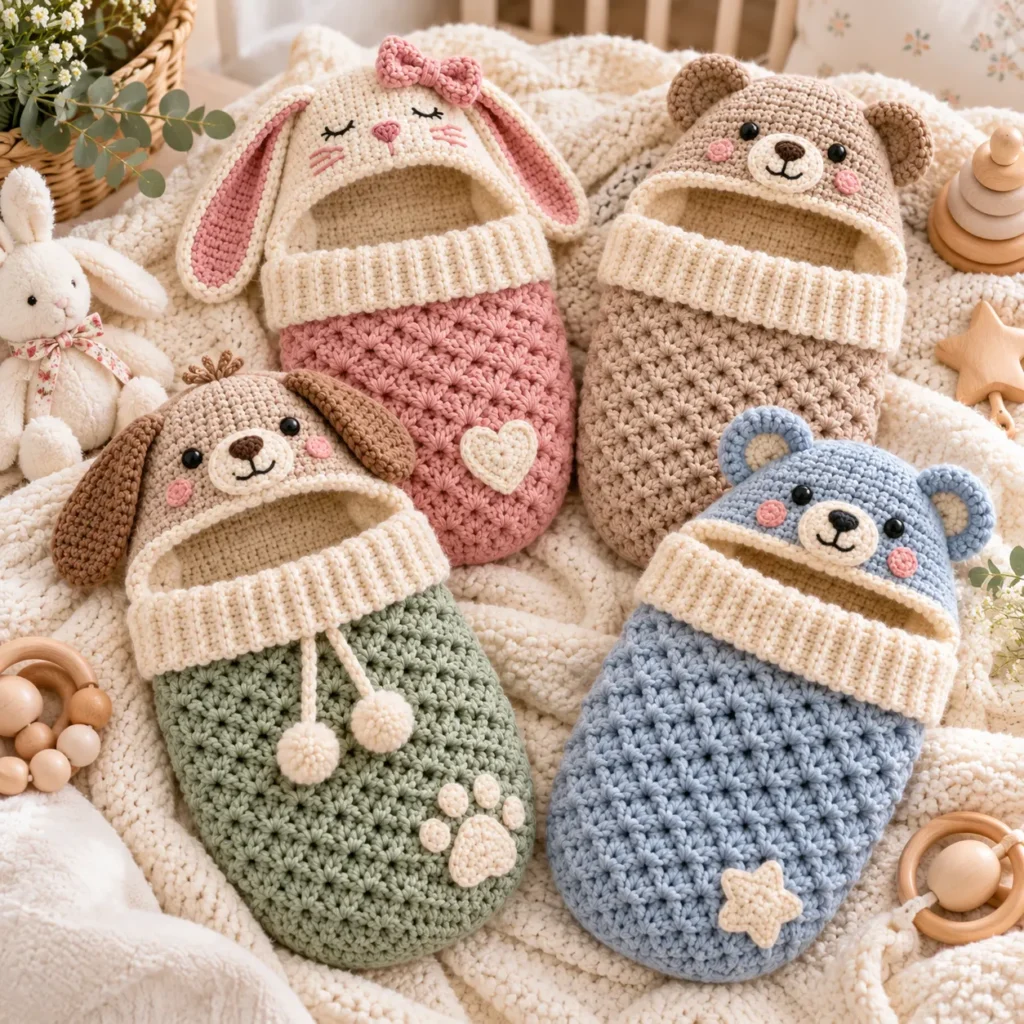
Alternative Bunny Hood
For a bunny variation:
Use cream yarn for the hood.
Make two long cream ears with dusty-pink inner panels.
Add:
- Embroidered closed eyes
- Small pink triangle nose
- Tiny whiskers
- Crochet bow near one ear
This creates a softer spring or Easter-inspired version.
Optional Cocoon Appliqués
You can decorate the lower body with:
- Crochet heart
- Small paw print
- Star
- Moon
- Initial
Keep embellishments flat and sewn securely.
For a newborn prop, avoid beads, loose buttons, pom-poms, or detachable decorations.
Color Ideas
Sage Puppy
Sage green
Warm cream
Taupe
Dusty Rose Bunny
Dusty rose
Cream
Blush pink
Powder Blue Bear
Dusty blue
Oatmeal
Cream
Neutral Teddy
Oatmeal
Caramel
Cream
Lavender Bunny
Soft lavender
Warm white
Blush
Woodland Cocoon
Muted sage
Rust
Oatmeal
Make a Simple Cocoon Without the Hood
For a cleaner design, skip the hood completely.
The basic cocoon with deep ribbed opening works beautifully as a supervised newborn photo prop on its own.
Add a Matching Bonnet
Instead of an animal hood, crochet a separate baby bonnet using the same cream-and-sage colors.
This gives the project a more classic nursery look.
Add Matching Booties
Use leftover sage yarn to make small crochet booties.
Finish them with:
- Cream cuffs
- Tiny bows
- Simple neutral edging
This creates a coordinated newborn photography set.
Newborn Gift Presentation
Fold the empty cocoon gently.
Place the hood or bonnet on top.
Add matching booties beside it.
Wrap the set in:
- Cream tissue paper
- Sage ribbon
- Wooden gift tag
Include a card stating:
For supervised photography and awake cuddling only — not for infant sleep.
Tips for a Professional Finish
Keep the base completely flat before starting the walls.
Count your stitches each round.
Do not make the body too narrow.
Keep the upper opening loose.
Use softer yarn around the neck and face areas.
Make the ribbed cuff deep enough to fold naturally.
Sew animal ears firmly.
Use embroidery instead of plastic facial features.
Weave in every yarn end securely.
Lightly block the empty cocoon before photographing it.
Important Baby Safety
A crocheted cocoon is not a safe sleep space or sleepwear substitute.
Use this design only:
- During awake supervised cuddling
- For short newborn photography sessions
- While an adult is continuously watching the baby
Do not use the cocoon:
- For naps
- Overnight
- In a crib or bassinet
- Unattended
- With the hood covering the face
- With loose cords, ties, buttons, or detachable decorations
For sleep, place babies on their backs on a firm, flat sleep surface with no loose blankets or soft objects around them.
Frequently Asked Questions
Is this Crochet Baby Cocoon beginner friendly?
It is suitable for an advanced beginner comfortable with working in rounds, basic increases, and ribbing.
How is the cocoon constructed?
The main body is worked from the bottom upward in continuous rounds.
Can I make it without the animal hood?
Yes.
The cocoon looks beautiful with just the deep ribbed opening.
What yarn is best?
Soft worsted baby acrylic, cotton blend, or superwash wool works well.
Can I use chunky yarn?
Yes, but the finished cocoon will be larger and heavier. Adjust the stitch count and hook accordingly.
Can a newborn sleep in this cocoon?
No. This design should be treated as a supervised photography or awake-use prop only, not a sleep product.
Can I make the cocoon larger?
Yes, but use measurements rather than simply adding rounds. Keep the fit loose and never restrictive.
Can I add buttons like the inspiration image?
For a newborn prop, I recommend avoiding loose or decorative buttons. Embroidered or crocheted details are a safer choice.
Save This Crochet Baby Cocoon Pattern
Save this Crochet Baby Cocoon Pattern to Pinterest for your next newborn crochet project.
The textured body, cozy ribbed opening, soft neutral colors, and optional animal hood make it a beautiful handmade prop for newborn photography, baby-shower gifts, keepsake sets, and nursery crochet inspiration.