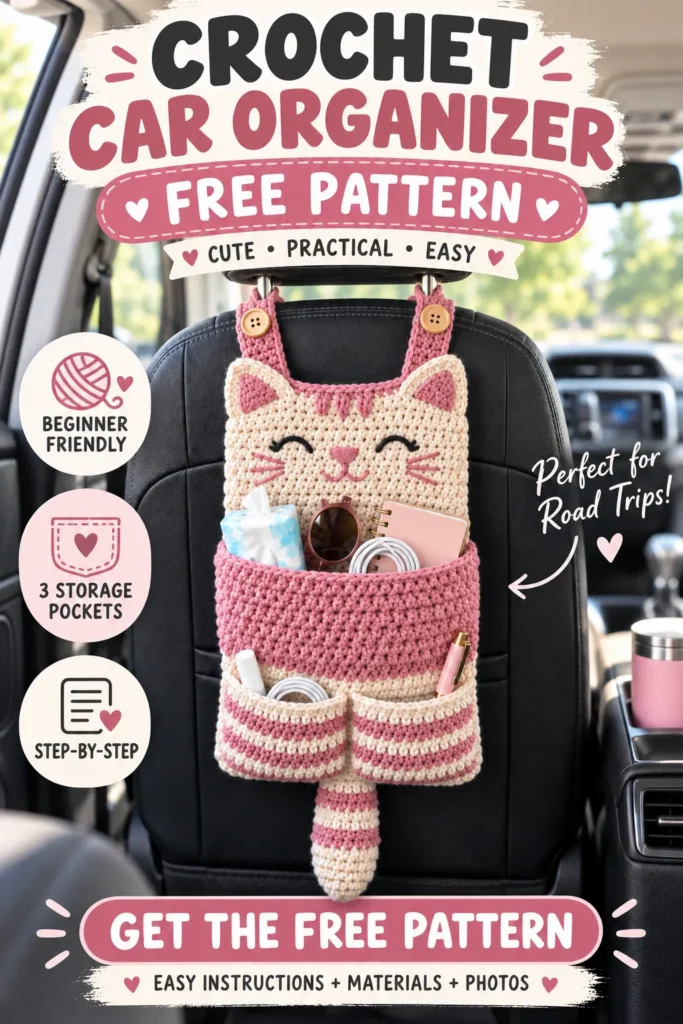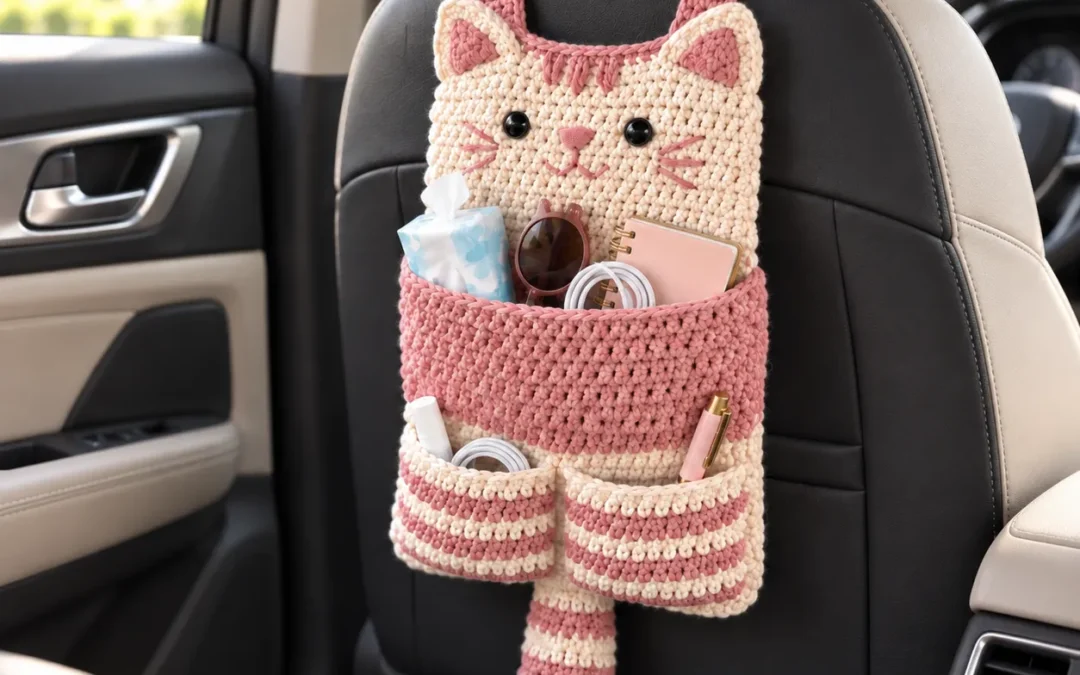
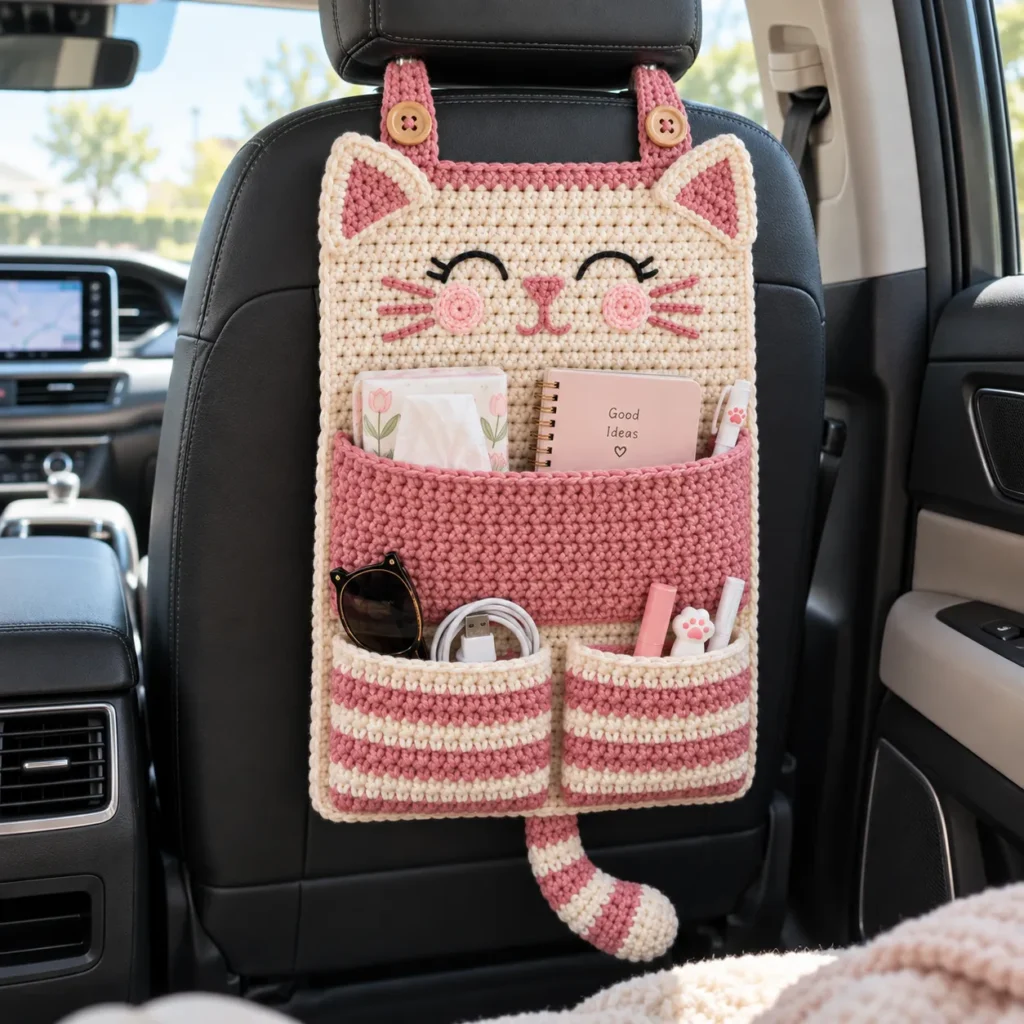
A handmade car organizer is a practical crochet project for keeping small travel essentials together while adding a soft handmade touch to the backseat. This crochet car organizer free pattern creates a hanging organizer with one large storage pocket, two smaller pockets, adjustable headrest straps, cute cat details, and a striped crochet tail.
The design uses a cream and dusty-pink color palette, but the colors can easily be changed to match a different car interior or personal style. Most of the project uses basic single crochet worked in rows, so the construction remains approachable for crocheters who already know the basic stitches.
The finished organizer can hold lightweight items such as tissues, sunglasses, charging cables, wipes, pens, lip balm, or a small notebook. The cat ears, embroidered face, and decorative tail give the project the cute visual appeal that works especially well for Pinterest.
Safety note: Keep only lightweight items inside the organizer. The organizer should never interfere with airbags, seat belts, child-seat hardware, headrest movement, vehicle controls, or the driver’s visibility.
About This Crochet Car Organizer
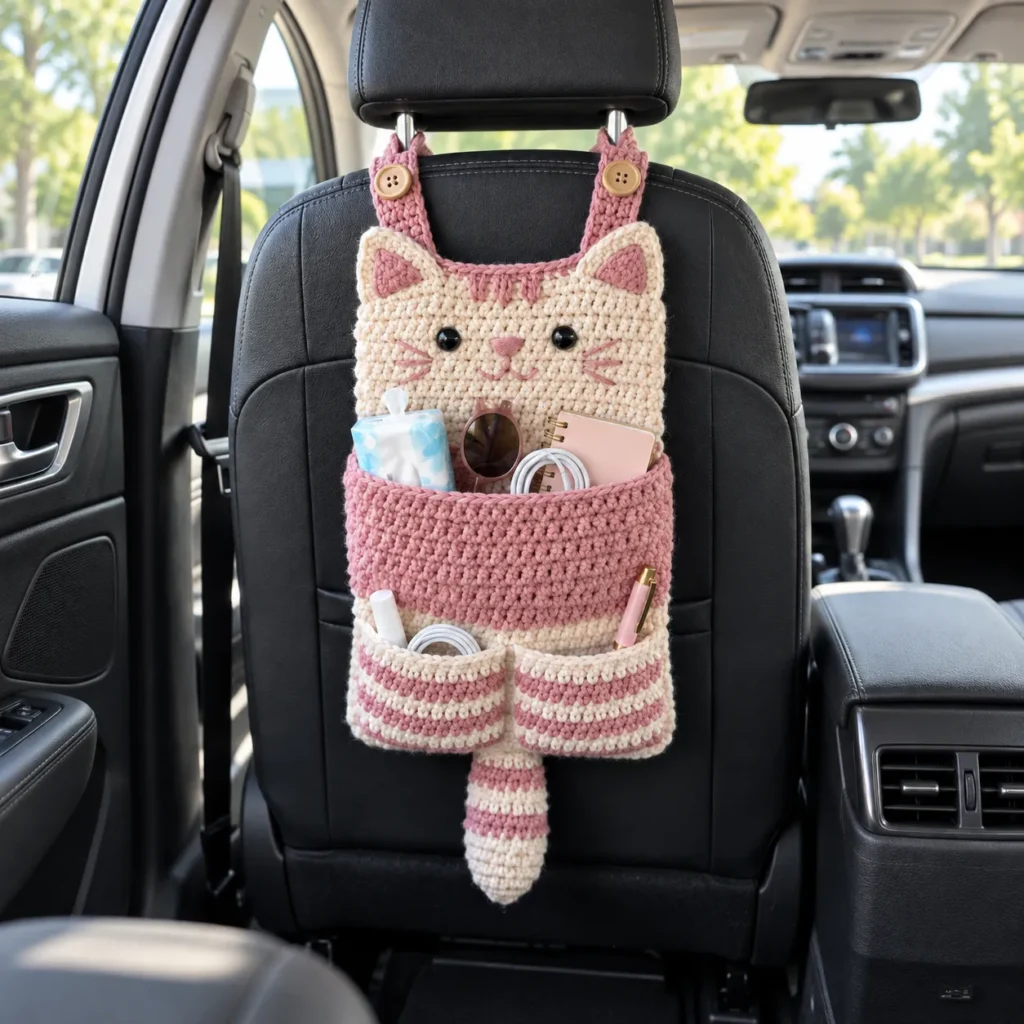
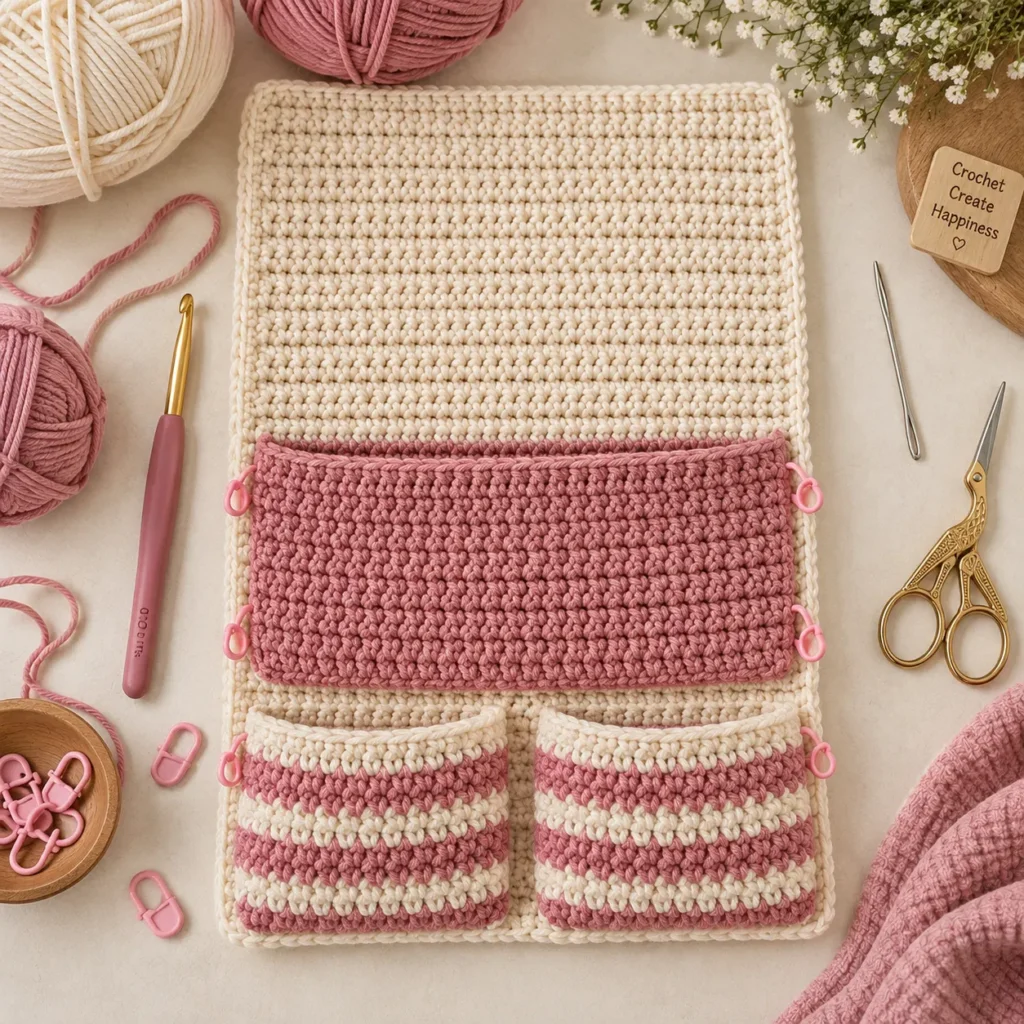
This crochet car organizer is made from several flat pieces that are joined together after crocheting. The project begins with a rectangular back panel that creates the main structure. A wide front pocket is added across the lower-middle area, followed by two smaller pockets near the bottom.
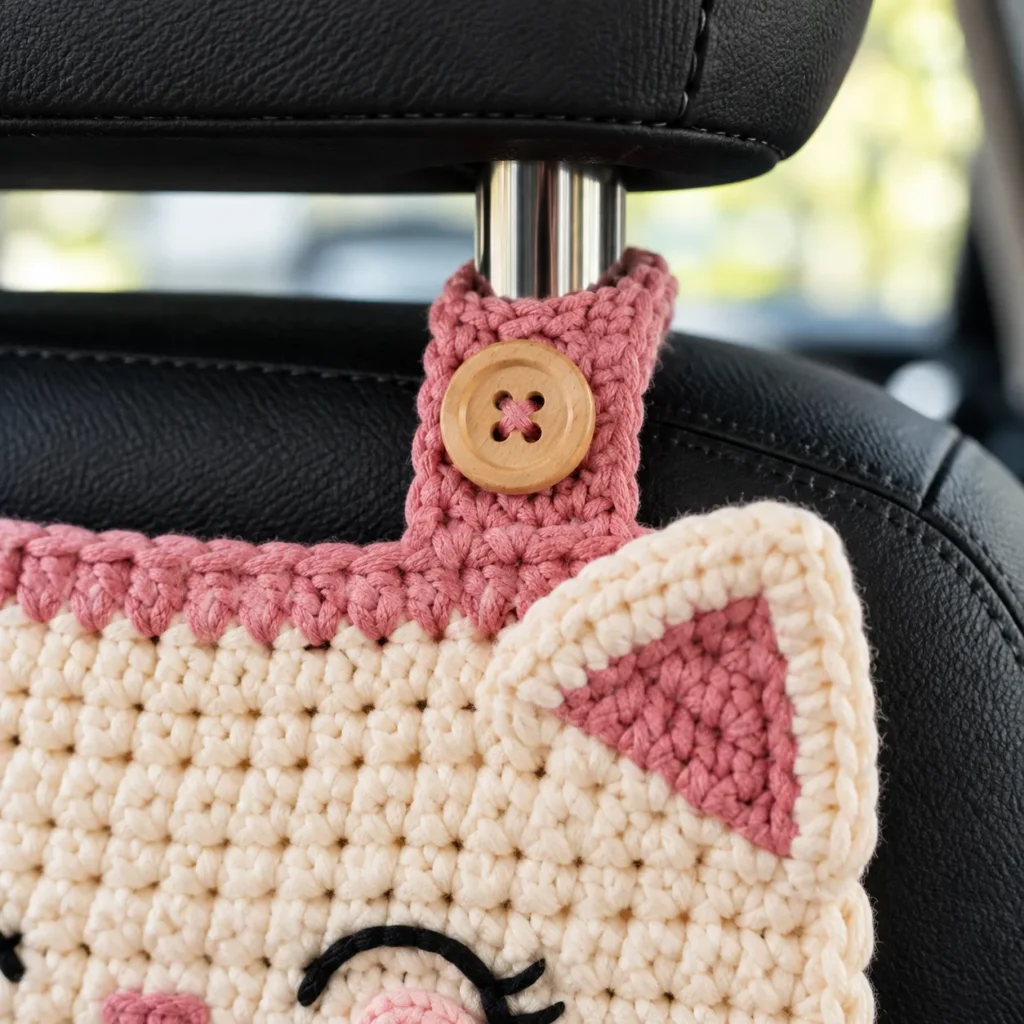
Two crochet straps at the top wrap around the metal posts of a vehicle headrest. Buttons make the organizer removable, which makes it easier to install or take down when needed.
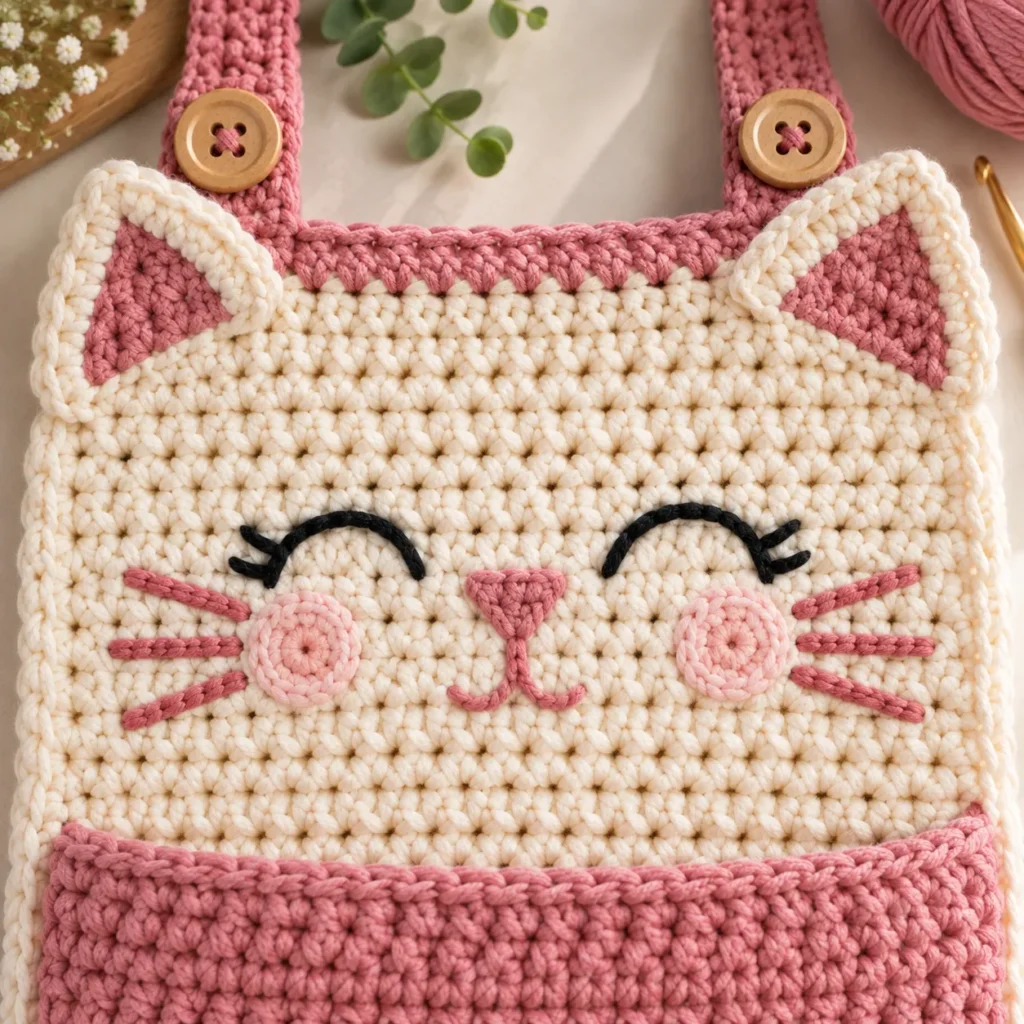
The decorative part is added after the functional pieces are complete. Small crochet ears are sewn near the upper corners, while the eyes, nose, mouth, and whiskers are embroidered directly onto the main panel. A striped crochet tail completes the cat-inspired design.
The finished organizer measures approximately 15 inches wide by 20 inches tall, excluding the straps and tail. Slight differences in yarn, hook size, and tension may change the finished dimensions.
Crochet Car Organizer Pattern at a Glance
Skill level: Confident beginner
Crochet terms: US terminology
Finished size: Approximately 15 × 20 inches / 38 × 51 cm
Construction: Flat pieces worked in rows and sewn together
Main stitch: Single crochet
Recommended yarn: Worsted-weight yarn held double
Hook size: 6 mm
Approximate project time: 5–7 hours

Materials You Will Need
- Approximately 650–750 yd / 595–685 m of worsted-weight yarn
- Cream worsted-weight yarn
- Dusty-pink worsted-weight yarn
- Small amount of darker pink yarn
- Small amount of black yarn or embroidery floss
- 6 mm crochet hook
- Two sturdy buttons, approximately 25 mm
- Yarn needle
- Scissors
- Stitch markers
- Measuring tape
A firm cotton or cotton-blend yarn works particularly well for this project because it gives the organizer more structure. Acrylic yarn can also be used, although very soft yarn may stretch more once items are placed inside the pockets.
Holding two strands of worsted-weight yarn together creates a thicker fabric without requiring complicated stitches.
Gauge
Approximately 12 single crochet stitches and 13 rows should measure 4 inches, or 10 cm, when using two strands of worsted-weight yarn held together.
Exact gauge is not critical for this project because the organizer does not need to fit the body like a garment. Staying reasonably close to the suggested gauge will help keep the finished size similar to the measurements listed above.
Crochet Abbreviations
ch – chain
sc – single crochet
hdc – half double crochet
sl st – slip stitch
st – stitch
sts – stitches
sk – skip
Pattern Notes
Two strands of worsted-weight yarn are held together throughout most of the project.
Chain 1 at the beginning of a row does not count as a stitch.
Firm and even crochet tension helps reduce stretching, especially around the storage pockets.
Leave long yarn tails on the pockets, straps, and ears to make assembly easier.
The dimensions can be adjusted to suit a particular vehicle seat. Measuring the back of the intended seat before making major size changes is useful.
Crochet Car Organizer Free Pattern
Main Back Panel
Using two strands of cream worsted-weight yarn held together, chain 46.
Row 1: Single crochet in the second chain from the hook and in every chain across. Turn. There should be 45 stitches.
Rows 2–65: Chain 1, single crochet in every stitch across, then turn.
Fasten off after Row 65.
The finished panel should measure approximately 15 inches wide and 20 inches tall.

Add the Border
Join the cream yarn in one corner of the main panel.
Chain 1 and work single crochet evenly around all four sides. Place three single crochet stitches into each corner so the fabric turns neatly without pulling.
Join with a slip stitch into the first single crochet and fasten off.
The border creates a cleaner outer edge and adds a little more strength around the areas where the pockets and straps will be attached.
Large Center Storage Pocket
Using two strands of dusty-pink yarn held together, chain 42.
Row 1: Single crochet in the second chain from the hook and across. Turn. There should be 41 stitches.
Rows 2–18: Chain 1, single crochet across, and turn.
Fasten off while leaving a long yarn tail for sewing.
Place the pocket across the lower-middle section of the cream panel. Leave approximately 1 inch, or 2.5 cm, between the pocket and each outer side edge.
Use stitch markers to keep the pocket in position.
Sew the left side, bottom edge, and right side securely to the main panel. Leave the upper edge open.
For a roomier pocket, allow the fabric to curve outward slightly instead of pulling it completely flat while sewing.
Small Bottom Pockets
Make two.
Using cream, dusty pink, or both colors, chain 20.
Row 1: Single crochet in the second chain from the hook and across. Turn. There should be 19 stitches.
Rows 2–12: Chain 1, single crochet in every stitch across, and turn.
For striped pockets, change between cream and dusty pink every two or three rows.
Fasten off while leaving a long tail for sewing.
Repeat the same instructions for the second pocket.
Position both small pockets underneath the large center pocket. Leave a small space between them, then sew along the left side, bottom, and right side of each pocket.
Headrest Straps
Make two straps using dusty-pink yarn held double.
Chain 8.
Row 1: Single crochet in the second chain from the hook and across. Turn. There should be 7 stitches.
Rows 2–22: Chain 1, single crochet across, and turn.
Row 23: Chain 1, single crochet in the first 2 stitches, chain 3, skip the next 3 stitches, then single crochet in the final 2 stitches.
This creates the buttonhole.
Row 24: Chain 1, single crochet in the first 2 stitches, work 3 single crochet stitches into the chain-3 space, then single crochet in the final 2 stitches.
Rows 25–26: Chain 1 and single crochet across.
Fasten off.
Repeat for the second strap.
Sew one strap securely near each top corner of the organizer.
Before sewing the buttons permanently into position, wrap the straps around the intended headrest posts and check the fit. The buttonholes should close without pulling tightly.
Crochet Cat Ears
Make two.
Using dusty-pink yarn held double, chain 2.
Row 1: Work 2 single crochet stitches into the second chain from the hook. Turn.
Row 2: Chain 1 and work 2 single crochet stitches into each stitch. Turn. There should be 4 stitches.
Row 3: Chain 1 and single crochet across.
Row 4: Chain 1, work 2 single crochet stitches into the first stitch, single crochet into the next 2 stitches, then work 2 single crochet stitches into the final stitch. There should now be 6 stitches.
Rows 5–6: Chain 1 and single crochet across.
Fasten off.
Repeat for the second ear.
A smaller cream triangle can be embroidered or crocheted inside each ear for extra contrast.
Sew one ear near each upper corner of the organizer.
Embroidered Cat Face
Use black yarn or embroidery floss to create two curved closed eyes in the upper center section of the organizer.
With dusty-pink yarn, embroider a small triangular nose between the eyes.
Add a short vertical line below the nose and two small curved stitches for the mouth.
Finish the face with three short whiskers on each side.
Keep all knots at the back of the project and weave the yarn ends securely into the crochet fabric.
Crochet Cat Tail
Using cream or dusty-pink yarn, chain 30.
Beginning in the second chain from the hook, work one half double crochet into every chain across.
Turn, chain 1, and work another row of half double crochet if a thicker tail is preferred.
Fasten off.
Alternating between cream and dusty pink creates a striped tail that matches the lower pockets.
Sew one end securely to the lower center of the organizer.
How to Assemble the Crochet Car Organizer
Lay the completed main panel flat on a clean surface.
Attach the large center pocket first, then sew the two smaller bottom pockets in place.
Add the cat ears along the upper edge and embroider the face.
Sew the two headrest straps securely to the upper corners and attach the buttons after checking the fit on the intended headrest.
Add the striped crochet tail along the bottom edge.
Check the entire organizer for loose yarn ends and weave each one securely into the crochet fabric.
Before installing the organizer permanently, place a few lightweight objects inside the pockets and check that the seams remain firm.

What Can Be Stored in a Crochet Car Organizer?
The wide center pocket works well for lightweight travel essentials such as tissues, wet wipes, a small notebook, a soft pouch, or a neatly coiled charging cable.
The smaller lower pockets can hold sunglasses, pens, lip balm, charging cords, or other compact items that often disappear between car seats.
Avoid storing heavy, sharp, breakable, flammable, or hazardous objects in a hanging organizer. Heavy objects can stretch the crochet fabric and may become unsafe during sudden braking.
Keeping the contents lightweight also helps the organizer maintain its original shape.
How to Make the Organizer More Structured
A firm yarn and tight crochet tension are the simplest ways to improve the structure of the organizer.
Cotton and cotton-blend yarns tend to produce a denser fabric than very soft acrylic yarn.
The large center pocket can also be lined with cotton fabric. A fabric lining helps reduce stretching and makes the inside of the pocket easier to clean.
For additional support, a piece of plastic canvas can be placed behind the main crochet panel and enclosed completely with a fabric backing.
Any stiff reinforcement should remain fully covered so that no hard or sharp edges are exposed.
Color Ideas for the Crochet Car Organizer
The dusty-pink and cream combination creates a soft handmade look, but this pattern can be adapted to many different color palettes.
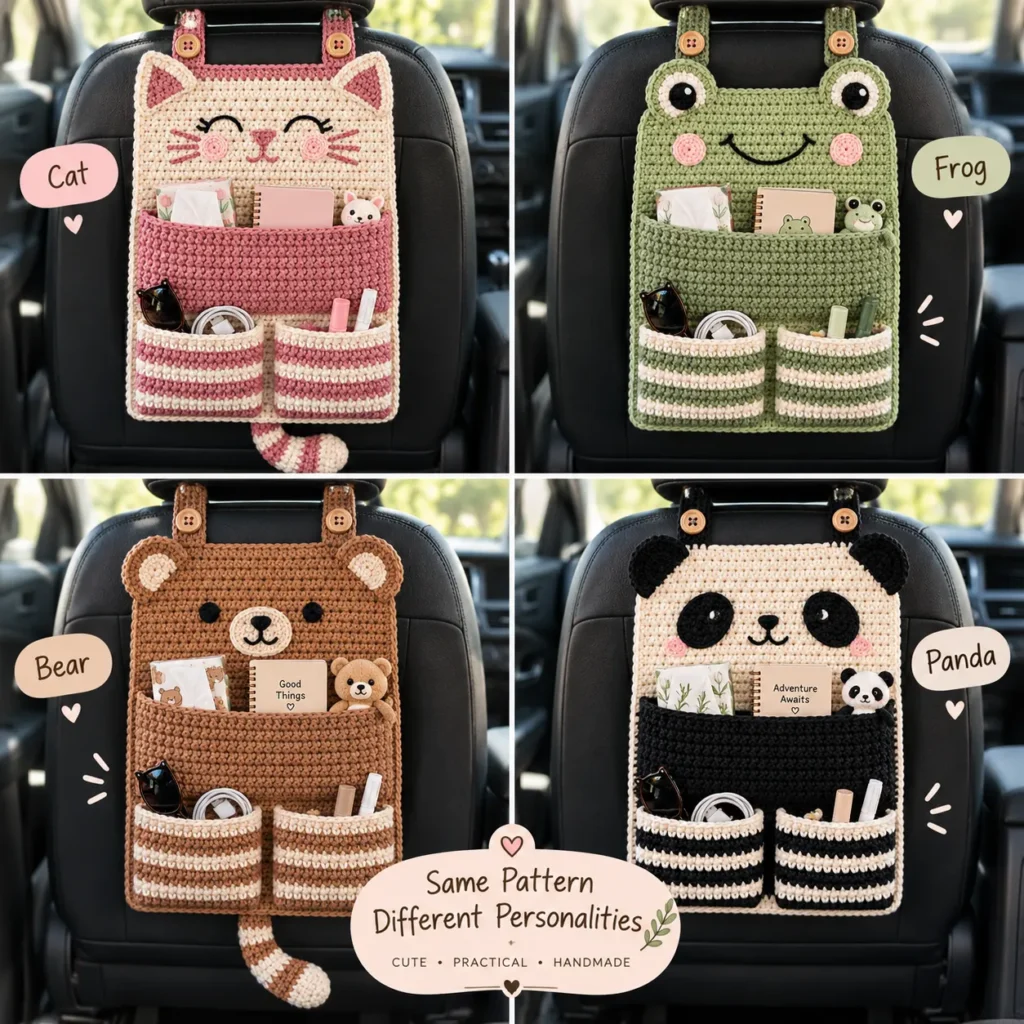
Sage green and cream create a calm neutral style. Caramel and beige produce a warmer look, while lavender, pastel blue, terracotta, mustard, or soft yellow can make the project more colorful.
A black, gray, and cream combination can create a more minimalist version for a modern car interior.
The pockets can also be made from leftover yarn, making this project useful for using smaller amounts from previous crochet projects.
Turn the Cat Organizer Into Another Animal
The basic organizer can easily become a different character without changing the functional pattern.
Rounded ears and a short embroidered muzzle can create a bear design.
Longer ears can turn the organizer into a bunny.
Black ears combined with dark eye details can create a black-and-white animal version.
Rounded crochet eyes along the top edge can create a frog organizer.
Changing only the decorative elements allows the same basic panel and pocket pattern to be used for several different designs.
How to Adjust the Size
Vehicle seats vary in width and height, so measuring the intended seat before making major adjustments is useful.
To make the organizer narrower, reduce the number of chains in the main panel.
To create a wider organizer, add more starting chains while maintaining the same stitch pattern.
The height can be adjusted by adding or removing rows.
If the main panel size changes significantly, resize the pockets proportionally so they remain slightly narrower than the organizer.
The headrest straps can also be lengthened or shortened depending on the distance around the headrest posts.
How to Care for a Crochet Car Organizer
Car accessories can collect dust over time, especially when used frequently.
Remove every object from the pockets before cleaning.
Check the yarn label for specific care instructions.
Gentle hand washing works for many cotton and acrylic yarns. Avoid aggressively twisting or wringing the organizer because this can distort the panel and stretch the pockets.
After washing, reshape the organizer carefully and allow it to air dry completely before reinstalling it in the vehicle.
Frequently Asked Questions
Is this crochet car organizer beginner friendly?
Yes. The pattern mainly uses chains, single crochet, and half double crochet. The most detailed part is sewing the pieces together neatly, so some familiarity with basic crochet techniques is useful.
What yarn works well for a crochet car organizer?
Cotton, cotton-blend, or firm acrylic yarn can all work. Two strands of worsted-weight yarn held together create a dense fabric that provides more structure.
Can bulky yarn be used instead?
Yes. One strand of bulky yarn can replace two strands of worsted-weight yarn. A different hook size may be needed, so checking the gauge before making the full organizer is helpful.
How can the pockets be prevented from stretching?
Firm yarn, consistent crochet tension, lightweight contents, and a simple fabric lining can all reduce stretching.
Can the pattern be made without the cat design?
Yes. The ears, face, and tail are decorative. Leaving them off creates a simple rectangular organizer that works well with neutral car interiors.
Can more pockets be added?
Yes. The pocket layout can be customized. One long lower pocket can replace the two smaller pockets, or narrow compartments can be added for pens and charging cables.
Can the organizer be washed?
That depends on the yarn used. Check the care instructions on the yarn label. Gentle washing followed by air drying can help preserve the shape.
Save This Crochet Car Organizer Free Pattern
This crochet car organizer combines practical storage, simple stitches, and a playful handmade design in one project.
The basic construction can be customized with different yarn colors, pocket layouts, sizes, and animal themes, making it easy to create more than one version from the same pattern.
Save this pattern to a Pinterest crochet board so it is easy to find when a practical crochet project is needed.
The same rectangular panel and pocket construction can also inspire wall organizers, nursery storage pockets, craft organizers, hanging bathroom storage, or desk accessories.