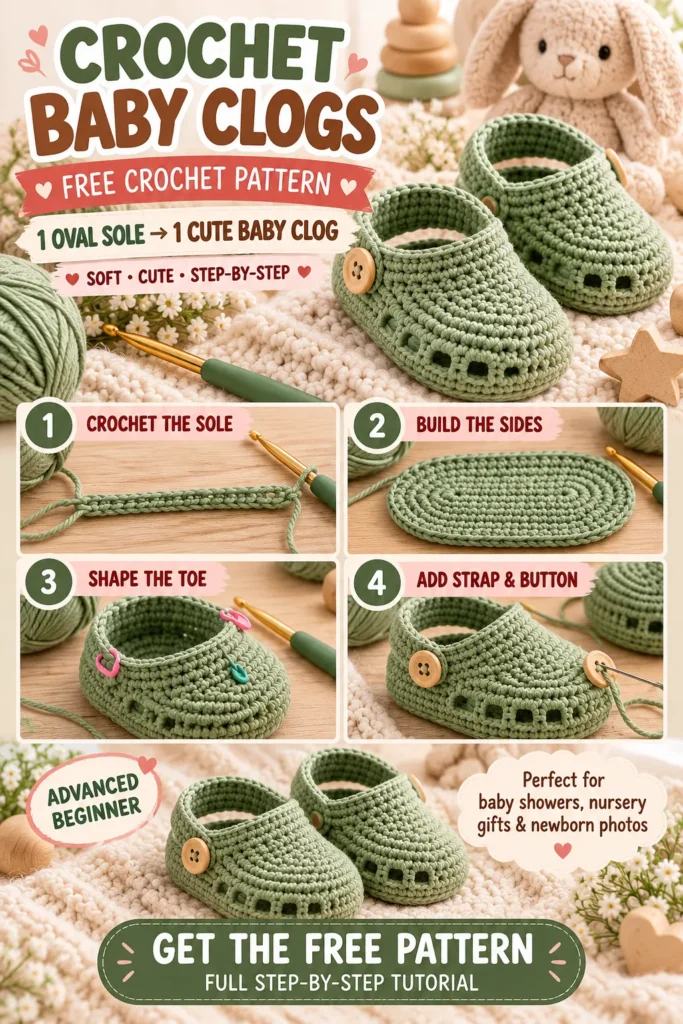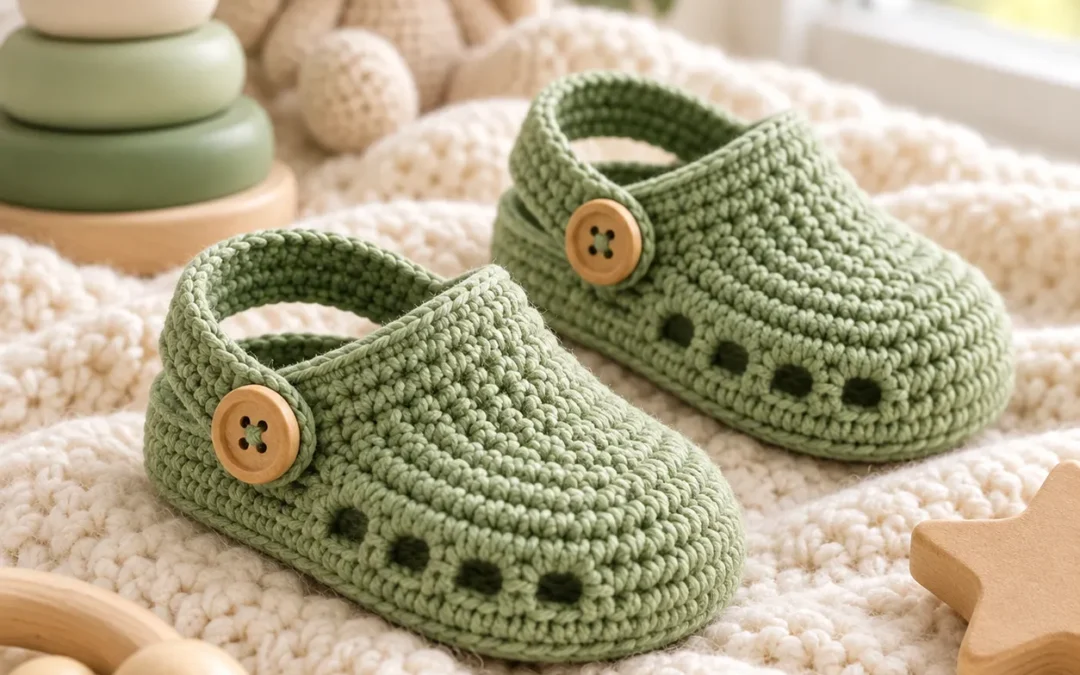
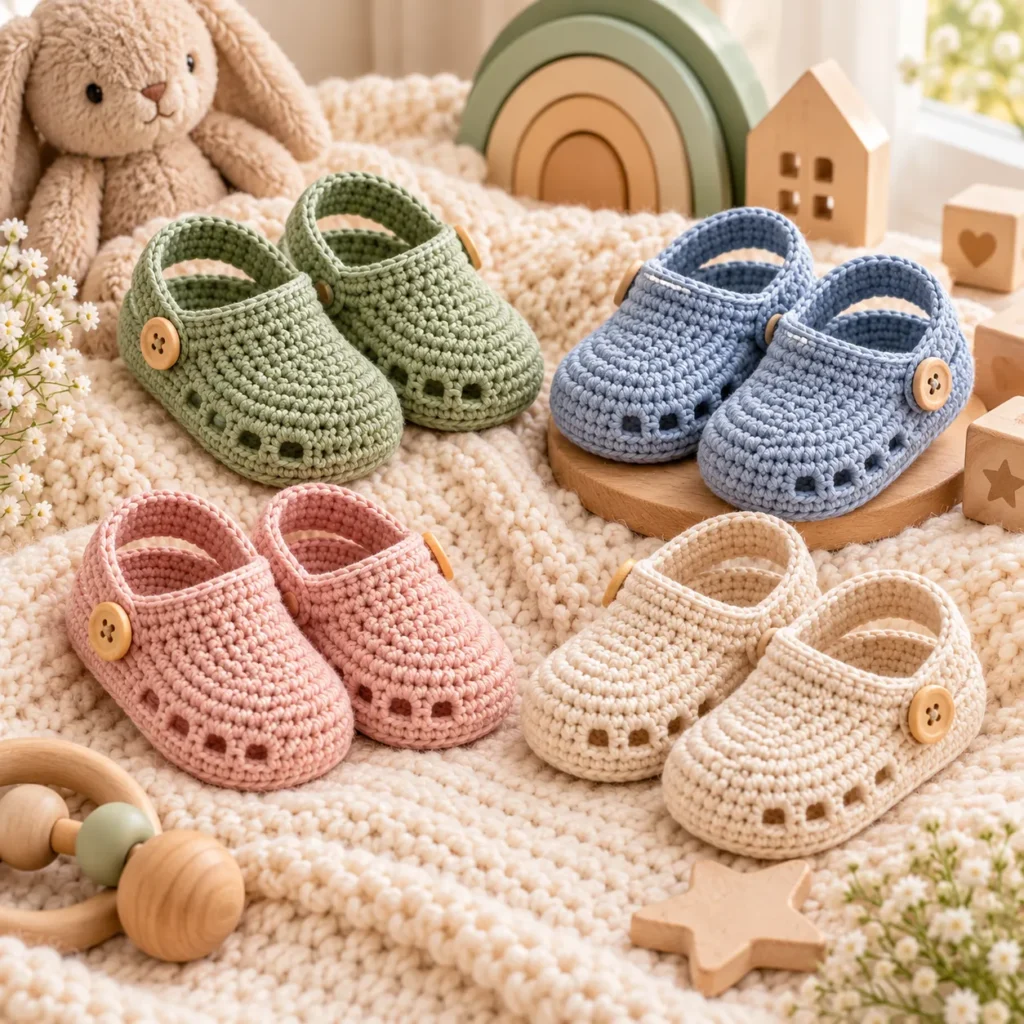
These adorable Crochet Baby Clogs combine the cozy feel of handmade booties with the cute rounded shape of classic clogs.
They feature a soft oval sole, structured toe, gently shaped sides, tiny decorative openings, and an optional heel strap that can sit behind the ankle or fold forward.
The simple construction makes them a lovely project for baby showers, newborn gifts, nursery photo props, and handmade gift sets.
Make them in sage, cream, dusty blue, blush pink, oatmeal, lavender, or any soft baby-friendly shade.
Crochet Baby Clogs Pattern at a Glance
| Pattern Detail | Information |
|---|---|
| Skill Level | Advanced Beginner |
| Crochet Terms | US terminology |
| Yarn Weight | DK / Light Worsted |
| Hook Size | 3.5 mm |
| Construction | Sole + upper + heel + strap |
| Main Stitches | sc, hdc, dc |
| Sample Size | Approx. 3–6 months |
| Sole Length | Approx. 10–10.5 cm |
| Closure | Optional button strap |
| Best For | Baby gifts, photos, nursery sets |
This pattern is designed as soft baby footwear. For babies who are standing or walking, use age-appropriate footwear with proper grip, support, and fit.
Why You’ll Love These Baby Clogs
These little shoes are:
- Quick to crochet
- Soft and flexible
- Easy to customize
- Scrap-yarn friendly
- Gender-neutral
- Perfect for baby showers
- Cute for nursery photos
- Easy to coordinate with blankets and hats
The strap is optional, so you can make either a classic clog shape or a more secure baby-shoe version.
Materials
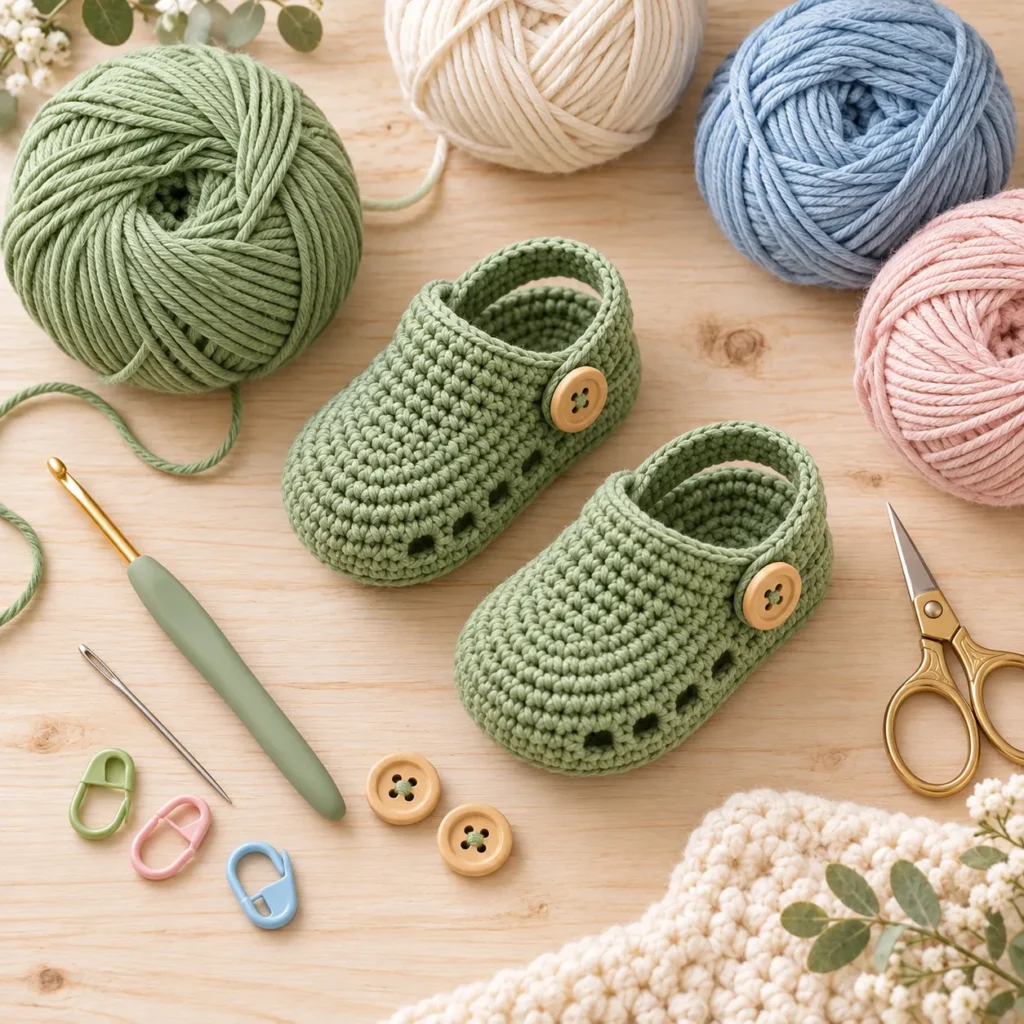
For one pair:
- Approx. 100–120 yd DK or light-worsted yarn
- 3.5 mm crochet hook
- Yarn needle
- Scissors
- Stitch markers
- Measuring tape
- 2 small buttons, optional
Recommended yarn:
- Cotton
- Cotton-acrylic blend
- Soft baby acrylic
Choose a yarn that is soft against delicate skin and holds its shape reasonably well.
Crochet Abbreviations
| Abbreviation | Meaning |
|---|---|
| ch | Chain |
| sl st | Slip stitch |
| sc | Single crochet |
| hdc | Half double crochet |
| dc | Double crochet |
| inc | 2 sts in same stitch |
| dec | Crochet 2 sts together |
| BLO | Back loop only |
| st / sts | Stitch / stitches |
| FO | Fasten off |
Size Notes
The sample pattern makes approximately a 3–6 month size with a finished sole measuring around 10–10.5 cm.
Because baby feet vary considerably, measure the intended baby's foot whenever possible.
A useful rule is:
finished sole = foot length + approximately 0.5–1 cm
Suggested target sole lengths:
| Approx. Age | Sole Length |
|---|---|
| Newborn | 8.5–9 cm |
| 0–3 months | 9–9.5 cm |
| 3–6 months | 10–10.5 cm |
| 6–12 months | 11–11.5 cm |
Age ranges are only general guides.
Part 1: Crochet the Sole
Using sage-green yarn:
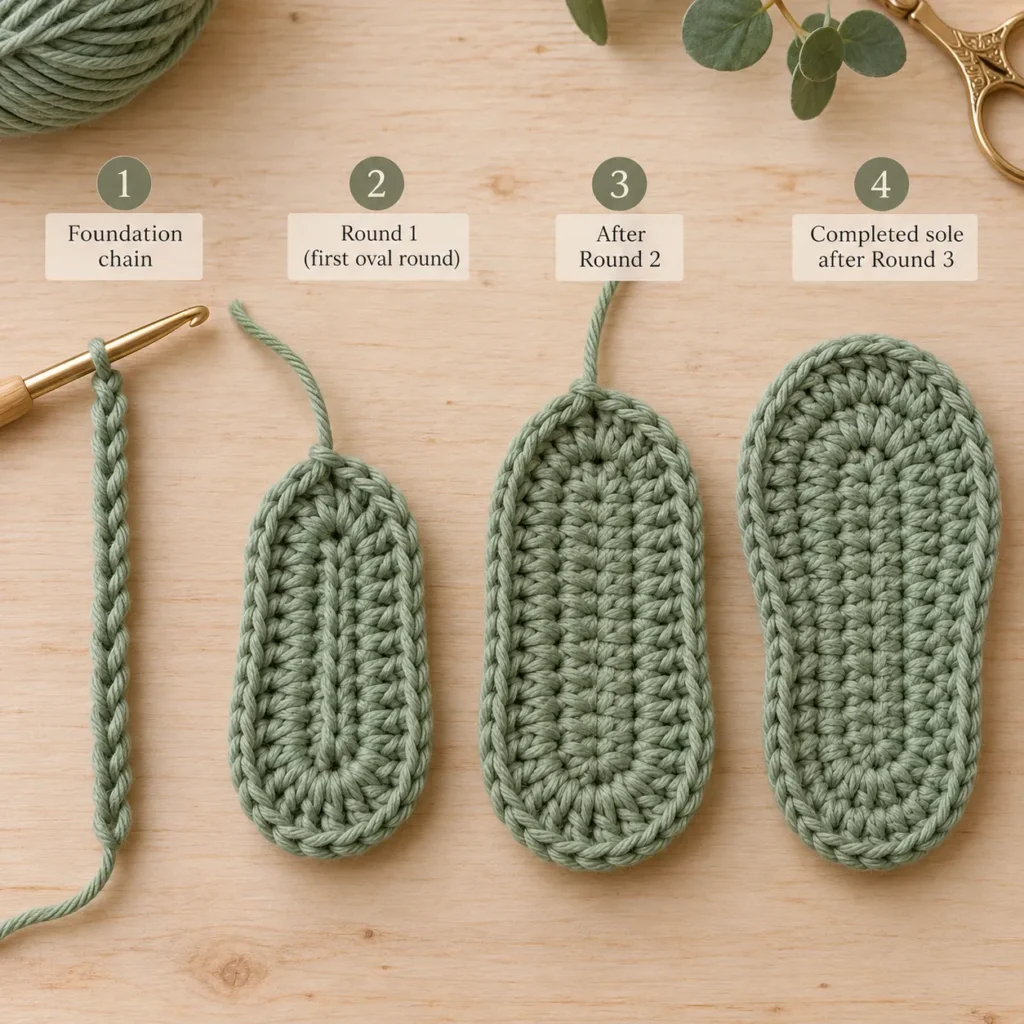
Ch 12.
We will crochet around both sides of the foundation chain to form an oval.
Round 1
Starting in the second chain from the hook:
Sc in next 10 ch.
Work 3 sc in final chain.
Rotate the foundation.
Work 9 sc along the opposite side.
Work 2 sc in the final chain.
Join with sl st.
You should now have an oval sole.
Round 2
Ch 1.
Sc in the first few stitches.
At the toe end, increase gradually:
2 sc in each of the 3 toe stitches
Continue sc along the second side.
At the heel, work:
2 sc in each of the final 2–3 heel stitches
Join.
Round 3
Continue working evenly around.
At the toe:
Alternate:
sc, inc
through the curved section.
Repeat a smaller number of increases around the heel.
The sole should lie flat without rippling.
Fasten off only if you want to change color.
Optional Double Sole
For a slightly firmer shoe, crochet two identical soles for each clog.
Hold them together and work a round of sc through both layers.
This gives the bottom a thicker, more structured finish.
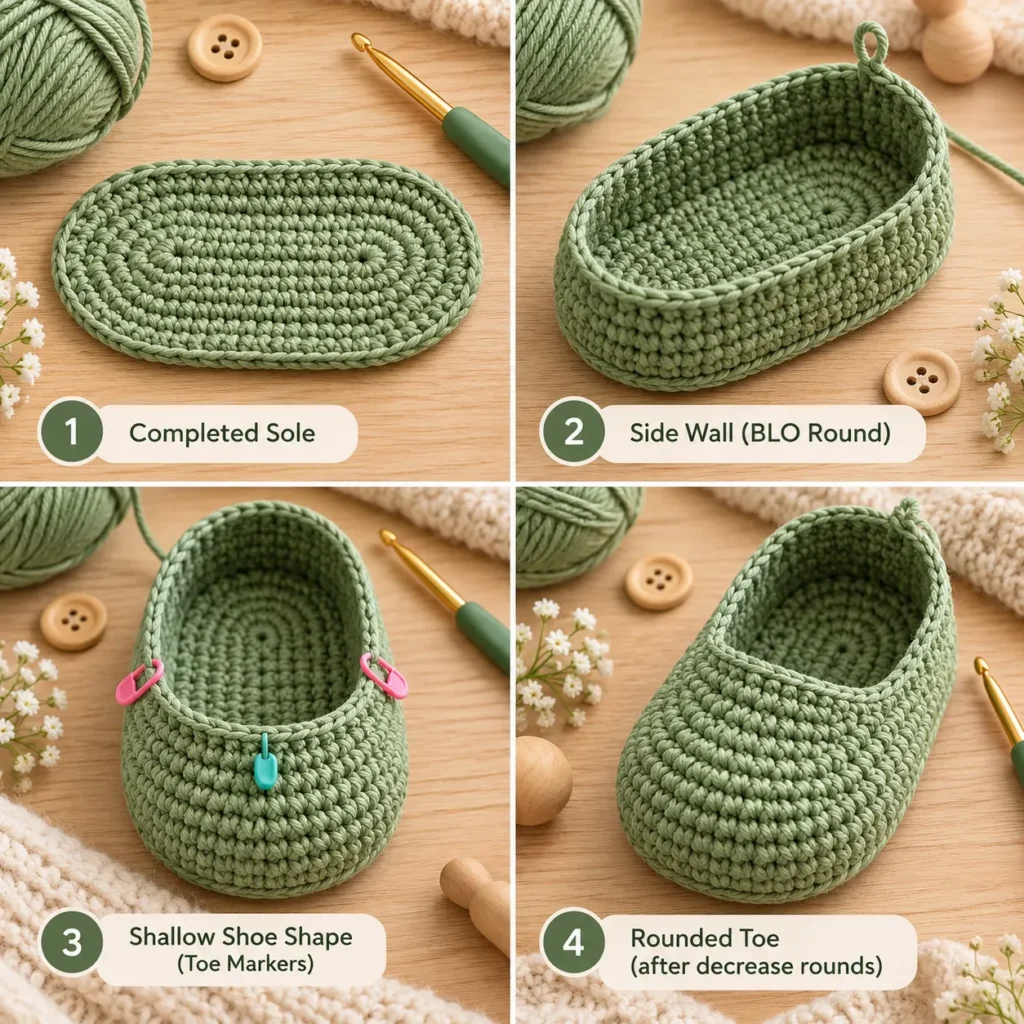
Part 2: Turn the Sole Into the Shoe
Join sage yarn at the center back.
Round 4
Work 1 sc BLO in every stitch around.
Working in the back loop creates a clear ridge between the sole and the upper.
Join.
Round 5
Sc around without increasing.
You should see the shoe sides beginning to stand vertically.
Round 6
Sc around again.
At this stage, the clog should look like a shallow crochet bowl.
Mark the Toe
Lay the sole flat.
Find the center front stitch.
Place a stitch marker there.
Count approximately 8–10 stitches to each side of the center.
Place markers.
This front section will become the closed toe.
Part 3: Shape the Rounded Toe
Work around until you reach the first toe marker.
Across the toe section, begin decreasing.
A simple sequence is:
sc 2, dec
repeat across the front.
Continue normally around the sides and heel.
On the following round, decrease again across the toe:
sc, dec
repeat across the marked front section.
This gathers the upper and creates the rounded clog shape.
Final Toe Shaping
On the next round:
Work sc until the front.
Across the remaining toe stitches, work several evenly spaced decreases.
The upper should close over the toes but leave a comfortable foot opening behind it.
Do not decrease too aggressively.
You want a rounded upper rather than a pointed toe.
Part 4: Create the Decorative Openings
The small openings are optional but give the clogs their distinctive airy look.
Locate the front-side area of the shoe.
Work the next round using:
sc in next 2–3 sts, ch 1, skip 1 st
Repeat this approximately 3–4 times across the front-side section.
Then continue with sc.
On the next round:
Work sc into each sc and 1 sc into each ch-1 space.
Repeat on the opposite side if you want symmetrical openings.
Keep these holes small so the shoe remains soft and secure.
Alternative Solid Version
For newborn clogs, you can skip the openings entirely and simply work sc around.
This creates a warmer, more enclosed shoe.
Part 5: Shape the Heel
Continue working around the back half of the shoe.
For a snug heel:
Work approximately 2 rounds of sc around the sides and heel while leaving the upper-front area unchanged.
You can work these rows back and forth rather than in full rounds.
This slightly raises the rear of the clog.
At each end of the heel row, use a slip stitch to blend it smoothly into the side.
Fasten off.
Part 6: Crochet the Heel Strap
Make 2.
Using sage yarn:
Ch approximately 18–22.
The length depends on shoe size.
Starting in second ch:
Work sc across.
Ch 1, turn.
Work one more row of sc.
Fasten off.
The strap should be long enough to curve comfortably around the heel without pulling.
Add the Button Loop
At one end of the strap:
Ch 4–6.
Sl st back into the strap to create a small button loop.
Check that the opening fits your button.
Attach the Strap
Sew the plain end of the strap firmly to the outside rear-side of the clog.
Sew a small button to the opposite side.
The strap can now sit:
- Behind the heel
- Across the top
- Folded forward decoratively

Optional Button-Free Strap
If the clogs are intended for very young babies, you can avoid buttons entirely.
Instead:
Sew both strap ends permanently to the shoe.
Or crochet the strap directly into both sides.
This removes detachable small components.
Add a Contrast Edge
Join cream yarn around the foot opening.
Work one round of:
sl st or sc
This creates a neat contrasting trim.
Beautiful combinations include:
- Sage + cream
- Dusty blue + ivory
- Blush + oatmeal
- Lavender + cream
- Camel + ivory
Make the Sole More Structured
If the clogs are for photo props or gifting, the regular crochet sole is usually enough.
For additional structure, you can:
- Crochet a double sole
- Use a smaller hook
- Choose firm cotton yarn
Avoid adding hard inserts for very young babies unless the footwear is strictly decorative and the insert is completely enclosed.
Make a Newborn Size
Use:
- DK yarn
- 3–3.25 mm hook
Begin with approximately:
Ch 10
Check the sole measurement before continuing.
Aim for approximately 8.5–9 cm.
Make a Larger Baby Size
For approximately 6–12 months:
Begin with:
Ch 13–14
Add an extra sole increase round if needed.
Aim for approximately 11–11.5 cm before building the upper.
Always rely on measurements rather than age alone.
Color Ideas
Sage Nursery
Sage green
Warm cream
Classic Neutral
Oatmeal
Ivory
Camel
Baby Girl
Blush pink
Cream
Baby Boy
Dusty blue
Warm white
Modern Neutral
Taupe
Beige
Cream
Soft Pastel
Lavender
Pale yellow
Mint
Add a Tiny Flower
Crochet a small flower and sew it near the strap.
This works beautifully for:
- Blush clogs
- Lavender clogs
- Cream clogs
Keep embellishments securely sewn.
Add a Bear Detail
Instead of a plain clog, add two tiny semicircle ears to the upper edge.
Embroider a small bear face on the toe.
This turns the same basic construction into cute animal baby shoes.
Make a Matching Baby Set
Pair the clogs with:
- Crochet bonnet
- Baby cardigan
- Baby blanket
- Headband
- Romper
Using the same yarn color creates a coordinated handmade gift set.
Baby Shower Gift Idea
Crochet one pair in a neutral shade.
Place them inside a small gift box with:
- Baby blanket
- Handmade card
- Matching hat
Add tissue paper and ribbon for a beautiful handmade presentation.
Tips for a Professional Finish
Keep your sole flat.
Count decreases carefully on both shoes.
Use stitch markers to center the toe.
Make both straps the same length.
Check the shoe opening before fastening off.
Use a smaller hook if the fabric feels too loose.
Weave all yarn ends securely.
Block only lightly so the shoe keeps its structure.
Make the second shoe while the first is nearby so you can compare the shaping.
Important Baby Safety Notes
These crochet clogs are best treated as soft pre-walker baby shoes, photo props, or gift items.
For babies:
- Avoid loose beads or decorations
- Secure every yarn end
- Consider embroidered details instead of detachable embellishments
- Check buttons frequently if used
- Never leave a baby unattended with loose or detachable pieces
- Remove footwear during sleep
- Make sure the shoes are not too tight
For babies beginning to stand or walk, use properly fitted footwear appropriate for walking surfaces.
Frequently Asked Questions
Are Crochet Baby Clogs beginner friendly?
They are best for an advanced beginner comfortable with working in rounds and making decreases.
Are the clogs worked in one piece?
The sole and main upper are worked continuously.
The heel strap is made separately and attached afterward.
What yarn is best?
Soft DK cotton, cotton blend, or baby acrylic works well.
Can I make them without buttons?
Yes.
Sew both ends of the strap permanently to the shoe.
How do I know what size to make?
Measure the baby's foot and add approximately 0.5–1 cm for comfort.
Can I make a double sole?
Yes.
A double crochet sole creates more structure.
Can these be used as walking shoes?
They are primarily designed as soft infant or pre-walker footwear rather than supportive outdoor walking shoes.
Save This Crochet Baby Clogs Pattern
Save this Crochet Baby Clogs Pattern to Pinterest for your next baby crochet project.
These little clogs are soft, customizable, giftable, and perfect for baby showers, nursery sets, newborn photos, handmade gift boxes, and matching baby crochet collections.