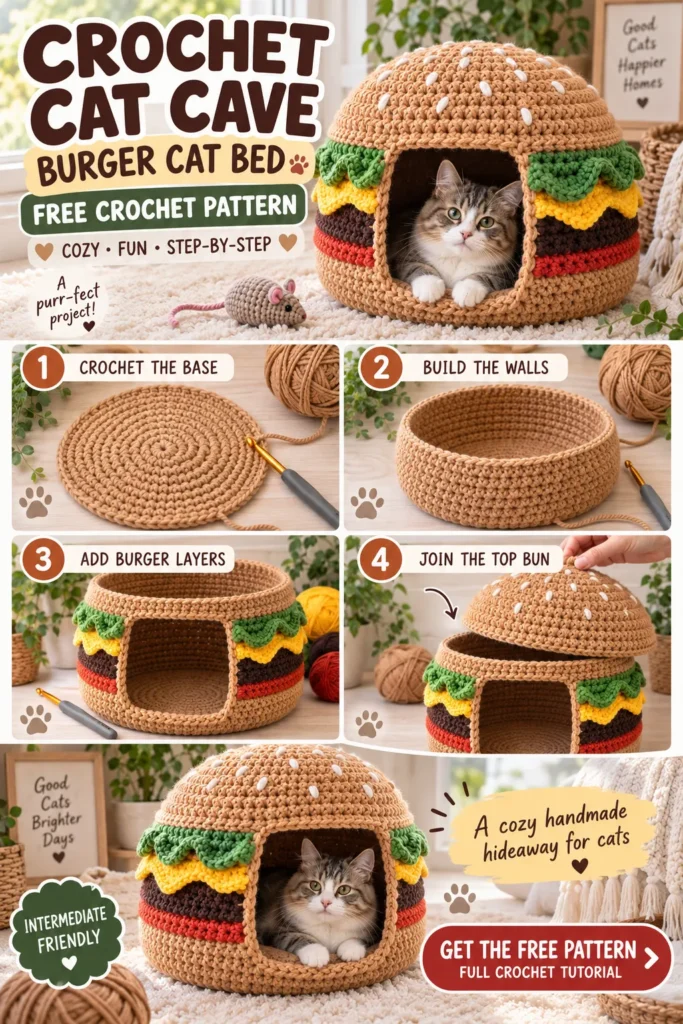
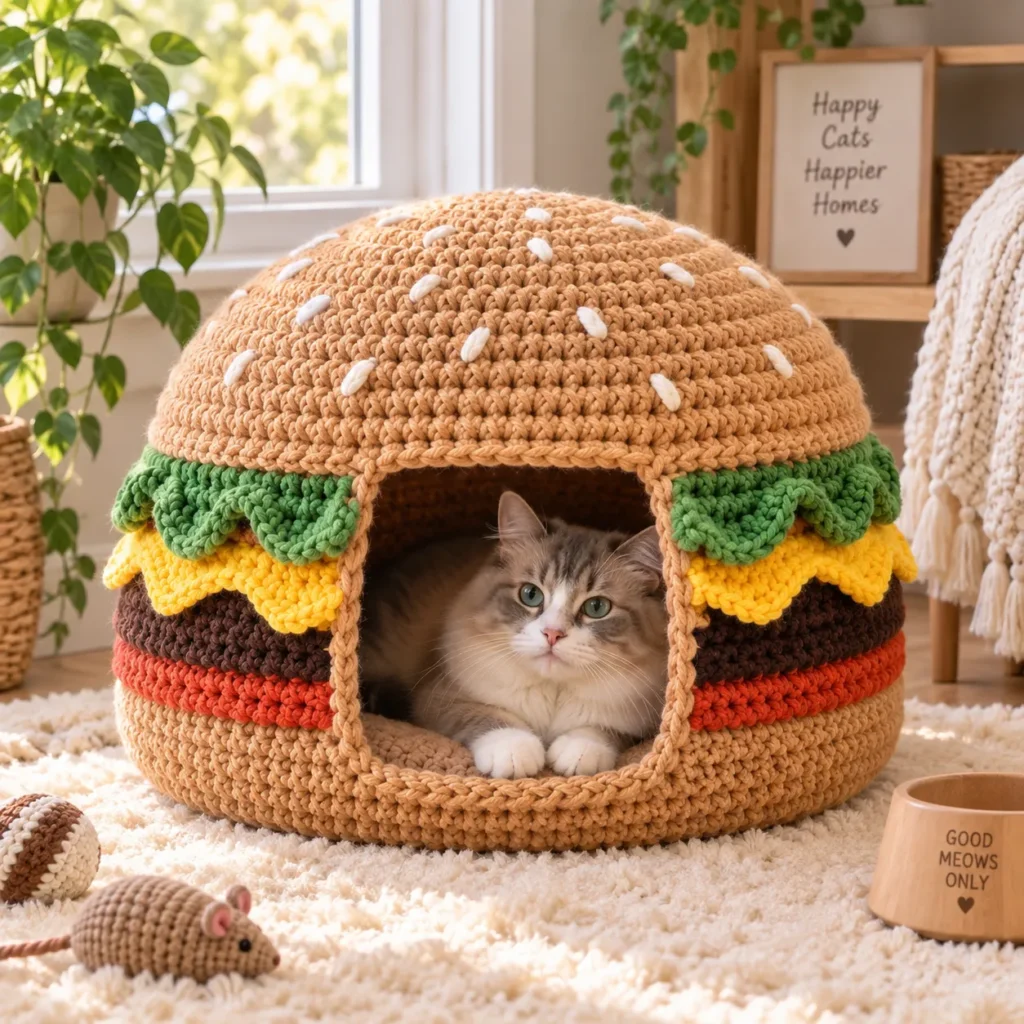
Give a favorite feline a cozy hideaway with this playful Crochet Cat Cave free pattern inspired by a classic cheeseburger.
The finished cave combines a warm golden-brown crochet bun with colorful burger-inspired layers, including lettuce green, cheese yellow, tomato orange-red, and a dark brown filling. A rounded entrance gives cats an enclosed place to curl up while still keeping the interior easy to access.
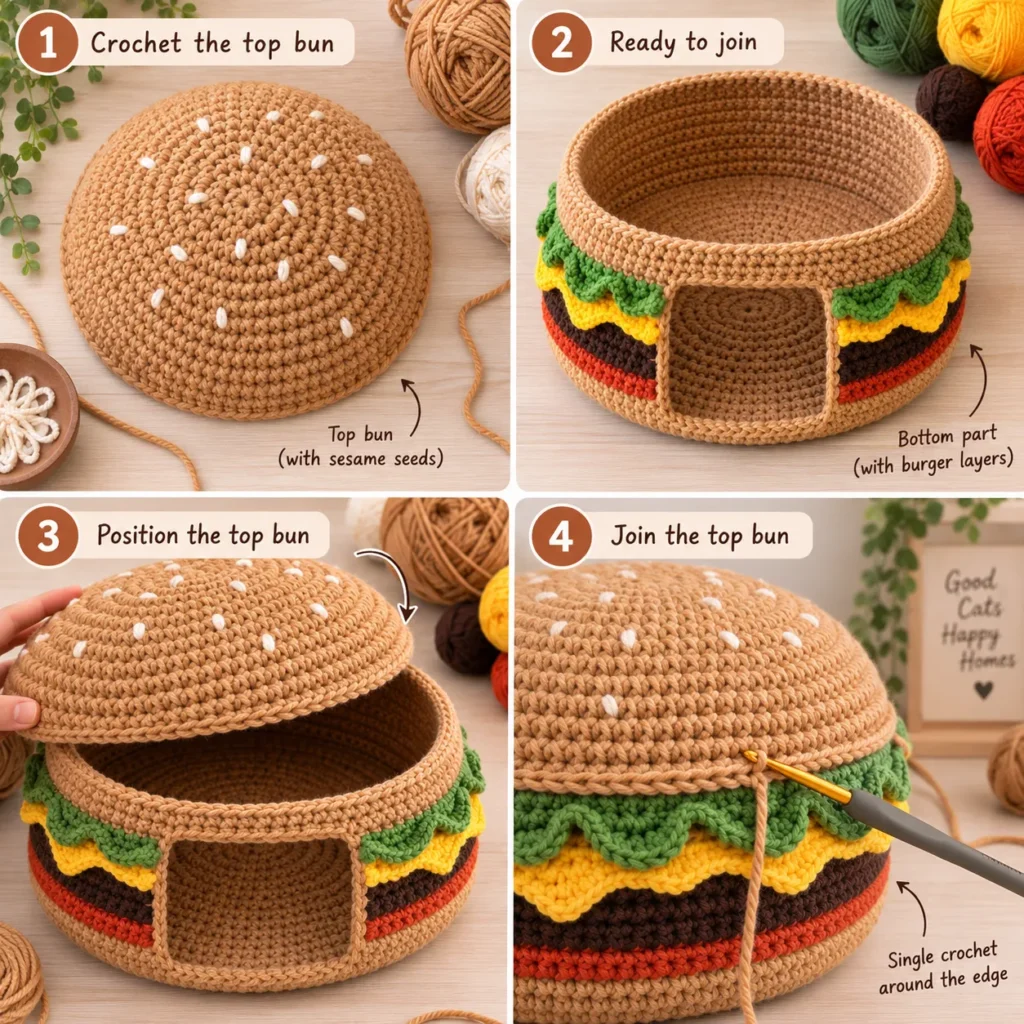
This project is worked in several structured sections: a flat circular base, reinforced lower walls, decorative burger layers, a separate domed top, and a final joining round.
The result is a fun handmade pet bed that doubles as cheerful home décor.
Crochet Cat Cave Pattern at a Glance
| Pattern Detail | Information |
|---|---|
| Skill Level | Intermediate |
| Crochet Terms | US terminology |
| Yarn Weight | Super Bulky #6 |
| Hook Size | 8 mm |
| Construction | Circular base + walls + separate dome |
| Finished Diameter | Approx. 16 in / 40 cm |
| Finished Height | Approx. 11 in / 28 cm |
| Entrance | Approx. 8 × 7 in |
| Main Stitch | Single crochet |
| Pattern Style | Burger cat cave |
| Optional Interior | Removable crochet cushion |
The finished dimensions can be adjusted for smaller or larger cats by changing the number of increase rounds.
Why Crochet a Cat Cave?
Many cats naturally seek out enclosed spaces for resting, observing, and sleeping.
A crochet cave provides a soft hideaway while the thick yarn gives the walls texture and warmth.
The burger design makes the project especially fun because each color round becomes part of the finished food-inspired appearance.
The cave can also be customized into other themes by changing the colors.
Possible variations include:
- Cheeseburger
- Hamburger
- Pastel burger
- Pumpkin cave
- Mushroom cat cave
- Strawberry cat cave
- Bear cave
- Minimal neutral cat pod
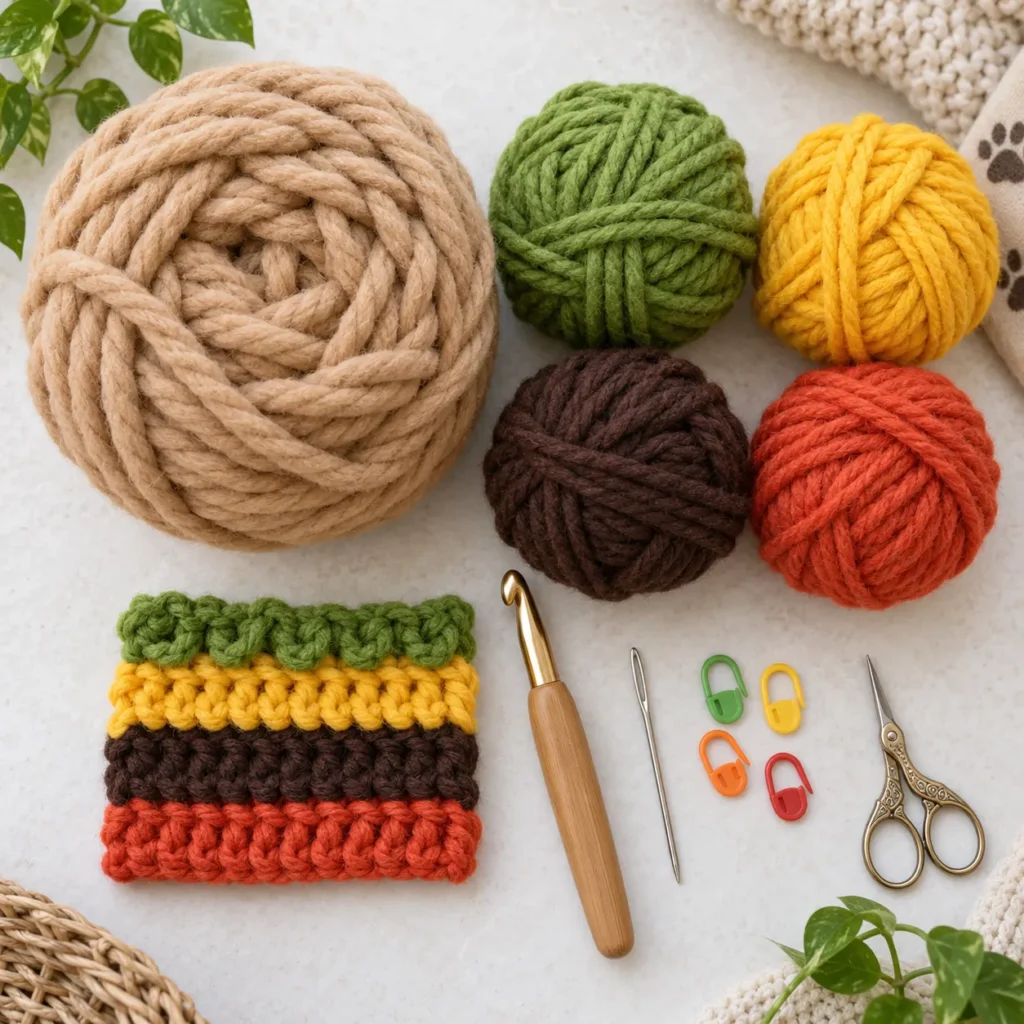
Materials
For one medium-sized cat cave:
- 450–550 yards tan or caramel super-bulky yarn
- 50 yards dark brown yarn
- 40 yards lettuce-green yarn
- 40 yards golden-yellow yarn
- 30 yards tomato-orange or red yarn
- 8 mm crochet hook
- Large yarn needle
- Scissors
- Stitch markers
- Flexible plastic canvas or washable foam stabilizer, optional
- Polyester stuffing for optional cushion
- Non-slip fabric for base, optional
For additional firmness, two strands of a medium-weight cotton yarn can also be held together.
Avoid yarn with long loose fibers that may shed easily.
Yarn Color Suggestions
The classic burger palette uses:
Bun
Warm caramel or golden tan
Lettuce
Olive or leafy green
Cheese
Mustard or golden yellow
Patty
Chocolate brown
Tomato
Rust red or burnt orange
Sesame Seeds
Cream or ivory
Neutral colors can create a more understated version.
A beige bun with sage-green lettuce and muted mustard cheese gives the project a softer modern look.
Crochet Abbreviations
- MR – magic ring
- ch – chain
- sc – single crochet
- hdc – half double crochet
- sl st – slip stitch
- st / sts – stitch / stitches
- inc – increase
- dec – decrease
- BLO – back loop only
- FLO – front loop only
- rep – repeat
Gauge
Exact gauge is not critical for this project.
A firm fabric is more important than matching a specific stitch count.
Use a hook small enough that the finished crochet feels dense rather than floppy.
As a general reference:
9–10 sc × 9 rows ≈ 4 × 4 inches
Pattern Notes
The cave is worked in several sections.
The base is crocheted first in continuous rounds.
The lower bun wall is then worked upward.
The front entrance is created by working back and forth instead of continuing full rounds.
The burger filling stripes are added while building the walls.
The top bun is crocheted separately as a shallow dome.
The dome is joined to the lower section at the end.
Use a stitch marker to identify the first stitch of each round.
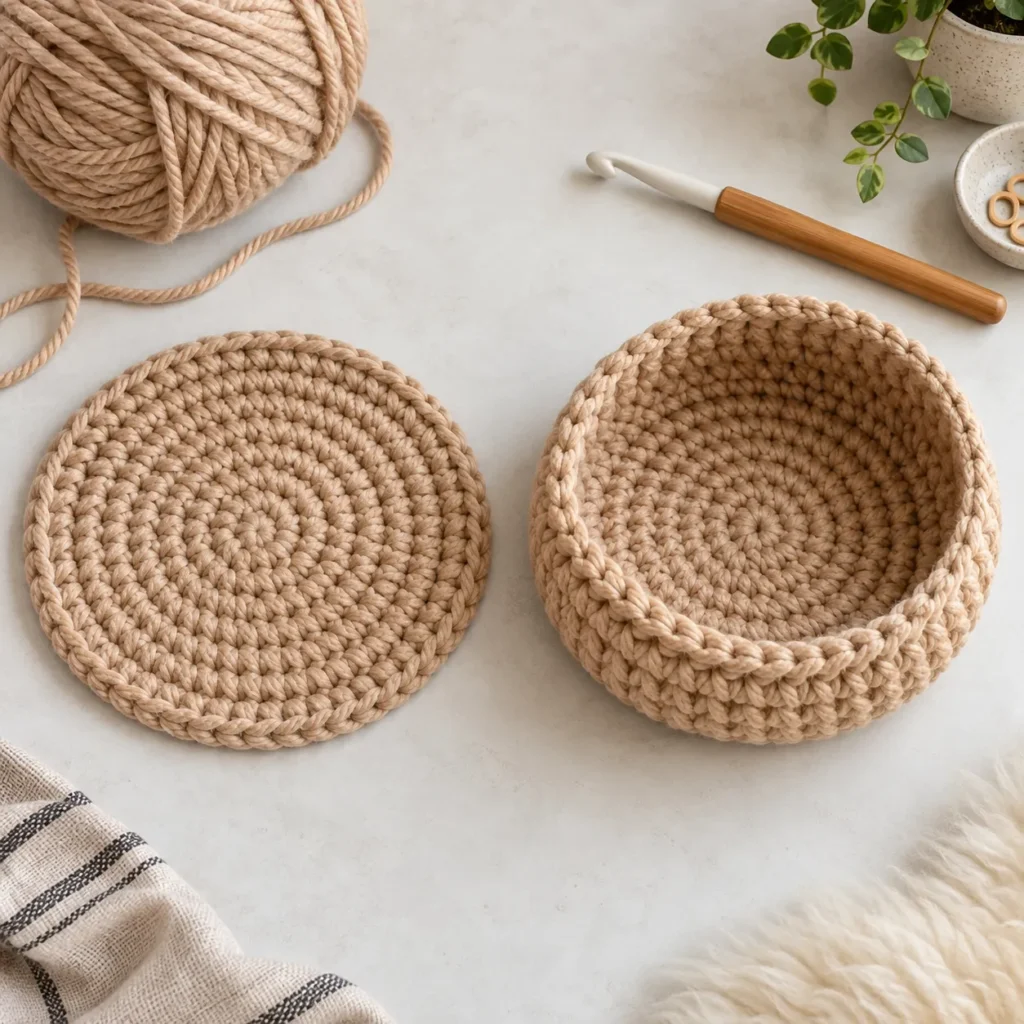
Part 1: Crochet the Circular Base
Use tan yarn.
Round 1
Create a magic ring.
Work:
6 sc into the ring
Pull the ring closed.
6 sts
Round 2
Work:
2 sc in each stitch around
12 sts
Round 3
Repeat:
1 sc, 2 sc in next st
around.
18 sts
Round 4
Repeat:
1 sc in next 2 sts, 2 sc in next st
around.
24 sts
Round 5
Repeat:
1 sc in next 3 sts, 2 sc in next st
around.
30 sts
Continue increasing by adding one additional single crochet between increases in every new round.
Continue until the base measures approximately:
15–16 inches / 38–40 cm across.
For many super-bulky yarns, this will require approximately 12–14 rounds.
Reinforce the Base
Work one round of sc in BLO only.
This creates a visible turning ridge and helps the sides begin standing upright.
If a firmer base is needed, cut a circle of plastic canvas slightly smaller than the crocheted base and position it inside later.
Part 2: Build the Bottom Bun
Continue with tan yarn.
Work sc evenly around without increasing.
Complete approximately:
5–6 rounds.
The side wall should begin standing vertically.
Keep the tension firm.
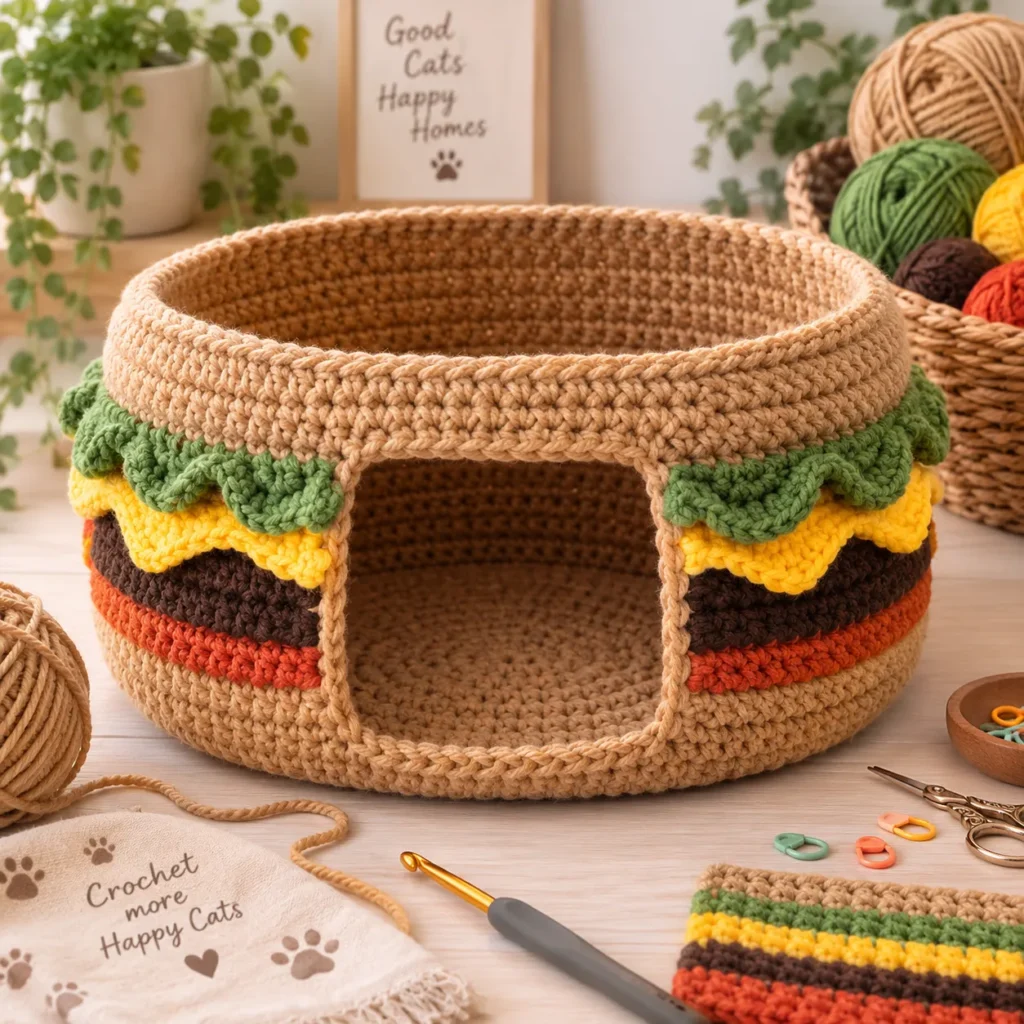
Part 3: Create the Cat Entrance
Determine the center front of the cave.
Place stitch markers approximately 8 inches apart.
This marked area will become the doorway.
Instead of continuing around the complete cave, turn the work when reaching each marker.
Crochet back and forth across the remaining stitches.
Entrance Row 1
Sc until the first marker.
Turn.
Entrance Row 2
Ch 1.
Sc back across the wall stitches until reaching the opposite marker.
Turn.
Continue working in rows.
The unworked center section creates the entrance opening.
Continue until the opening measures approximately:
6.5–7 inches tall.
Keep both doorway edges straight.
Shape the Doorway
To create slightly rounded upper corners, decrease once near each doorway edge during the final two wall rows.
This creates a softer arch rather than a completely rectangular entrance.
The opening should remain wide enough for the cat to enter comfortably.
Part 4: Add the Burger Layers
The colored rounds create the burger appearance.
Work them above the bottom bun and around the doorway edges.
Tomato Layer
Switch to orange-red yarn.
Work:
1–2 rows of sc
around the cave walls.
Patty Layer
Switch to dark brown.
Work:
2–3 rows sc
Cheese Layer
Switch to yellow.
For a slightly irregular cheese edge, alternate:
sc, hdc, sc
across sections of the round.
Lettuce Layer
Switch to green.
For a textured lettuce edge, repeat:
sl st, 3 hdc in next stitch, sl st
around visible sections.
Finish with one regular green sc row to stabilize the layer.
Switch back to tan yarn for the upper bun section.
Continue the Upper Wall
Using tan yarn, work another:
2–3 rows of sc.
This gives the top bun something firm to attach to later.
Fasten off.
Part 5: Crochet the Top Bun
The upper bun is crocheted separately.
Use tan yarn.
Start exactly as for the bottom circle.
Round 1
6 sc into MR.
Round 2
2 sc in each stitch around.
Round 3
Repeat:
1 sc, 2 sc in next stitch
around.
Continue increasing until the circle is approximately 2 inches smaller than the cave base.
Then begin shaping the dome.
Shape the Dome
Work several rounds with fewer increases.
For example:
Dome Round 1
Sc around without increasing.
Dome Round 2
Add approximately 6 evenly spaced increases.
Dome Round 3
Sc around.
Alternate lightly increased rounds with plain rounds.
The fabric should gradually curve downward into a shallow dome.
Continue until the outer edge matches the circumference of the cave body.
Add Sesame Seeds
Using cream yarn and a yarn needle, embroider short diagonal stitches across the upper bun.
Space them irregularly.
Approximately 12–20 sesame stitches create enough detail without overcrowding the bun.
Secure all embroidery ends inside the dome.
Optional Dome Reinforcement
If the yarn is very soft, a flexible layer of washable foam can be placed inside the top bun.
Cut the foam slightly smaller than the crochet dome.
Avoid rigid or sharp material.
The cave should remain flexible enough to compress safely.
Part 6: Join the Top Bun
Place the dome over the lower cave.
Align the outer stitches.
Make sure the entrance remains open and centered.
Use tan yarn.
Join with:
sc through both layers around the outside edge.
Alternatively, use mattress stitch for a less visible seam.
Before completely closing the seam, insert any optional flexible stabilizer.
Finish joining.
Weave in the ends securely.
Part 7: Crochet an Optional Cat Cushion
A removable cushion makes cleaning easier.
Using tan, cream, or another neutral yarn, crochet a flat circle approximately 1 inch smaller than the cave interior.
Make two identical circles.
Place them together.
Sc around both layers.
Before closing completely, lightly stuff with polyester filling.
Do not overfill.
The cushion should remain flat and soft.
Close the remaining stitches.
Fasten off.
Place inside the cave.
Helping the Cave Hold Its Shape
A Crochet Cat Cave needs more structure than a typical basket.
Several methods can help.
Use Dense Yarn
Super-bulky cotton blends or firm acrylic yarn produce stronger walls.
Crochet Tightly
Dense single crochet reduces sagging.
Add Flexible Stabilizer
Washable foam or plastic canvas can be placed between crochet layers.
Reinforce the Doorway
Work an additional round of sc around the entrance edge.
Keep the Dome Lightweight
Too much stuffing in the roof can cause the cave to collapse inward.
Cat Cave Size Adjustments
Not every cat is the same size.
For a smaller cat or kitten, stop increasing the base at approximately:
13–14 inches.
For a larger cat, continue until approximately:
17–18 inches.
The cave should provide enough room for the cat to turn around and curl up comfortably.
The doorway can also be enlarged for bigger cats.
Crochet Cat Cave Safety Notes
Pet projects need slightly different finishing than decorative crochet.
Avoid:
- Buttons
- Plastic eyes
- Beads
- Bells
- Long loose cords
- Loose fringe
- Easily detached decorations
All yarn tails should be woven in securely.
Inspect the cave regularly for pulled loops or damaged yarn.
If a cat frequently chews yarn or textile fibers, supervised use is advisable.
Washing and Care
If washable yarn is used, spot cleaning is usually sufficient for regular maintenance.
A removable cushion can be washed separately.
For deeper cleaning, follow the yarn manufacturer's care instructions.
If foam or stabilizer has been added, confirm that the reinforcement material is washable before machine washing.
Allow the cave to dry completely before returning it to the pet.
Crochet Cat Cave Color Variations
The burger theme is only one option.
The same basic construction can become several different pet beds.
Neutral Cat Cave
Cream base
Beige walls
Oatmeal dome
Pastel Burger
Blush bun
Sage lettuce
Pale yellow cheese
Halloween Burger
Orange bun
Black filling
Purple accents
Minimal Modern Cave
Warm beige throughout with no burger layers
Cottagecore Cave
Cream body with muted green and terracotta stripes
Frequently Asked Questions
Is this Crochet Cat Cave beginner friendly?
Basic single crochet is used throughout most of the pattern, but the doorway shaping, dome construction, joining, and structural considerations make the project better suited to an advanced beginner or intermediate crocheter.
What yarn works best for a crochet cat cave?
Super-bulky yarn with relatively firm construction works well.
Cotton blends, thick acrylic, or doubled worsted yarn can all be used.
How large should a cat cave be?
For an average adult cat, an interior width of approximately 15–16 inches works well.
Larger cats may need a wider base.
Why does the cave collapse?
Soft yarn, loose tension, or a heavy dome can make the structure collapse.
A smaller hook, denser stitches, and flexible reinforcement can improve stability.
Can the burger colors be removed?
Yes.
Work all wall rows in one color for a simple round cat cave.
Can the top bun be removable?
Yes.
Instead of permanently crocheting it to the base, several concealed crochet ties can be added.
For cats that chew strings, however, permanently joining the top is safer.
Can this pattern be used for small dogs?
Potentially, provided the animal fits comfortably inside and does not chew loose yarn.
Adjust the base and doorway measurements as required.
Save This Crochet Cat Cave Pattern
Save this Crochet Cat Cave free pattern to Pinterest for a future pet project.
The burger design combines a cozy resting space with a playful handmade look that works especially well in craft rooms, bedrooms, living rooms, and pet corners.