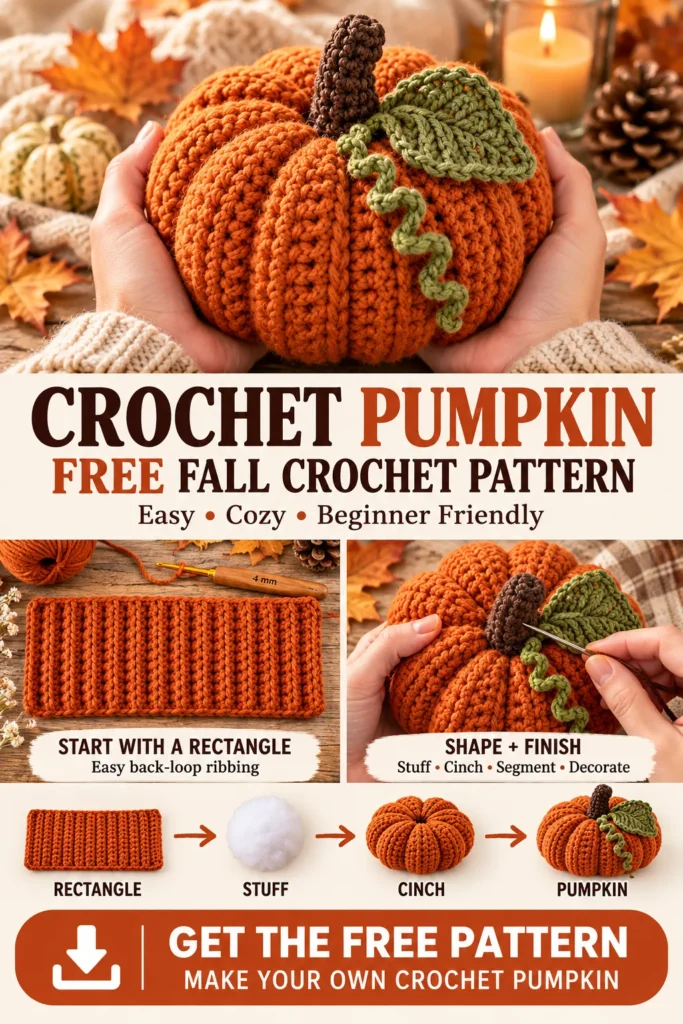
Nothing says cozy fall quite like handmade pumpkins.
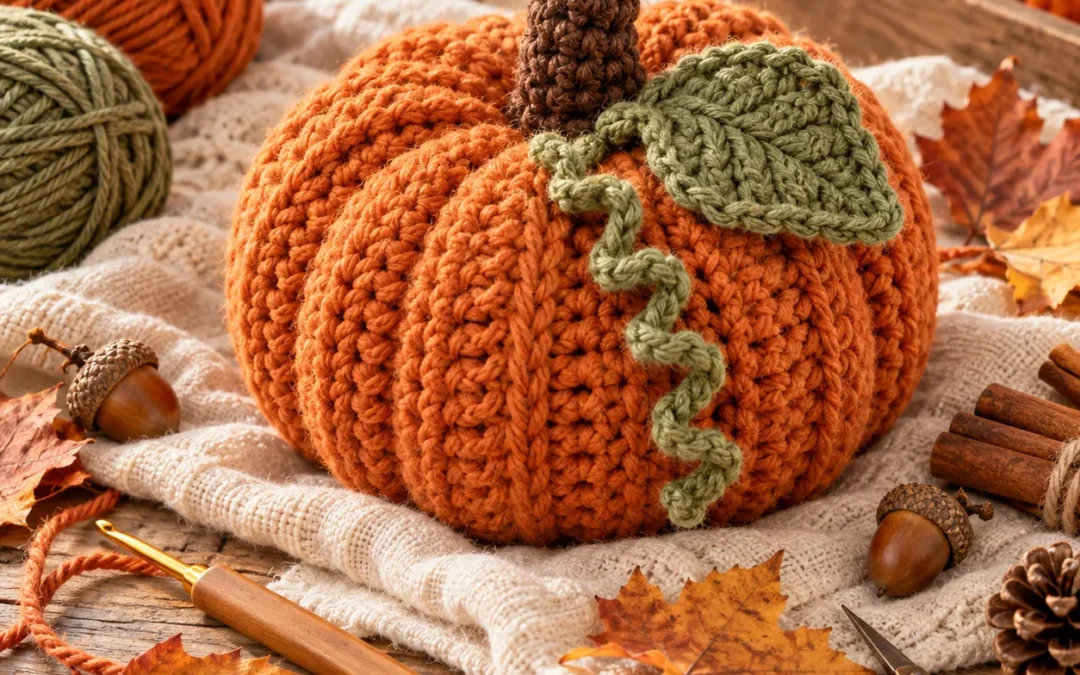
This Crochet Pumpkin Pattern turns a simple ribbed crochet panel into a plump, dimensional pumpkin that is perfect for autumn decorating, Thanksgiving displays, handmade gifts, or seasonal craft-market collections.
The main version uses warm burnt-orange yarn with a dark brown stem, muted-olive crochet leaf, and curly green vine.
Once you understand the construction, you can easily make the same pumpkin in cream, sage, mustard, terracotta, rust, oatmeal, or deep burgundy.
The best part is that the pumpkin body is made from a simple rectangle, so there is no complicated shaping to memorize.
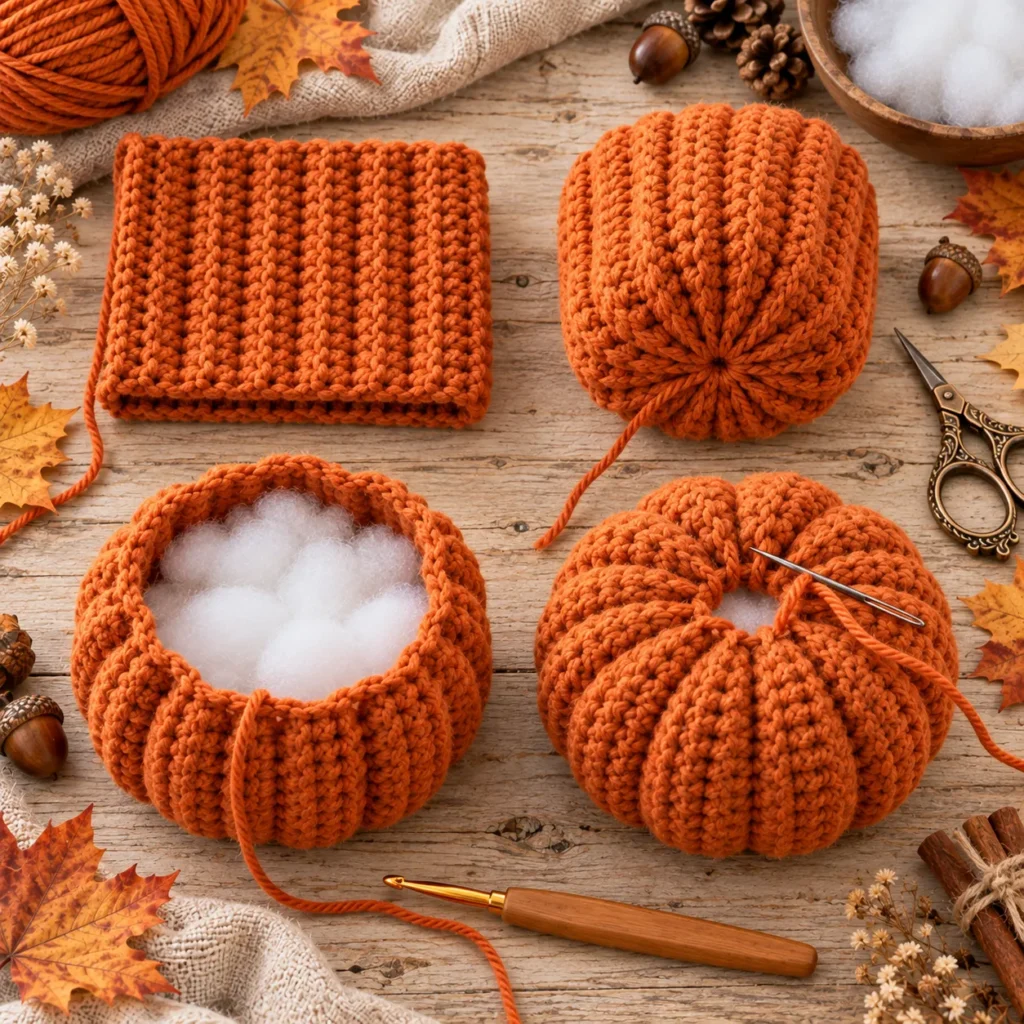
You crochet the ribbing, join the sides, cinch the bottom, add stuffing, close the top, and then use yarn to create the classic pumpkin segments.
Pattern at a Glance
| Detail | Pattern Information |
|---|---|
| Skill Level | Beginner / Confident Beginner |
| Crochet Terms | US terminology |
| Yarn | Worsted / Medium #4 |
| Hook | 4 mm |
| Construction | Ribbed rectangle, seamed and stuffed |
| Finished Size | Approx. 5–6 in wide |
| Main Stitches | ch, hdc, BLO hdc, sc, sl st |
| Stuffing | Polyester fiberfill |
| Approx. Time | 1½–2 hours |
| Best Uses | Fall décor, gifts, table styling, Thanksgiving |
Why This Crochet Pumpkin Is So Easy
The pumpkin body starts as a flat ribbed rectangle.
That means you do not need to increase and decrease through complicated rounds.
The formula is simply:
crochet rectangle → join → cinch → stuff → close → segment
Working half double crochet through the back loop only creates strong vertical ridges.
Once the rectangle is turned into a tube and stuffed, those ridges naturally resemble the texture of a real pumpkin.
Materials
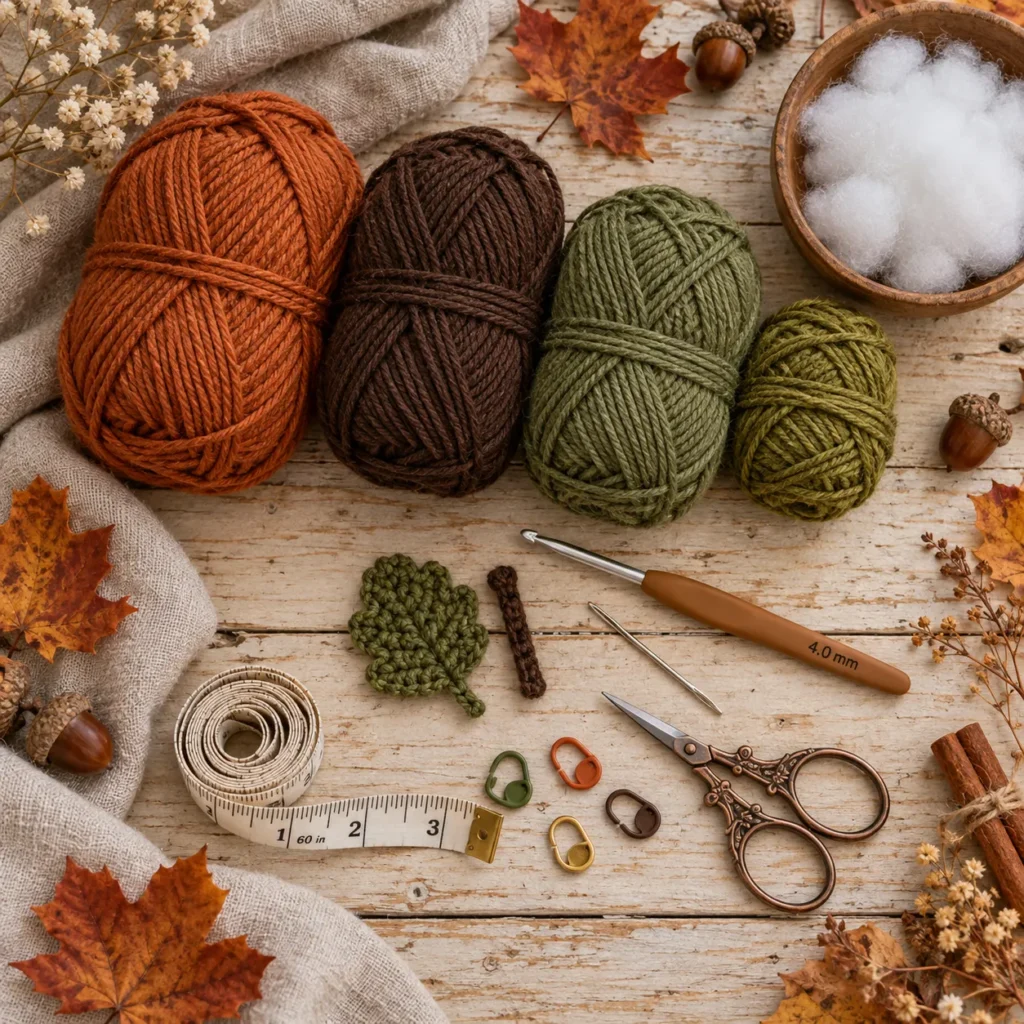
You’ll need:
- Worsted / medium #4 yarn in burnt orange
- Small amount of brown yarn
- Small amount of muted olive yarn
- Small amount of green yarn for the vine
- 4 mm crochet hook
- Polyester fiberfill
- Yarn needle
- Scissors
- Stitch marker, optional
Cotton, acrylic, wool-blend, or soft worsted yarn can all work.
A slightly firm yarn helps the ribbing stay defined.
Abbreviations
| Abbreviation | Meaning |
|---|---|
| ch | Chain |
| sc | Single Crochet |
| hdc | Half Double Crochet |
| BLO | Back Loop Only |
| sl st | Slip Stitch |
| st / sts | Stitch / stitches |
| FO | Fasten Off |
Part 1: Crochet the Ribbed Pumpkin Body
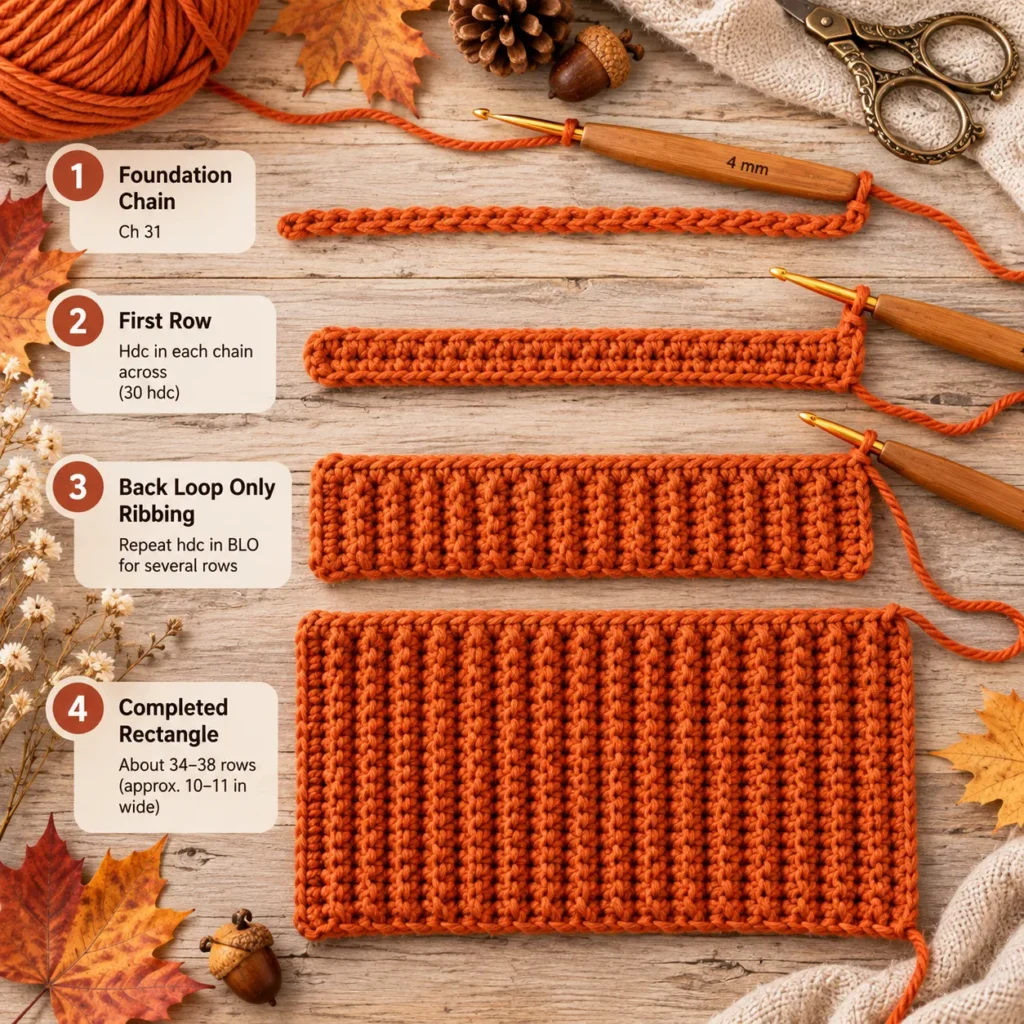
Using burnt-orange yarn:
Ch 31.
Row 1
Starting in the second chain from the hook:
hdc in each chain across
You should have:
30 hdc
Turn.
Row 2
Ch 1.
Work:
hdc in BLO across
Turn.
Repeat Row 2 until you have approximately 34–38 rows, or until the rectangle measures roughly 10–11 inches / 25–28 cm wide when relaxed.
The exact row count is flexible.
More rows create a wider pumpkin.
Fewer rows create a narrower pumpkin.
The ribbing should run vertically from top to bottom once the pumpkin is assembled.
Part 2: Join the Rectangle
Fold the finished panel so the first and last rows meet.
Make sure the ribbing runs vertically.
Using your hook, slip stitch the two short edges together.
You can also sew the seam with a yarn needle if you prefer.
Do not fasten off immediately if you want to use the same yarn for closing the bottom.
Turn the tube so the seam sits neatly toward the back.
Part 3: Close the Bottom
Cut a long yarn tail.
Thread it through your yarn needle.
Weave the needle in and out around one open end of the tube, passing through the edge stitches.
Pull firmly.
The opening will gather together.
Pass the needle through several opposite sections of the gathered fabric to reinforce the center.
Secure with several knots.
Turn the piece right side out.
You should now have an open pumpkin-shaped pouch.
Part 4: Stuff the Pumpkin
Add polyester fiberfill.
Stuff the outer sides first.
Then fill the center.
Keep the pumpkin:
- firm
- rounded
- slightly wider than tall
- soft enough to compress
Do not overstuff so much that the ribbing becomes stretched flat.
The ridges should remain clearly visible.
Part 5: Close the Top
Thread a long strand of orange yarn onto your needle.
Weave it around the entire upper opening.
Pull firmly until the opening closes.
Before securing completely, add or remove stuffing as needed.
Once you like the shape, pull tight and knot securely.
Leave a very long tail if you plan to use the same yarn for segmenting.
Part 6: Create the Pumpkin Segments
This step transforms the stuffed ball into a recognizable pumpkin.
Use the long orange yarn tail.
Insert the needle through the center top of the pumpkin.
Bring it out through the bottom center.
Wrap the yarn around the outside of the pumpkin, following one ribbed groove.
Insert the needle again through the top and pull through the bottom.
Pull firmly.
This creates one deep pumpkin groove.
Repeat around the pumpkin.
Aim for approximately 6–8 evenly spaced segments.
For the sample pumpkin, make:
8 segments
After every few passes, check the shape from above.
Adjust the yarn tension so all sections look balanced.
Secure the yarn firmly underneath the pumpkin when finished.
Part 7: Crochet the Stem
Using dark-brown yarn:
Ch 7.
Join carefully with a sl st to form a small ring.
Rounds 1–5
Sc around.
You can work approximately 6 sc per round.
For a slightly curved stem, make one side one row taller before finishing.
Fasten off with a long tail.
Lightly stuff the stem with a tiny amount of fiberfill or yarn scraps.
Alternative Short Stem
For a smaller pumpkin:
Ch 5
and work approximately three rounds.
Part 8: Crochet the Leaf
Using muted-olive yarn:
Ch 9.
Starting in the second chain from your hook, work:
sl st, sc, hdc, dc, tr, dc, hdc, sc
At the end:
ch 2
Now work along the opposite side of the foundation chain:
sc, hdc, dc, tr, dc, hdc, sc, sl st
Fasten off with a long tail.
Gently block the leaf if needed.
Add a Leaf Vein
Using the same or slightly darker green yarn, surface crochet or embroider a line down the center of the leaf.
This small detail makes it look much more polished.
Part 9: Make the Curly Vine
Using moss-green yarn:
Ch 25–30.
Starting in the second chain from the hook:
work 2 sc in every chain.
The piece will naturally curl into a spiral.
For a tighter vine, use:
3 sc in each chain
Fasten off with a long sewing tail.
Attach the Stem, Leaf & Vine
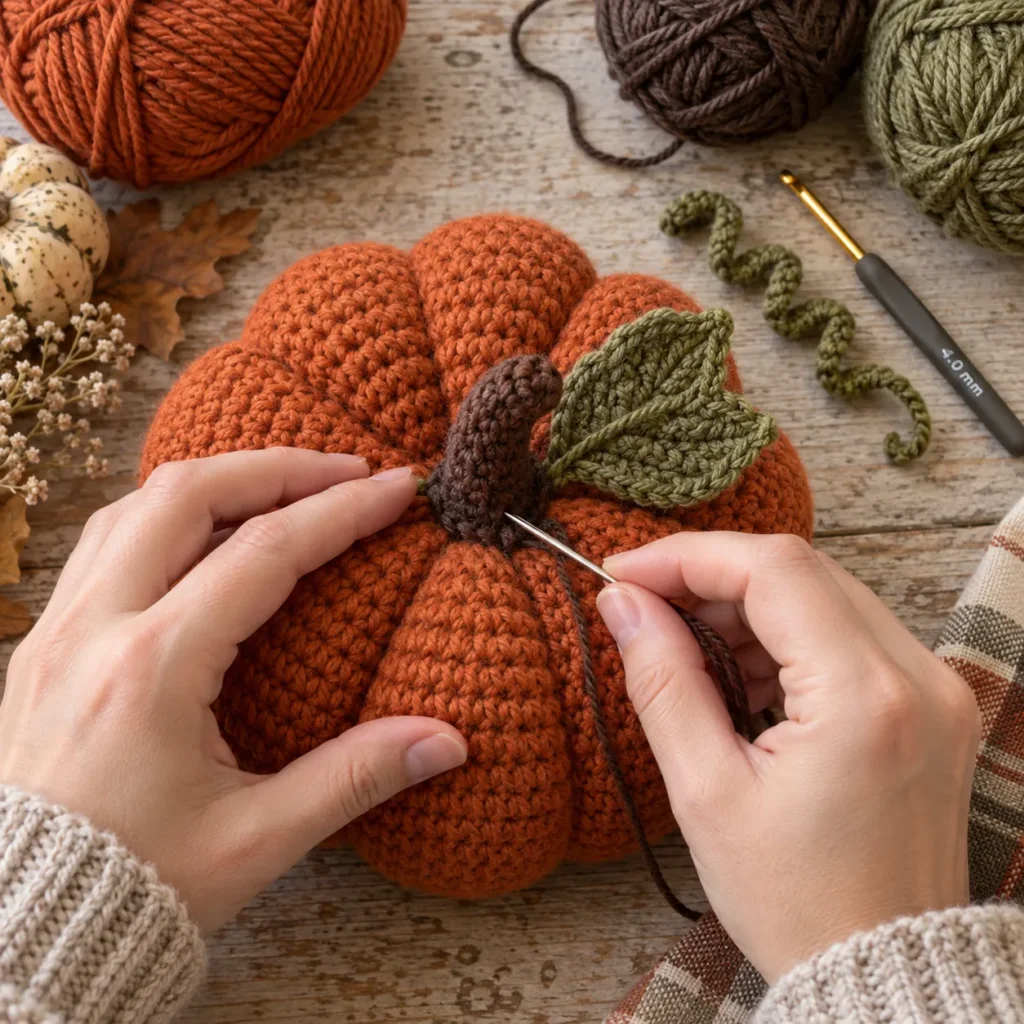
Position the brown stem directly over the gathered top center.
Sew around the bottom of the stem several times.
Place the leaf slightly to one side.
Attach only the base so the remainder of the leaf can sit naturally against the pumpkin.
Position the curly vine beside the stem and secure its base.
Final Shaping
Once all pieces are attached, press gently on the top of the pumpkin.
This helps flatten the upper center slightly.
Massage the stuffing toward the sides.
Pull the segmentation yarn slightly tighter if you want deeper grooves.
The finished pumpkin should have:
- rounded outer shape
- slightly flattened top
- slightly flattened bottom
- deep vertical sections
- centered stem
Crochet Pumpkin Size Variations
The easiest way to change the size is to alter the starting chain and number of rows.
Mini Pumpkin
Start with approximately:
Ch 17–21
Crochet a smaller ribbed rectangle.
These are perfect for:
- garlands
- table settings
- ornaments
- gift toppers
Medium Pumpkin
Use the main pattern:
Ch 31
This is ideal for shelves and table décor.
Large Pumpkin
Start with approximately:
Ch 41–45
Make a wider rectangle.
Use additional stuffing and a slightly larger stem.
Beautiful Fall Color Ideas
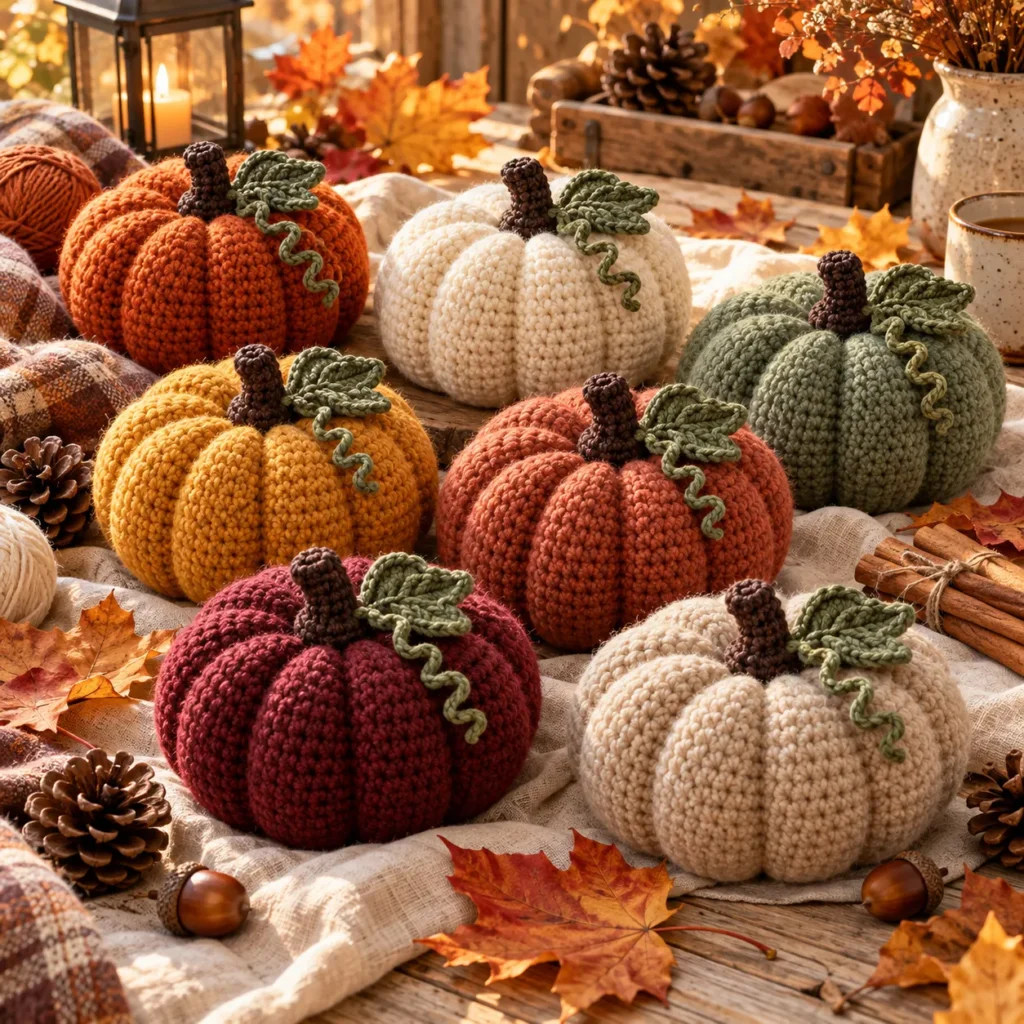
Make an entire pumpkin patch using the same construction.
Classic Pumpkin
Burnt orange + brown + olive
Farmhouse Cream
Warm ivory + brown + sage
Sage Pumpkin
Muted sage + dark brown
Mustard Harvest
Mustard gold + brown
Terracotta
Warm clay / rust + olive
Burgundy
Deep wine red + sage
Oatmeal Neutral
Natural beige + dark brown
Turn Them Into a Fall Centerpiece
Make three pumpkins in different sizes.
Try:
- large cream pumpkin
- medium burnt-orange pumpkin
- mini sage pumpkin
Arrange them on a wooden tray with dried leaves, candles, acorns, and pinecones.
Using different heights creates a more natural autumn display.
Make a Crochet Pumpkin Garland
Make several mini pumpkins.
Create a long chain using neutral or green yarn.
Attach one mini pumpkin every several inches.
Add crochet leaves or tassels between them.
This looks beautiful across:
- fireplaces
- shelves
- windows
- kitchen cabinets
- autumn party tables
Use Them for Thanksgiving Place Settings
Make tiny pumpkins in cream, orange, sage, and oatmeal.
Place one on each plate.
Add a small cardstock name tag around the stem.
Guests can take the pumpkin home afterward as a handmade keepsake.
Add Cinnamon-Stick Stems
If the pumpkin is purely decorative, you can replace the crochet stem with a short cinnamon stick.
Push the cinnamon stick carefully into the top opening before it is fully closed.
Secure it with strong thread or hot glue only if the pumpkin will remain a decoration rather than a toy.
Make a Velvet Pumpkin
Use soft velvet or chenille yarn for the body.
Increase the hook size according to the yarn thickness.
Velvet yarn creates a luxurious plush pumpkin that works beautifully for farmhouse and autumn décor.
Make a Striped Pumpkin
Alternate two colors every few rows while making the ribbed rectangle.
Try:
- cream + orange
- sage + ivory
- rust + oatmeal
- mustard + cream
Keep the stem neutral to avoid making the design too busy.
Tips for a Professional Crochet Pumpkin
Keep your BLO stitches consistent.
Do not stretch the ribbing while measuring.
Stuff the sides before filling the center.
Do not overstuff.
Use a long sturdy needle for segmentation.
Space the pumpkin grooves evenly.
Pull each segment with similar tension.
Secure the stem very firmly.
Block the leaf lightly.
Hide all yarn tails underneath the pumpkin or inside the body.
Frequently Asked Questions
Is this Crochet Pumpkin Pattern beginner friendly?
Yes. The main body uses repeated half double crochet stitches worked through the back loop.
Why is the pumpkin made from a rectangle?
A ribbed rectangle is one of the easiest ways to create strong vertical pumpkin texture without complicated increases and decreases.
How big is the finished pumpkin?
Using worsted yarn and a 4 mm hook, approximately 5–6 inches / 13–15 cm wide, depending on stuffing and tension.
Can I use chunky yarn?
Yes. Your pumpkin will simply be larger and more plush.
Can I use cotton yarn?
Yes. Cotton creates excellent stitch definition and a firmer finished pumpkin.
How many pumpkin segments should I make?
Around 6–8 works well. The sample uses eight.
Do I need the leaf and vine?
No. They are optional embellishments.
Can I make this pattern in cream?
Absolutely. Cream and oatmeal crochet pumpkins are particularly versatile for neutral farmhouse fall décor.
Can I make a whole pumpkin collection?
Yes. Using multiple sizes and colors is one of the best ways to display this pattern.
Save This Crochet Pumpkin Pattern
Save this Crochet Pumpkin Pattern to Pinterest for your fall crochet list.
With its easy ribbed construction, soft stuffed shape, defined pumpkin segments, crochet stem, leaf, and curly vine, this project is a beautiful way to bring handmade texture into your autumn décor.
Make one classic orange pumpkin—or crochet an entire patch in cozy fall colors.