
Halloween crochet doesn't always have to be scary! Sometimes, the cutest handmade decorations are the ones that bring a little spooky charm and a big smile to your home.
If you love adorable Halloween amigurumi, whimsical witch hats, and cozy seasonal crochet projects, this Crochet Skull Witch Hat is sure to become one of your favorite Halloween creations.
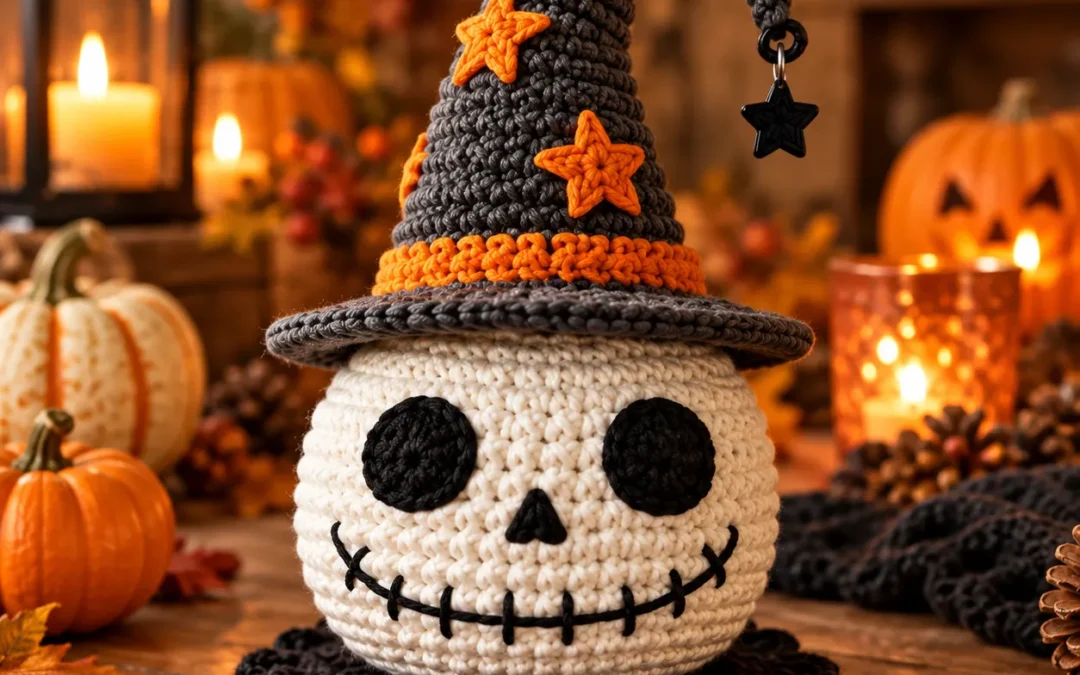
Featuring a soft ivory crochet skull, oversized black eyes, a stitched skeleton smile, and a tall, crooked charcoal witch hat decorated with bright orange stars, this little character is the perfect combination of spooky and sweet.
The playful curled hat tip, dangling black star charm, and beautiful textured stitches give this amigurumi a magical personality that makes it stand out from ordinary Halloween decorations.
Whether you're decorating a Halloween mantel, creating a handmade gift, or adding another adorable character to your crochet collection, this charming skull witch is full of creative inspiration.
Why You'll Love This Crochet Skull Witch Hat
There's something irresistible about Halloween amigurumi that combines spooky details with an adorable personality.
This crochet skull witch does exactly that!
Its cheerful skeleton face and oversized pointed hat create a playful design that's perfect for anyone who loves cute Halloween decorations.
Here are a few reasons this project is worth adding to your crochet inspiration list:
- Adorable Halloween character: A friendly skull with a whimsical witch hat.
- Beautiful crochet textures: Defined stitches give the skull and hat a gorgeous handmade appearance.
- Classic Halloween colors: Ivory, charcoal black, and bright orange create a timeless seasonal palette.
- Charming witch hat details: A tall curved tip, orange band, crochet stars, and dangling black charm make the design especially unique.
- Perfect seasonal décor: Display it on a shelf, desk, mantel, or Halloween table.
- Wonderful handmade gift: A thoughtful surprise for Halloween lovers and amigurumi collectors.
- Fun customization possibilities: Experiment with different hat colors, decorations, and facial expressions.
And perhaps the best part? This little skull witch has just the right amount of spooky charm without feeling frightening!
Materials You'll Need for a Crochet Skull Witch Hat
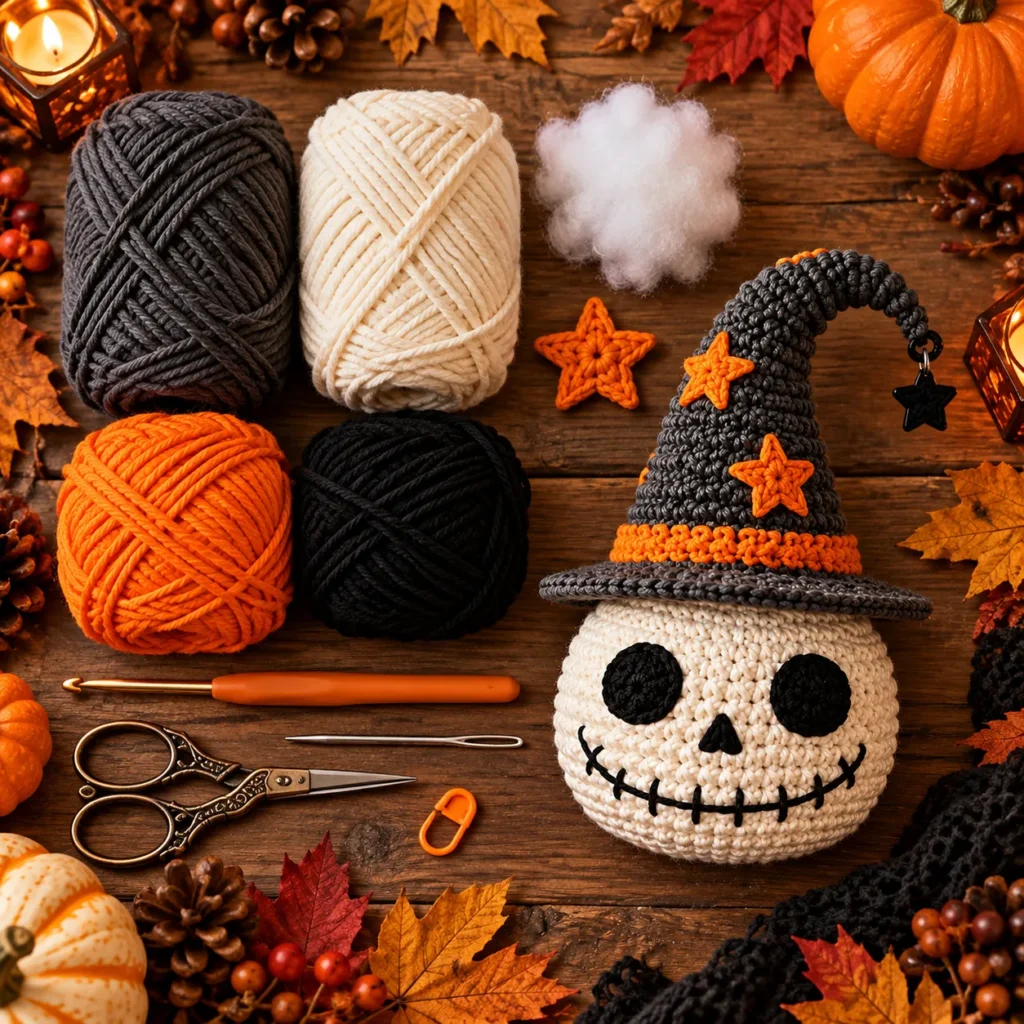
One of the most enjoyable parts of creating Halloween crochet decorations is choosing the yarn colors.
For this skull witch design, the color palette is simple but incredibly effective.
The creamy ivory skull contrasts beautifully with the dark charcoal hat, while the bright orange decorations add a cheerful autumn touch.
Recommended materials
- Ivory or cream yarn: For the round crochet skull.
- Charcoal-gray yarn: For the tall, pointed witch hat and wide brim.
- Orange yarn: For the decorative hatband and crochet stars.
- Black yarn: For the round eyes, triangular nose, stitched smile, and dark base.
- Polyester fiberfill: To stuff the skull and help it maintain a rounded shape.
- Crochet hook: Choose an appropriate size for your yarn and desired stitch density.
- Tapestry needle: For sewing components and embroidering facial details.
- Stitch markers: For keeping track of rounds.
- Sharp scissors: For cutting yarn.
- Optional black star charm: For the dangling decoration at the end of the witch hat.
What's the best yarn for this project?
A smooth worsted-weight cotton or acrylic yarn is a lovely option for amigurumi projects like this one.
Cotton creates beautiful stitch definition and helps decorative elements maintain their shape.
Acrylic yarn can provide a softer, lightweight finish.
For amigurumi, it's helpful to choose a crochet hook that creates a relatively tight fabric so the stuffing doesn't show through the stitches.
If you prefer a chunkier look, a thicker yarn with a compatible hook can create a larger, softer decoration.
The key is maintaining similar stitch tension throughout the project so the skull and witch hat look balanced.
A Closer Look at This Adorable Skull Witch Design
What makes this Halloween crochet project special is the combination of a classic skeleton face and a whimsical pointed witch hat.
The design has several distinctive details that work together beautifully.
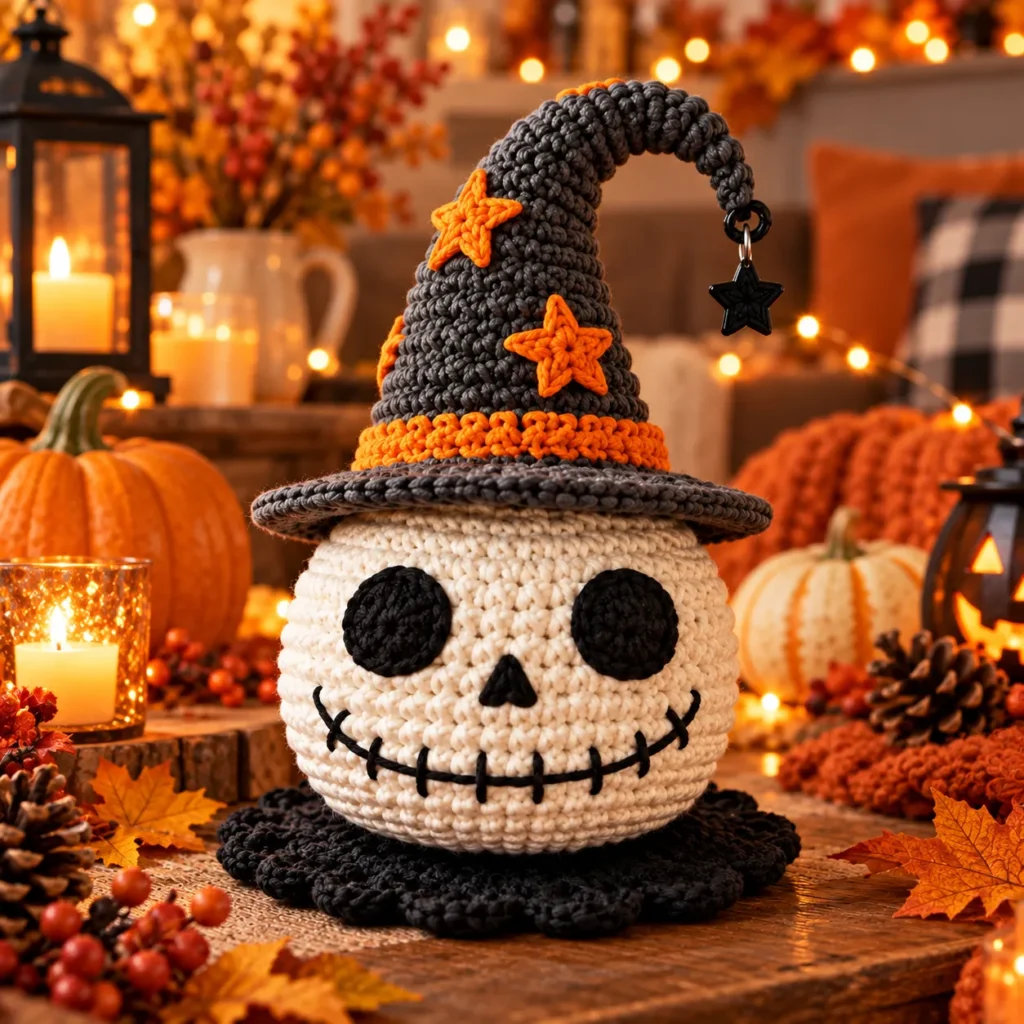
The round ivory crochet skull
The main body is a soft, rounded skull created with tightly worked ivory crochet stitches.
Unlike realistic skeleton decorations, this skull has a sweet, cartoon-inspired appearance.
Its gently rounded shape gives it a friendly personality and makes it particularly suitable for kawaii-style Halloween décor.
Two large black circular eyes stand out against the creamy background.
A tiny black triangular nose sits between them.
Below the nose, a curved embroidered smile with short vertical stitches creates the familiar skeleton-mouth effect.
The finished expression is playful, cheerful, and just a little spooky!
The oversized charcoal witch hat
The tall witch hat is the most dramatic part of the design.
Made with deep charcoal-gray yarn, the hat features a wide circular brim and an elongated pointed crown.
Instead of standing completely straight, the tip curves gracefully to one side.
This creates a whimsical silhouette that makes the little skull witch look like a character from a magical Halloween story.
The hat's beautiful stitch texture adds depth and gives it an authentic handmade appearance.
Orange stars and a magical finishing touch
A bright orange crochet band wraps around the lower section of the hat.
Small orange crochet stars decorate the pointed crown, creating cheerful pops of color against the charcoal yarn.
At the curled tip, a tiny black star charm hangs like a magical ornament.
Together, these details turn a simple pointed witch hat into a charming statement piece.
How the Crochet Skull Witch Hat Comes Together
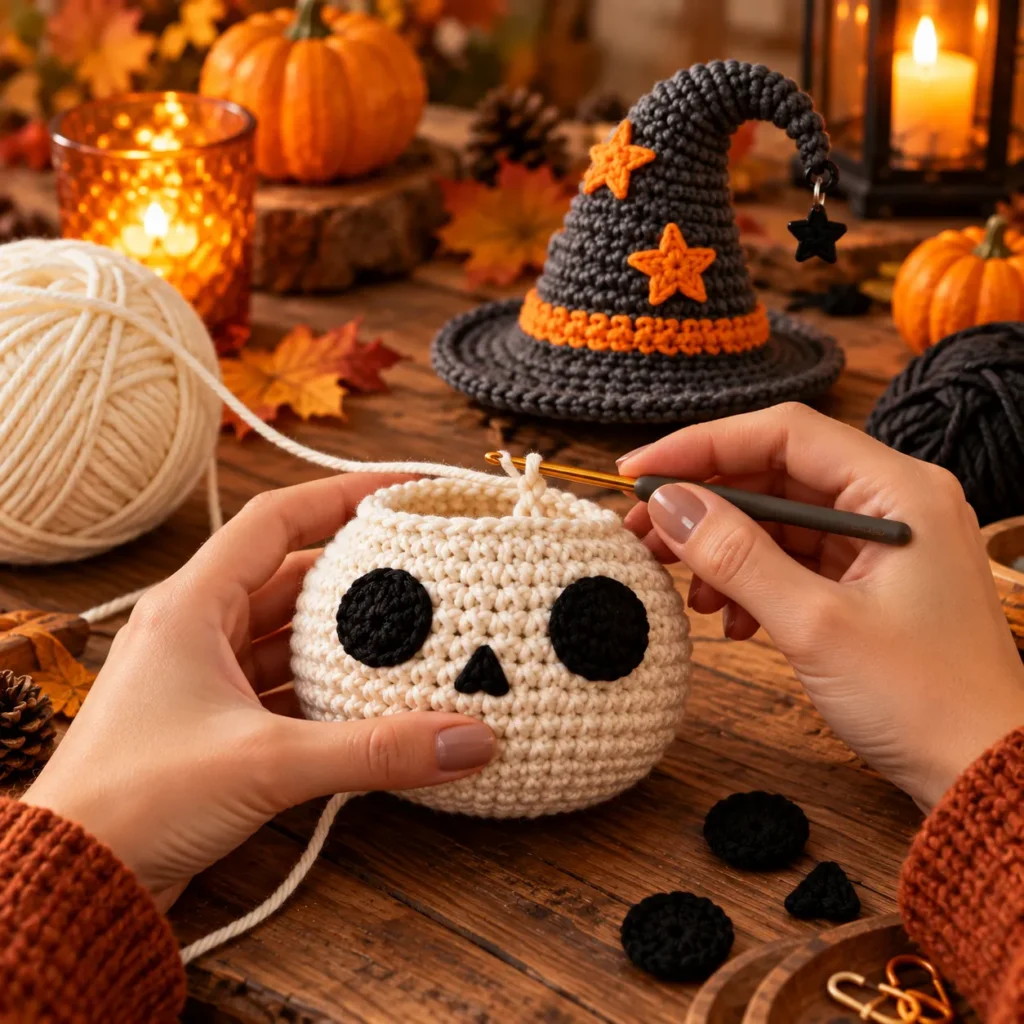
Although this amigurumi design looks detailed, its general construction uses familiar crochet techniques.
The skull begins as a rounded amigurumi shape.
A small circular foundation gradually expands through a series of increases.
As the fabric grows, the stitches form the rounded skull.
Consistent tension helps maintain a smooth surface and keeps the shape balanced.
Once the skull has reached its widest section, decreases help close and shape the lower portion.
Polyester fiberfill gives the head its soft, rounded appearance.
Tips for creating a smooth skull
- Use a stitch marker to track the beginning of each round.
- Keep your tension consistent.
- Add stuffing gradually so the shape remains even.
- Avoid overstuffing, which can stretch the crochet stitches.
- Check the shape from different angles before closing the final opening.
Taking a little extra care with the skull foundation helps give the finished character a polished appearance.
Creating the Tall, Crooked Witch Hat
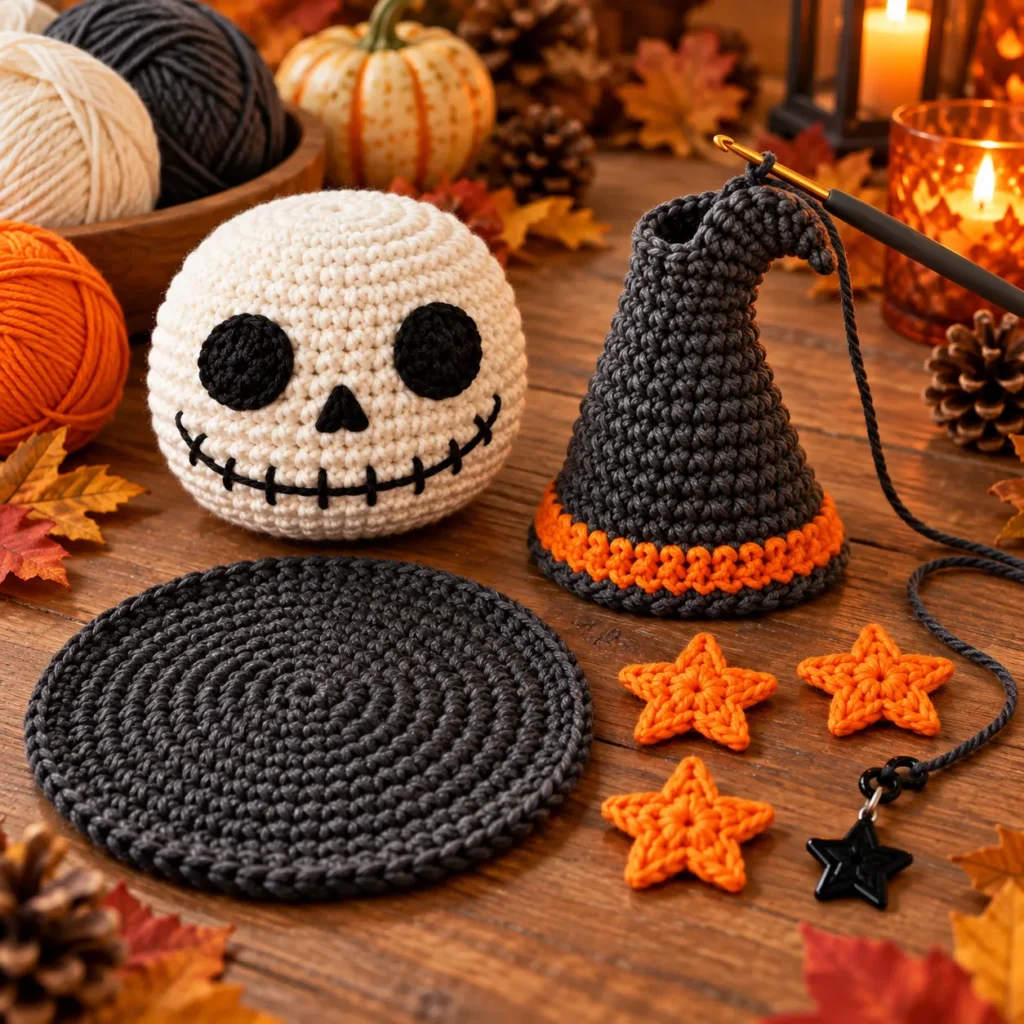
Once the skull is complete, it's time to focus on the character's most eye-catching feature: the witch hat!
The pointed crown is shaped with gradual changes in circumference to create its tall, tapered appearance.
The dark charcoal yarn gives the hat a traditional Halloween look.
Shaping the curved tip
One of the loveliest details is the way the hat bends toward one side.
A curved tip can be created through careful shaping and finishing, depending on the chosen pattern.
The goal is to achieve a soft, whimsical curve rather than a perfectly straight cone.
A little structure can help the hat hold its shape, but it should still look soft and crocheted.
Adding the wide brim
The broad circular brim creates the recognizable silhouette of a classic witch hat.
It extends outward around the crown, forming a neat, gently flattened edge.
The brim should be wide enough to look proportional to the skull without overpowering the character's face.
A well-shaped brim also helps frame the large black eyes and embroidered smile.
Creating the orange stars
The decorative orange stars add a playful burst of Halloween color.
Their small size works beautifully against the taller charcoal crown.
Arranging the stars at different heights creates visual interest while keeping the design balanced.
The orange hatband ties everything together and adds a warm contrast between the dark hat and ivory skull.
Assembling and Finishing Your Halloween Skull Witch
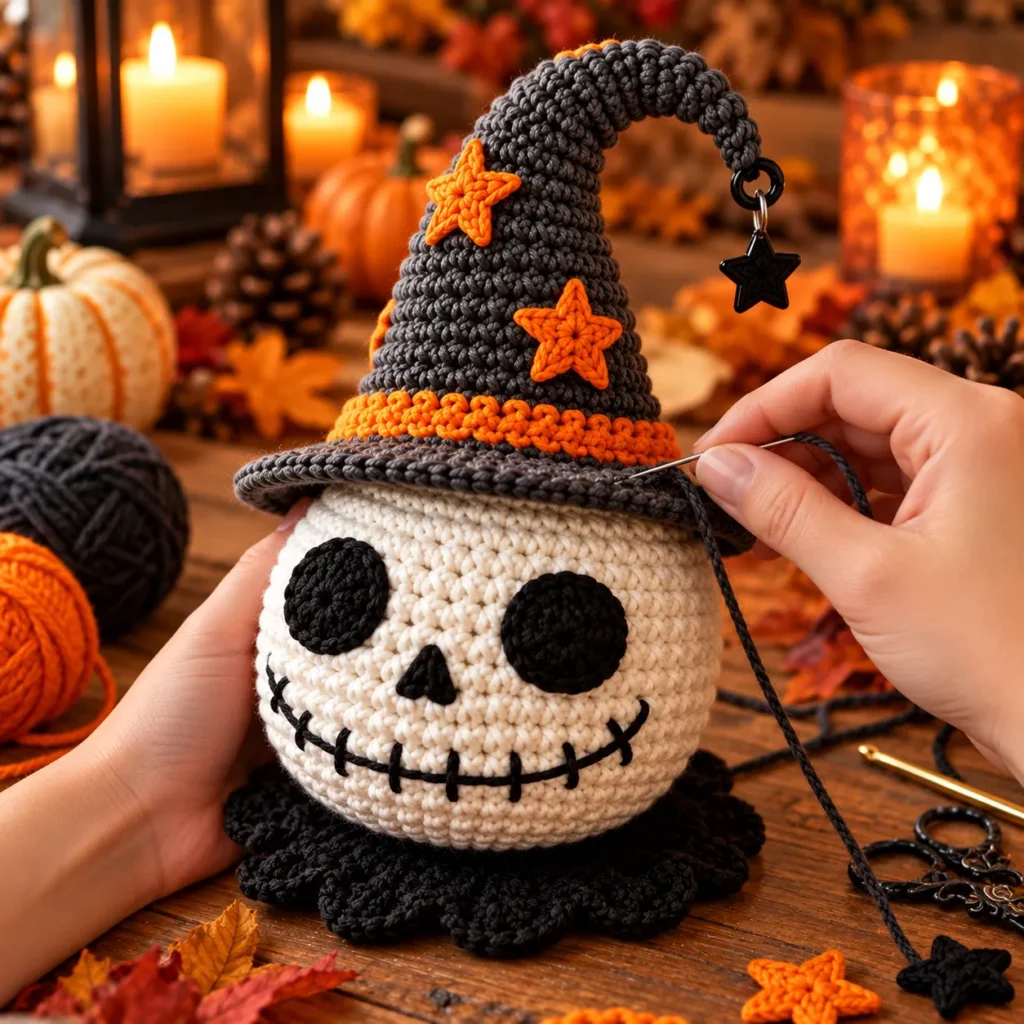
The assembly stage is when all the individual crochet pieces come together to create the finished Halloween character.
The witch hat is positioned securely over the upper portion of the skull.
Its wide brim should sit naturally while keeping the facial features visible.
The orange decorative band and stars add color and charm.
Finally, the little black star charm completes the pointed tip.
Embroidering the skeleton smile
The face is one of the most important details in this design.
The large black circular eyes create an expressive look.
A small triangular nose adds the classic skull appearance.
The smile is formed with a gently curved black line and several short vertical stitches.
This creates the familiar stitched skeleton grin.
Finishing tips for a beautiful result
Keep the eyes balanced. Position both eyes at the same approximate height for a symmetrical expression.
Check the hat placement. The brim should sit naturally above the face.
Secure the orange stars. Attach each decorative star carefully so it lies neatly against the hat.
Shape the curved tip. Gently adjust the hat until it has the desired whimsical appearance.
Keep the black charm lightweight. A heavy charm could pull the hat out of shape.
Hide loose yarn ends. Carefully weave in or secure the remaining ends for a professional-looking finish.
A little patience during assembly can make a wonderful difference in the final appearance.
Beautiful Color Combinations for Your Crochet Skull Witch
Although the charcoal, ivory, and orange combination is a Halloween classic, you can create completely different moods by changing the color palette.
Here are some adorable ideas.
1. Classic Halloween Magic
- Ivory skull
- Charcoal witch hat
- Orange hatband and stars
- Black facial details
A timeless combination that looks beautiful alongside pumpkins and autumn leaves.
2. Pastel Halloween Witch
- Cream skull
- Lavender witch hat
- Soft pink decorative stars
- Black stitched face
A sweet, whimsical version for pastel Halloween lovers.
3. Midnight Witch
- White skull
- Deep navy witch hat
- Silver-gray stars
- Black face details
A slightly mysterious version inspired by moonlit Halloween nights.
4. Enchanted Forest Witch
- Warm ivory skull
- Forest-green witch hat
- Golden-yellow stars
- Brown or black finishing details
Perfect for an earthy, cottagecore-inspired Halloween display.
5. Pumpkin Spice Witch
- Cream skull
- Rust-orange witch hat
- Mustard-yellow decorations
- Dark brown facial details
A warm autumn palette that feels cozy and festive.
The same general design can take on a completely different personality with just a few color changes.
5 Cute Ways to Display Your Crochet Skull Witch Hat
Once your adorable skull witch is finished, there are so many fun ways to include it in your Halloween decorations.
1. Create a Spooky-Cute Halloween Shelf
Place your crochet skull witch on a wooden shelf alongside miniature pumpkins, autumn leaves, and warm fairy lights.
Its oversized hat makes it a lovely focal point.
Add a few small crochet ghosts or pumpkins for a coordinated handmade display.
2. Make a Halloween Desk Buddy
Give your workspace a seasonal touch by placing the skull witch beside your computer, notebook, or favorite stationery.
Its cheerful skeleton smile adds a little personality to your desk without taking up too much space.
3. Style a Halloween Mantel
Create a beautiful Halloween mantel arrangement using your crochet skull witch, pumpkins, faux autumn foliage, and battery-operated candles.
The orange hat decorations coordinate naturally with traditional fall colors.
4. Give It as a Handmade Halloween Gift
A crochet skull witch makes a thoughtful gift for anyone who loves Halloween, amigurumi, or cute seasonal collectibles.
Present it in a little gift box with tissue paper and a handwritten note.
Its whimsical appearance makes it especially charming as a handmade keepsake.
5. Build a Halloween Amigurumi Collection
Pair your skull witch with other crochet Halloween characters.
A smiling pumpkin, a little black cat, a friendly ghost, or a miniature witch's cauldron would all look adorable together.
You can create an entire handmade Halloween scene using just a few small crochet projects.
Why Halloween Amigurumi Projects Are So Popular
Halloween offers endless inspiration for crochet enthusiasts.
From smiling pumpkins and tiny ghosts to black cats and witch hats, there are so many creative ways to transform familiar Halloween symbols into adorable handmade characters.
Amigurumi projects are especially fun because each creation has its own personality.
Small changes in the eyes, mouth, colors, or accessories can make a character look completely different.
This crochet skull witch is a wonderful example.
Its traditional skeleton face brings a spooky element, while the oversized witch hat and cheerful orange stars add warmth and charm.
The result is a decoration that feels both festive and playful.
It's also a lovely opportunity to practice crochet shaping, working in rounds, sewing components, and adding embroidered details.
Tips for Making Your Crochet Skull Witch Look Professional
If you want your finished Halloween amigurumi to look beautiful, a few simple techniques can help.
Maintain consistent tension
Even stitches help create a smoother skull and a more balanced witch hat.
Choose yarn with good stitch definition
Smooth cotton or acrylic yarn makes the crochet texture easier to see.
Stuff the skull gradually
Add small amounts of stuffing at a time and distribute it evenly.
Keep the hat proportional
The tall hat should feel dramatic without making the skull appear too small.
Take your time with facial embroidery
The shape of the eyes, nose, and smile has a big influence on the character's personality.
Secure decorative elements
Make sure the stars, hatband, and dangling charm are attached firmly.
Check the balance
The finished decoration should be stable when displayed.
If the hat is particularly tall or heavy, check that the base supports the overall shape.
How to Care for Your Crochet Skull Witch Hat
Handmade amigurumi decorations are best cared for gently.
For regular cleaning, use a soft brush or clean, dry cloth to remove dust.
If the yarn allows it, gently spot-clean small marks with cool water and mild detergent.
Avoid excessive rubbing or twisting, especially around the stitched face and hat decorations.
Allow the project to dry thoroughly before storing it.
When Halloween is over, place your skull witch in a clean storage box where the tall hat won't be crushed.
Avoid stacking heavy objects on top of it.
Safety note: This project is intended as a decorative amigurumi item. The dangling black star charm and any small detachable components can pose a choking hazard to young children. For child-friendly versions, omit hard or detachable decorations and embroider the details securely. Keep the decoration away from candles, open flames, and hot surfaces.
Frequently Asked Questions About Crochet Skull Witch Hats
Is a crochet skull witch hat beginner-friendly?
The rounded skull and basic hat shapes use techniques commonly found in beginner amigurumi projects.
However, shaping the curved witch hat, attaching the brim, and embroidering the face may be easier for confident beginners with some experience.
What yarn is best for this crochet skull witch?
Smooth worsted-weight cotton or acrylic yarn is a good option.
Choose a crochet hook that creates firm stitches and prevents stuffing from showing through.
Can I make the skull witch in different sizes?
Yes!
The finished size can change depending on your yarn weight, hook size, stitch tension, and pattern.
A thicker yarn can create a larger decoration, while finer yarn can produce a smaller version.
Can I make the witch hat without the orange stars?
Absolutely!
The orange stars are decorative elements.
Leaving them off creates a simpler, more traditional witch hat.
Can I change the skull's facial expression?
Yes!
You can experiment with different embroidered smiles, eye shapes, and facial details to give your character a unique personality.
How do I keep the witch hat curved?
The curved appearance depends on the hat's construction and finishing.
Careful shaping and lightweight stuffing or suitable internal support, where appropriate, can help maintain the desired bend.
Is this a good Halloween gift?
Definitely!
Its adorable expression and whimsical design make it a lovely handmade gift for Halloween enthusiasts and amigurumi collectors.
Can I use this as a Halloween table decoration?
Yes!
It looks adorable as a decorative centerpiece or shelf accent.
Just make sure it sits securely on a stable surface and stays away from open flames.
Final Thoughts: A Little Handmade Halloween Magic
There's something wonderful about creating Halloween decorations with your own hands.
This adorable Crochet Skull Witch Hat brings together everything we love about seasonal amigurumi: charming details, playful colors, beautiful yarn texture, and a personality that's impossible to resist.
From the smiling ivory skull to the tall, crooked witch hat decorated with orange stars, every detail adds to its whimsical Halloween character.
Whether you're crocheting for your home, preparing a thoughtful handmade gift, or simply searching for your next spooky-cute project, this little skull witch is a lovely source of inspiration.
And with so many possible color combinations and decorative ideas, you can create a version that feels completely your own.
So gather your favorite Halloween yarn colors, find a cozy crafting spot, and enjoy a little handmade magic this season!
Love this Crochet Skull Witch Hat idea? Save it to your favorite Pinterest Halloween crochet board so you can revisit it whenever you're ready for your next spooky-cute crochet adventure!
And don't forget to share it with a crochet-loving friend who enjoys adorable Halloween decorations.
Happy crocheting and happy Halloween!
Crochet Petal Studio
A Little Yarn. A Little Wonder. Something Made by Hand.