
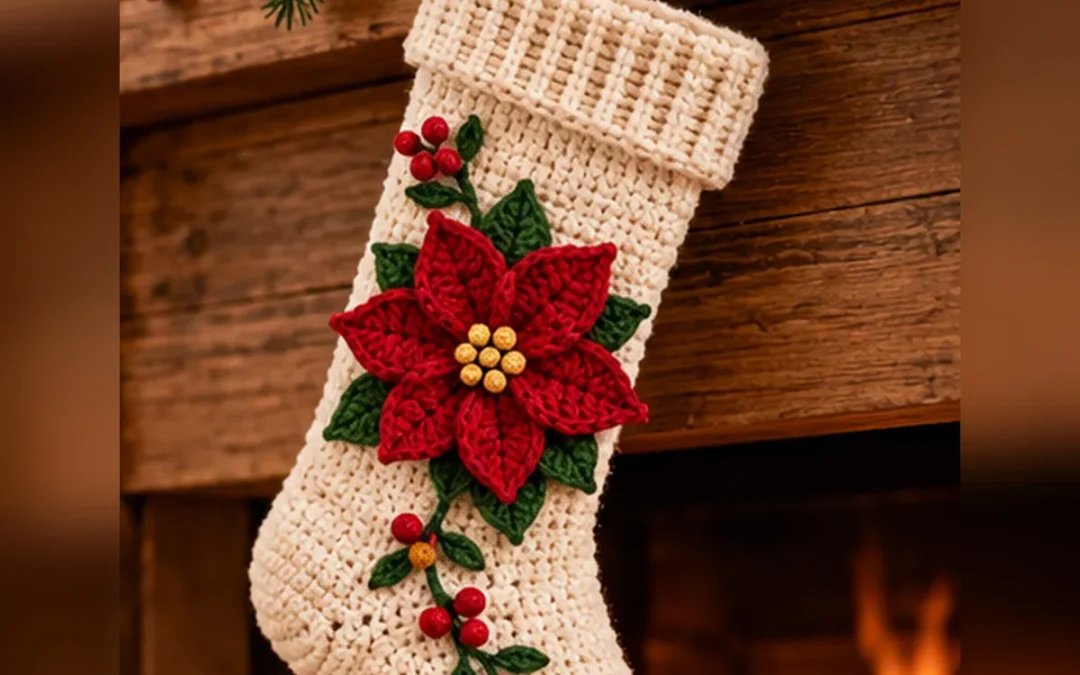
There's something truly magical about a handmade Christmas stocking hanging beside a cozy fireplace.
The soft glow of Christmas lights, evergreen garlands, beautifully wrapped presents, and the anticipation of Christmas morning make stockings one of the most beloved holiday traditions.
And what could be more special than creating your very own festive crochet Christmas stocking?
If you love classic Christmas decorations, handmade holiday gifts, and beautiful crochet projects, this Festive Crochet Stockings for Christmas tutorial is the perfect project to add to your winter crafting list.
Today, we're making an elegant, cream-colored crochet stocking decorated with a stunning red poinsettia flower, deep-green leaves, delicate holly berries, and a beautiful folded ribbed cuff.
The design combines traditional Christmas colors with the warmth and texture of handmade crochet.
It looks wonderful hanging from a rustic wooden mantel, displayed beside evergreen branches, or filled with small gifts for someone special.
The stocking is created using simple crochet stitches, a shaped toe, an afterthought heel, and a separate ribbed cuff. The decorative poinsettia and holly elements are crocheted separately and sewn onto the finished stocking.
In this complete tutorial, you'll learn how to crochet the stocking from toe to top, shape the heel, create the cuff, make a dimensional poinsettia flower, add leaves and berries, and assemble everything into one beautiful Christmas decoration.
Whether you're creating a family tradition or looking for a thoughtful handmade gift, this charming stocking is a lovely way to bring more creativity and warmth into your holiday season.
Let's gather our yarn and start crocheting!
What Makes This Crochet Christmas Stocking Special?
There are countless Christmas stocking designs, but this one stands out because of its beautiful combination of texture, floral decorations, and traditional seasonal colors.
The main stocking is worked in a soft ivory shade.
Instead of using a bright red or green background, the neutral cream color allows the red poinsettia flower and green leaves to become the focal point.
The folded ribbed cuff adds a classic finishing touch, while the raised flower petals bring a beautiful three-dimensional effect.
Small crocheted berries and embroidered stems create a decorative botanical arrangement extending down the front of the stocking.
The finished project has a charming, handmade farmhouse appearance.
It's festive enough for Christmas but elegant enough to become a cherished holiday decoration for years.
Why You'll Love This Christmas Stocking Pattern
Beautiful holiday colors: Warm ivory, cranberry red, forest green, and golden yellow create a timeless Christmas palette.
A dimensional poinsettia: The separate crochet petals give the stocking a lovely raised floral centerpiece.
Customizable decorations: You can change the flower color, add initials, or make matching stockings for the entire family.
A practical construction: The stocking is worked from the toe upward, with a heel opening created before continuing the leg.
Perfect for handmade gifting: A personalized stocking makes a meaningful Christmas present.
A versatile holiday project: Make a single statement stocking or create a coordinated collection for your mantel.
The construction is best suited to confident beginners or intermediate crocheters who already understand basic stitches, increases, decreases, and sewing crochet pieces together.
Festive Crochet Stocking Pattern Details
| Project Detail | Information |
|---|---|
| Pattern Name | Festive Crochet Stockings for Christmas |
| Style | Poinsettia Christmas stocking |
| Skill Level | Confident beginner to intermediate |
| Crochet Terminology | US terms |
| Yarn Weight | Medium worsted weight (#4) |
| Recommended Hook | 5.0 mm (H/8), adjusted to gauge |
| Optional Detail Hook | 3.5–4.0 mm |
| Construction | Toe-up stocking with afterthought heel |
| Main Color | Warm ivory |
| Decorations | Red poinsettia, green leaves, berries |
| Cuff | Separate ribbed panel, folded outward |
| Estimated Time | 7–11 hours |
| Estimated Size | Approximately 15–18 inches from toe to cuff, depending on gauge and how measured |
The measurements and time estimates are approximate. Your finished size will depend on your yarn, hook, tension, and how deeply you fold the cuff.
This is a decorative stocking intended for lightweight holiday treats and small gifts, not a weight-bearing bag.
Materials You'll Need
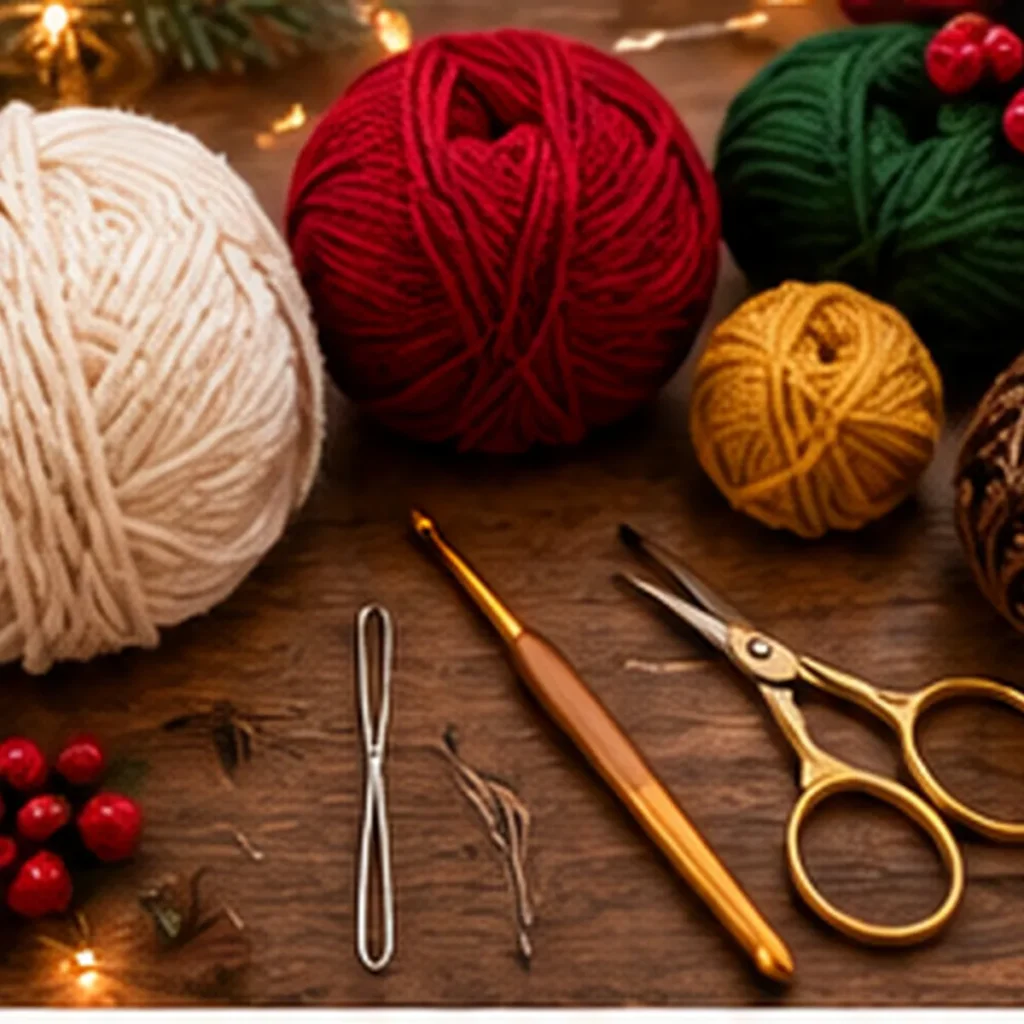
Before starting, choose your yarn colors and gather your crochet supplies.
Yarn Colors
Color A – Warm Ivory
This will be the main stocking color.
Choose cream, natural white, oatmeal, or soft ivory yarn.
The warm neutral shade creates the elegant farmhouse look seen in the reference design.
Estimated amount: 180–250 grams, depending on yarn and finished size.
Color B – Cranberry Red
Use rich red or deep cranberry yarn for the poinsettia petals and decorative berries.
Estimated amount: 35–55 grams.
Color C – Forest Green
Choose a classic evergreen shade for the large leaves and smaller holly leaves.
Estimated amount: 25–40 grams.
Color D – Golden Yellow
You'll need a small amount of golden-yellow yarn for the poinsettia center.
Estimated amount: 5–10 grams.
These quantities are estimates rather than sample-measured requirements. Check the yardage on your selected yarn and consider purchasing extra for color consistency.
Crochet Tools
You'll also need:
- 5.0 mm crochet hook.
- Optional smaller hook for flowers and berries.
- Tapestry needle.
- Scissors.
- Stitch markers.
- Measuring tape.
- Straight pins for arranging decorations.
- Optional blocking mat.
- Optional rust-resistant blocking pins.
Which Yarn Should You Choose?
Worsted-weight acrylic yarn is a convenient choice for a decorative Christmas stocking.
It comes in many colors, has good stitch definition, and is often easy to care for.
Cotton yarn also works well, especially for the poinsettia leaves and smaller floral details.
If you prefer a soft, cozy stocking, choose a smooth acrylic or acrylic-blend yarn with a gentle texture.
Avoid highly fuzzy yarn for your first attempt because it can make counting stitches and shaping the heel more difficult.
Crochet Abbreviations
All instructions use US crochet terminology.
| Abbreviation | Meaning |
|---|---|
| MR | Magic ring |
| ch | Chain |
| sc | Single crochet |
| hdc | Half double crochet |
| dc | Double crochet |
| sl st | Slip stitch |
| inc | Increase: 2 sc in the same stitch |
| dec | Decrease: single crochet 2 stitches together |
| BLO | Back loop only |
| FLO | Front loop only |
| st / sts | Stitch / stitches |
| rnd | Round |
| rep | Repeat |
Important Pattern Notes
The stocking body is worked in continuous rounds.
Do not join after each round unless specifically instructed.
Always use a stitch marker to identify the beginning of the round.
The heel will be worked into an opening created between the foot and the leg.
The ribbed cuff is crocheted separately in rows and sewn onto the top of the stocking.
The poinsettia, green leaves, and berries are worked separately and attached after the stocking body is finished.
Gauge and Tension
Exact gauge is less important than creating a sturdy fabric with an attractive shape.
For a useful starting point, aim for approximately 14–16 single crochet stitches per four inches.
Work a swatch and adjust your hook size until the fabric is flexible but not excessively loose.
Keep the same tension throughout the stocking.
Part 1: Crochet the Rounded Stocking Toe
We'll begin at the tip of the stocking and work toward the heel.
Using ivory yarn:
Round 1
Make a magic ring.
Work 6 sc into the ring.
Pull the center closed.
6 sc.
Round 2
Work 2 sc into every stitch around.
12 sc.
Round 3
Repeat (1 sc, inc) six times.
18 sc.
Round 4
Repeat (2 sc, inc) six times.
24 sc.
Round 5
Repeat (3 sc, inc) six times.
30 sc.
Round 6
Repeat (4 sc, inc) six times.
36 sc.
You have now completed the rounded toe increases.
Gently flatten the piece to check its shape.
It should resemble a small rounded cup.
Try to keep your stitches consistent.
If you notice large gaps between the stitches, consider switching to a slightly smaller hook.
Part 2: Crochet the Stocking Foot
Continue using ivory yarn.
Rounds 7–22
Work 1 sc into every stitch around.
36 sc per round.
These sixteen rounds create the foot of the stocking.
After several rounds, the piece will begin to resemble a soft tube.
The toe should remain rounded, while the sides become relatively straight.
Check the Foot Length
Lay the stocking foot flat.
Measure from the rounded toe to the current working edge.
If you want a longer stocking foot, add two or three additional rounds before creating the heel opening.
For a shorter decorative stocking, you can reduce the number of straight rounds.
Make sure to record any changes if you're making matching stockings.
Part 3: Create the Afterthought Heel Opening
This step creates the opening that we'll later use to crochet the shaped heel.
Position your round marker along one side of the foot.
Think of the first eighteen stitches as the top or instep of the foot, and the remaining eighteen as the underside.
Round 23 – Heel Opening
Work 1 sc into each of the first 18 stitches.
Chain 18.
Skip the remaining 18 stitches of the foot.
Continue into the next round by working into the first sc of Round 23.
The chain bridge replaces the eighteen skipped stitches, maintaining a 36-stitch circumference for the leg.
The skipped foot stitches remain available beneath the chain bridge for the heel.
Round 24
Work 1 sc into each of the 18 stitches across the top of the foot.
Then work 1 sc into each of the 18 chain stitches.
36 sc.
Take care not to twist the chain bridge.
You should now have a circular opening on the underside of the stocking, bordered by the original skipped stitches and the chain bridge.
This is where the heel will be added later.
Part 4: Crochet the Stocking Leg
Continue crocheting upward from the heel opening.
Rounds 25–54
Work 1 sc in every stitch around.
36 sc per round.
These thirty rounds create the main leg of the Christmas stocking.
The fabric should form a long, consistent tube.
Keep your stitch marker in place and check the stitch count occasionally.
Adjusting the Leg Length
For a taller stocking, add additional rounds.
For a shorter stocking, remove a few rounds.
Try to keep both the leg and foot proportions balanced.
Finishing the Leg
After Round 54, check that you have 36 stitches.
Slip stitch into the next stitch to smooth the finishing edge.
Fasten off and weave in the yarn tail.
Set the main stocking aside.
The next step will give the stocking its recognizable angled shape.
Part 5: Crochet the Shaped Heel
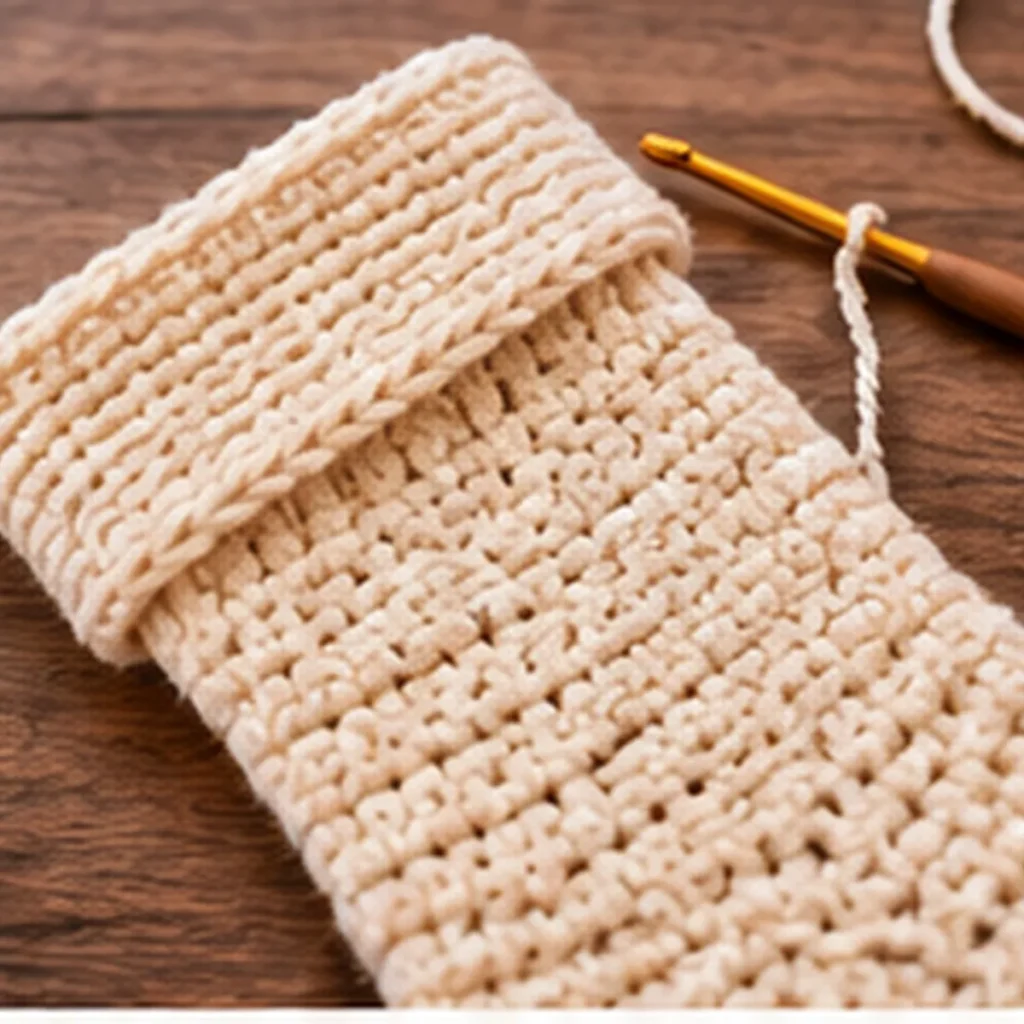
Turn the stocking so you can see the heel opening.
You'll notice eighteen unworked stitches along one edge and eighteen chain loops along the opposite edge.
We'll use these thirty-six available stitch positions to create a rounded heel.
Join ivory yarn at one side of the heel opening.
Heel Round 1
Work 1 sc into each of the 18 unworked foot stitches.
Continue along the chain bridge, working 1 sc into each of the 18 available chain loops.
36 sc.
Be careful at the two side corners.
If a small hole appears, use the yarn tail to close it neatly during finishing.
Heel Round 2
Repeat (4 sc, dec) six times.
30 sc.
Heel Round 3
Work 1 sc in every stitch.
30 sc.
Heel Round 4
Repeat (3 sc, dec) six times.
24 sc.
Heel Round 5
Work 1 sc in every stitch.
24 sc.
Heel Round 6
Repeat (2 sc, dec) six times.
18 sc.
Heel Round 7
Repeat (1 sc, dec) six times.
12 sc.
Heel Round 8
Decrease six times.
6 sc.
Fasten off, leaving a yarn tail.
Use a yarn needle to weave the tail through the front loops of the remaining six stitches.
Pull gently to close the opening.
Secure the yarn and weave in the end.
Shape the Heel
Turn the stocking right-side out if necessary.
Gently manipulate the heel into a rounded shape.
The heel pouch creates the bend between the foot and the leg.
Lay the stocking flat and adjust the foot so that it points slightly outward.
The result should resemble a classic Christmas stocking silhouette.
Part 6: Crochet the Folded Ribbed Cuff
The thick, folded cuff is one of the most recognizable details in the reference design.
We'll make a ribbed rectangle and attach it to the top of the stocking.
Using ivory yarn:
Row 1
Chain 15.
Work 1 sc into the second chain from the hook.
Continue working 1 sc in each remaining chain.
14 sc.
Row 2
Chain 1 and turn.
Work 1 sc into the back loop only of each stitch across.
14 sc.
Rows 3–36
Repeat Row 2.
14 sc per row.
Working into the back loops creates raised ridges, giving the cuff its stretchy ribbed appearance.
Check the Cuff Fit
Wrap the ribbed rectangle around the top of the stocking.
The long edge should fit comfortably around the 36-stitch opening without excessive stretching.
If your row gauge differs, add or remove ribbing rows until the cuff fits.
You can then distribute the attachment stitches evenly around the stocking opening.
Sew the Ribbing Into a Circle
Fold the rectangle so that the first and last rows meet.
Use a tapestry needle to sew the short edges together.
Avoid creating a bulky seam.
You should now have a ribbed circular band.
Attach the Cuff
Place the band around the upper stocking edge.
Using ivory yarn, sew or slip stitch one long edge of the cuff to the top of the stocking.
If your cuff has thirty-six rows, you can match approximately one row-end position to each stocking stitch.
Keep the stitches evenly distributed.
After attachment, fold the cuff outward and downward.
Adjust the fold until the ribbing looks thick, neat, and even.
Add the Hanging Loop
Using ivory yarn:
Chain 28.
Fasten off, leaving long sewing tails.
Fold the chain into a loop.
Position both ends at the upper side of the stocking, preferably near the heel side.
Sew the ends securely through both the cuff and the underlying stocking fabric.
Reinforce the attachment with several extra stitches.
The loop should be strong enough to support an empty stocking and lightweight decorations.
Do not overload the stocking with heavy gifts.
Part 7: Crochet the Red Poinsettia Flower
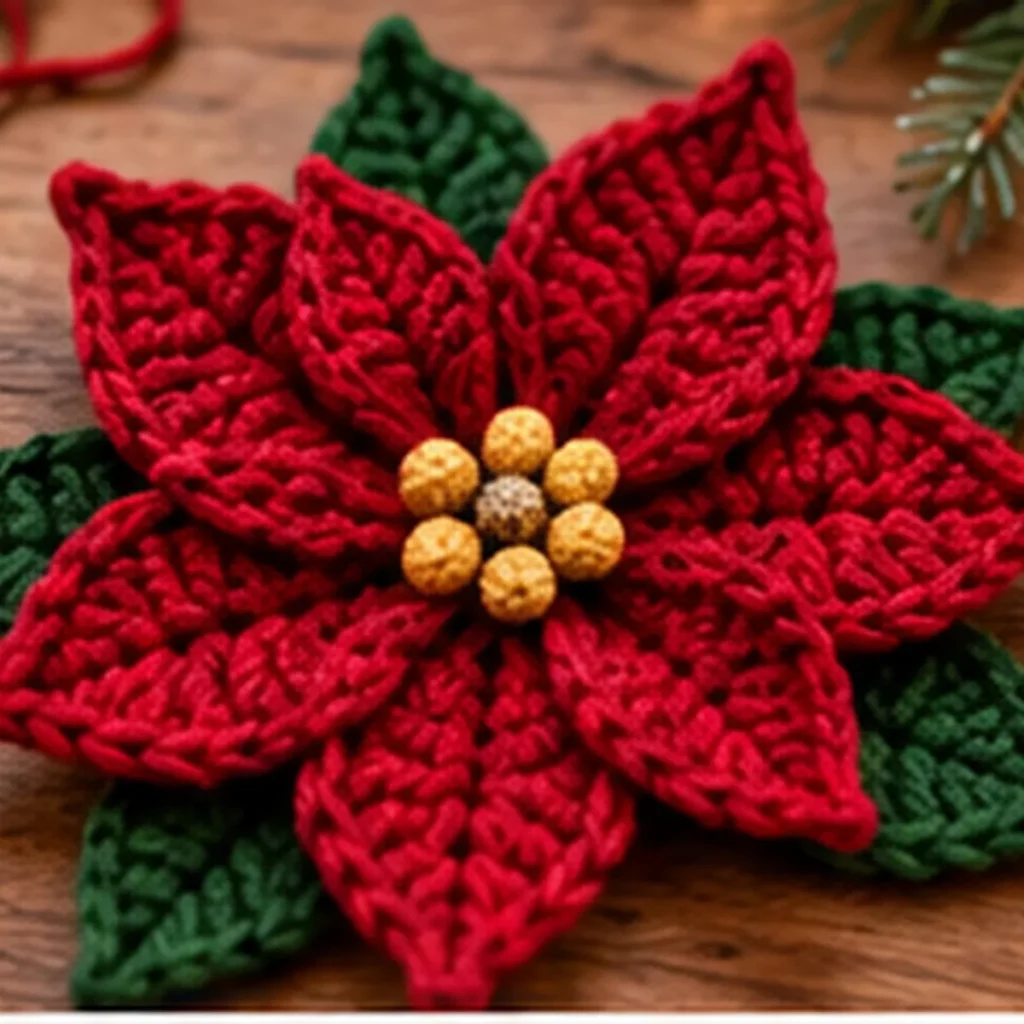
Now we can begin the most beautiful part of the project: the dimensional red poinsettia.
Poinsettias are one of the most recognizable Christmas flowers, known for their rich red bracts and festive appearance.
We'll recreate that look using six individually crocheted red petals arranged around a golden center.
Make Six Red Petals
Using cranberry-red yarn and your smaller hook:
Step 1: Chain 11.
Step 2: Work 1 sc in the second chain from the hook.
Step 3: Work 1 hdc in the next chain.
Step 4: Work 1 dc into each of the next six chains.
Step 5: Work 1 hdc into the next chain.
Step 6: Work 1 sc into the last chain.
You have now worked ten stitches down one side of the foundation chain.
Chain 1 to turn around the base.
Continue along the unused loops on the opposite side of the original chain.
Work:
- 1 sc in the first available loop.
- 1 hdc in the next loop.
- 1 dc in each of the next six loops.
- 1 hdc in the next loop.
- 1 sc in the final loop.
Slip stitch near the pointed tip.
Fasten off, leaving a sewing tail.
Shape the Petal
Lay the petal flat.
Gently stretch and shape the outer end into a point.
The petal should be narrow at its tip and fuller through the middle.
Repeat until you have six matching red petals.
Arrange the Poinsettia
Lay the petals on your workspace.
Position their wider bases together in the center.
Fan the pointed ends outward to create a six-petal flower.
Try to space the petals evenly.
Some overlap is desirable because it creates the full, dimensional appearance of a real poinsettia.
Sew the Petals Together
Thread a yarn needle with red yarn.
Sew through the base of each petal, joining all six pieces in the center.
Keep the stitch tension firm enough to hold the arrangement but not so tight that the petals curl excessively.
Optional Layered Effect
For an even fuller flower, crochet three additional smaller red petals using a chain of nine instead of eleven.
Arrange these smaller petals above the main six, allowing them to overlap.
This creates a layered poinsettia with more depth.
The extra layer is optional.
Part 8: Crochet the Green Poinsettia Leaves
The deep-green leaves behind the red petals help the flower look more realistic and create beautiful contrast against the ivory stocking.
We'll make six green leaves.
Using forest-green yarn:
Leaf Foundation
Chain 9.
Work into the second chain from the hook.
First Side
Work:
- 1 sc.
- 1 hdc.
- 1 dc in each of the next four chains.
- 1 hdc.
- 1 sc.
Opposite Side
Chain 1 to turn around the base.
Work along the opposite unused foundation loops:
- 1 sc.
- 1 hdc.
- 1 dc in each of the next four loops.
- 1 hdc.
- 1 sc.
Slip stitch near the pointed tip.
Fasten off, leaving a sewing tail.
Shape the Leaves
Gently stretch each leaf into a pointed oval.
Repeat until you have six leaves.
Arrange the Leaves
Place the green leaves behind the red poinsettia petals.
Allow some leaves to extend beyond the outer edges of the flower.
Try not to hide every green leaf completely.
Sew the leaves to the back of the flower at their bases.
You should now have a beautiful red poinsettia surrounded by deep-green foliage.
Part 9: Make the Golden Poinsettia Center
The small golden center adds warmth and dimension to the flower.
A simple approach is to create several raised embroidery knots.
Using golden-yellow yarn and a yarn needle, make six to eight small French knots clustered together at the center.
To create each French knot:
- Bring the needle up through the flower center.
- Wrap the yarn around the needle two or three times.
- Reinsert the needle close to the original point.
- Hold the wrapped yarn gently while pulling the needle through.
- Tighten carefully to create a raised knot.
Repeat until the center resembles a compact cluster of golden stamens.
Alternative Crocheted Center
If you prefer not to embroider, make several tiny golden balls.
For each one:
- Make a magic ring.
- Work 4 sc into the ring.
- Fasten off.
- Pull the yarn tails together to form a small rounded bump.
Sew six of these tiny pieces together at the center of the flower.
This creates a fuller, more dimensional centerpiece.
Part 10: Crochet the Holly Leaves and Berries
The poinsettia is the main decoration, but the additional berries and greenery make the stocking feel especially festive.
We'll create several small leaves and berry clusters extending from the flower.
Small Holly Leaves
Using forest-green yarn:
Chain 8.
Work into the second chain from the hook:
1 sc, 1 hdc, 3 dc, 1 hdc, 1 sc.
Chain 1 and work along the opposite side of the foundation chain.
Repeat:
1 sc, 1 hdc, 3 dc, 1 hdc, 1 sc.
Slip stitch to finish.
Fasten off, leaving a sewing tail.
Make six to eight small holly leaves, depending on the arrangement you want.
Crochet the Red Berries
Using cranberry-red yarn:
Round 1: Make a magic ring and work 6 sc. (6)
Round 2: Work 1 sc in each stitch. (6)
Fasten off, leaving a sewing tail.
Draw the opening closed to form a small rounded berry.
Make approximately nine to twelve berries.
You can use the yarn tails to shape the tiny balls without adding stuffing.
Optional Golden Berries
For a subtle accent, crochet one or two additional berries using golden-yellow yarn.
This echoes the golden center of the poinsettia and adds visual interest.
Create the Green Stems
Using green yarn and a tapestry needle, embroider gently curved stems on the front of the stocking.
Use small backstitches to create lines extending downward from the flower.
Position small leaves along the stems.
Then sew the red berries in groups of three.
Try to create a natural botanical arrangement instead of placing every berry in a straight line.
Part 11: Attach the Poinsettia and Decorations
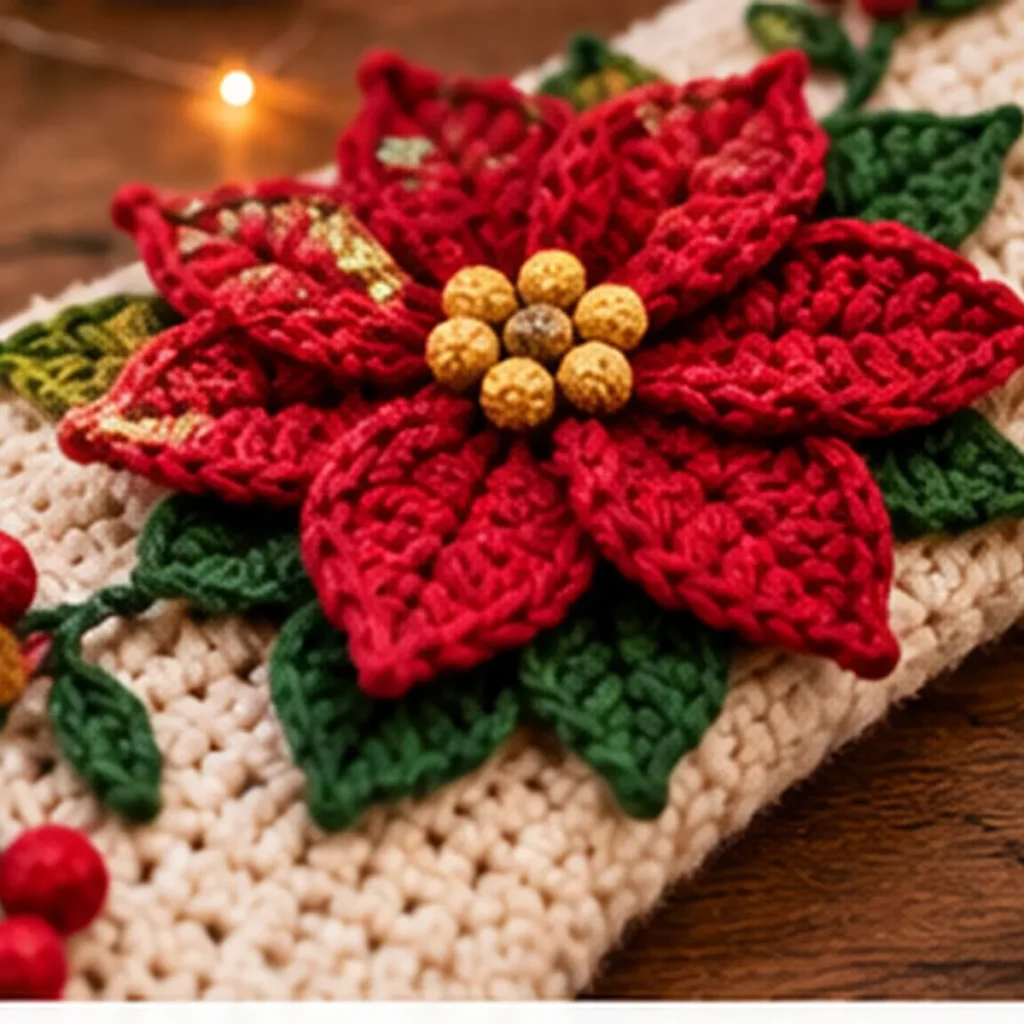
Now it's time to decorate the completed stocking.
Lay the stocking flat with the front facing upward.
Position the main poinsettia below the ribbed cuff.
The flower should be centered on the upper part of the stocking body.
Step 1 – Position the Poinsettia
Place the completed poinsettia on the front of the stocking.
Use straight pins to temporarily secure the flower.
Check that the flower doesn't interfere with the folded cuff.
Adjust the arrangement until you're happy with the balance.
Step 2 – Sew the Flower
Thread a tapestry needle with matching red yarn.
Sew through the center and the bases of the petals, attaching them securely to the stocking.
You can also attach portions of the outer petals to prevent them from folding forward excessively.
Avoid pulling the fabric too tightly.
The stocking should remain soft and flexible.
Step 3 – Add the Greenery
Position the smaller green leaves around the main flower.
Let some leaves extend above the flower and others toward the lower foot.
Sew each leaf securely at its base.
For a flatter appearance, also attach the tip with a small hidden stitch.
Step 4 – Add the Holly Berries
Arrange the red berries along the embroidered stems.
Create two or three small berry clusters.
A beautiful arrangement is to place one small cluster above the poinsettia and two others trailing toward the foot.
Sew each berry securely.
Step 5 – Add Optional Golden Accents
Position one or two small golden berries among the red decorations.
Use them sparingly so the red poinsettia remains the main attraction.
Step 6 – Inspect the Finished Decoration
Check that:
- The poinsettia is centered.
- The petals are arranged naturally.
- The leaves extend visibly behind the flower.
- The golden center is secure.
- The berry clusters are balanced.
- All yarn tails are hidden.
- The stocking remains flexible and hangs naturally.
Your festive Christmas stocking is now complete!
How to Personalize Your Crochet Christmas Stocking
One of the best things about handmade Christmas stockings is that every piece can be customized.
Add a Name
Use embroidery or a small crocheted name appliqué to personalize the folded cuff.
Names look especially pretty in red, green, or gold.
Make a Traditional Red Stocking
Instead of ivory, crochet the main body in cranberry red.
Use an ivory cuff and deep-green decorative leaves.
Create a Forest-Green Stocking
Choose a rich evergreen body and an ivory cuff.
Decorate it with a red poinsettia for a classic Christmas look.
Try a Blush-Pink Poinsettia
For a softer holiday palette, use blush pink or dusty rose for the flower petals.
Pair it with sage-green leaves and a cream stocking.
Add Small Snowflakes
Use white or gold yarn to crochet or embroider tiny snowflake motifs.
Place them sparingly around the main flower.
Make Coordinated Family Stockings
Create several stockings using the same basic pattern.
Change the flower colors or cuff decorations for each family member.
This creates a coordinated mantel display while giving every stocking its own personality.
How to Make Your Stocking Larger or Smaller
Changing the yarn and hook size is the simplest way to adjust the project.
Smaller Stocking
Use lighter-weight yarn with a smaller hook.
Follow the same general instructions.
The finished stocking will be smaller, making it suitable for decorative mini gifts or small Christmas displays.
Larger Stocking
Use thicker yarn and a corresponding hook.
You can also add rounds to the foot and leg, although increasing the circumference requires recalculating the toe and heel counts.
Longer Leg
Add extra straight rounds before beginning the cuff.
This is the easiest adjustment for a taller decorative stocking.
Longer Foot
Add extra straight rounds between the toe increases and the heel-opening round.
Make sure to keep your notes if you're making multiple matching stockings.
Creative Ways to Display Festive Crochet Stockings
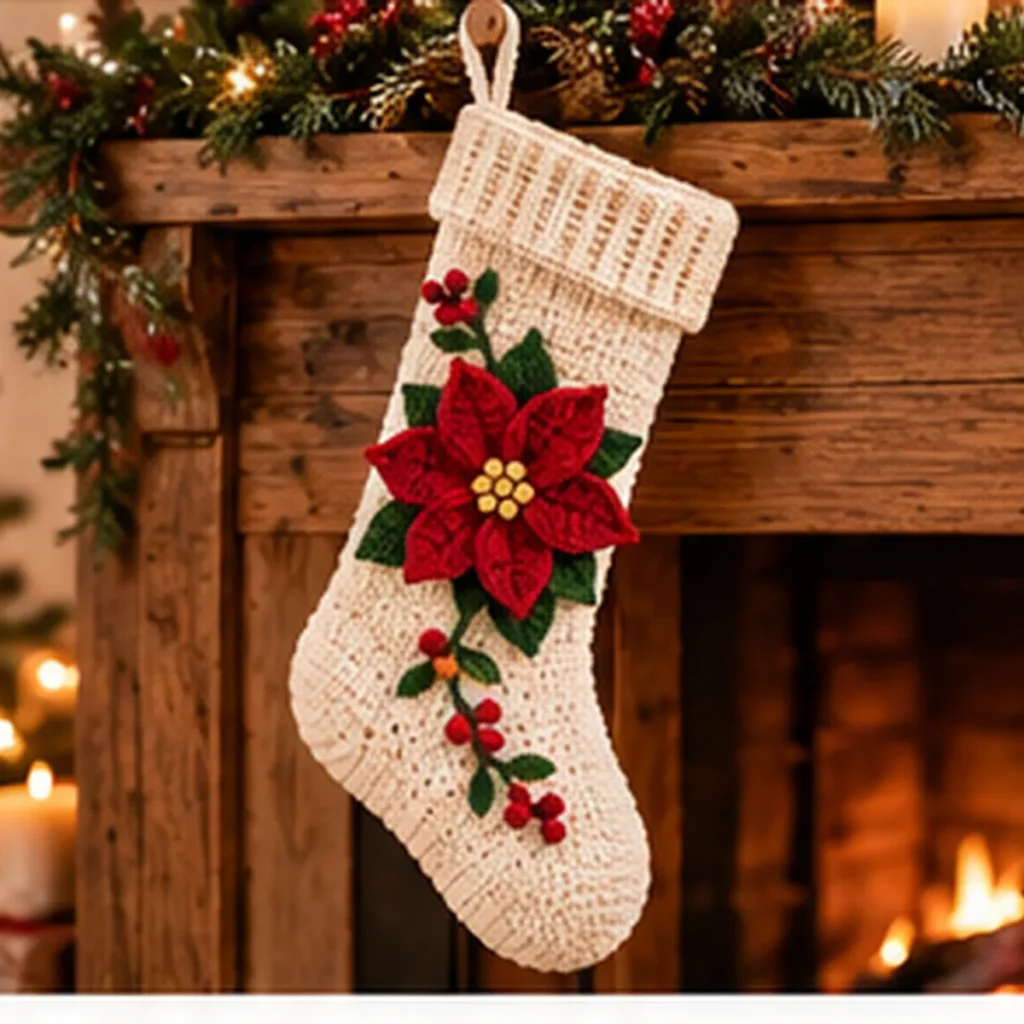
The finished stocking is a beautiful decoration that can be displayed in several ways.
Above the Fireplace
Hang your stocking from a secure mantel hook.
Decorate the mantel with evergreen garlands, pinecones, warm fairy lights, and festive ribbon.
Always keep crocheted stockings and yarn decorations well away from flames, embers, and hot surfaces.
Along a Staircase
Hang a row of coordinating stockings along a staircase banister.
Alternate ivory, cranberry, and forest-green colors for a traditional Christmas appearance.
On a Bedroom Door
A single poinsettia stocking makes a charming bedroom-door decoration.
Use a secure hook and a lightweight arrangement.
As Part of a Christmas Gift
Fill the stocking with small wrapped treats, a handwritten note, or other lightweight gifts.
The stocking itself becomes part of the present.
Christmas Photo Styling
Photograph your finished stocking beside a wrapped gift, natural greenery, and soft Christmas lighting.
This creates beautiful seasonal images for your crochet blog or Pinterest boards.
Common Crochet Stocking Problems and How to Fix Them
My Stocking Toe Looks Pointed
The toe should be rounded rather than sharp.
Check that you followed the increase rounds correctly.
Gently shape the toe with your fingers.
My Heel Opening Looks Too Small
Make sure you chained eighteen stitches and skipped exactly eighteen stitches.
The heel opening should contain thirty-six available stitch positions around its perimeter.
My Heel Has Small Holes at the Corners
This can happen where the chain bridge meets the foot.
Use a yarn needle to close small gaps with matching ivory yarn.
Avoid adding too many extra stitches, which may distort the heel.
My Stocking Doesn't Have a Clear Bend
The afterthought heel creates the shaping, but you may need to adjust the fabric by hand.
Lay the stocking flat and gently reposition the heel and foot.
My Ribbed Cuff Is Too Loose
The ribbing may contain too many rows or your tension may be too loose.
Remove a few rows and test the fit again.
The band should fit comfortably around the top without excessive stretching.
My Cuff Looks Uneven
Make sure the rectangle has the same number of stitches in every row.
When attaching it, distribute the row ends evenly along the stocking opening.
My Poinsettia Petals Curl Too Much
Some curling is normal for dimensional flowers.
If the petals curl excessively, try using a slightly larger hook or blocking the individual petals before assembly.
My Poinsettia Looks Flat
Overlap the petal bases slightly.
Consider adding the optional smaller petal layer to increase dimension.
The Decorative Leaves Keep Folding
Secure the leaf tips with small hidden stitches.
This will help the leaves lie neatly against the stocking fabric.
My Stocking Looks Too Heavy in the Front
If the poinsettia and berries are very bulky, the decoration may pull the stocking forward.
Try lighter yarn for the appliqués or use fewer decorative pieces.
How to Wash and Store Your Handmade Christmas Stocking
A handmade crochet stocking can become a special seasonal keepsake.
Proper care will help maintain its shape and decorative details.
Spot Cleaning
For small marks, use a clean, damp cloth and mild detergent.
Gently dab the affected area.
Avoid aggressive rubbing around the flower petals and berry decorations.
Hand Washing
If your chosen yarn permits hand washing, use cool water and a mild detergent.
Gently squeeze the water through the fabric.
Avoid twisting or wringing the stocking.
Drying
Press out excess moisture using a clean towel.
Reshape the stocking and poinsettia.
Lay flat to dry completely.
Storage
When Christmas is over, store the stocking in a clean, dry place.
Avoid placing heavy decorations on top of it.
You can gently fill the stocking with acid-free tissue paper to help it retain its shape during storage.
Frequently Asked Questions
1. Is this Christmas crochet stocking pattern suitable for beginners?
It's most suitable for confident beginners and intermediate crocheters.
You'll need to understand single crochet, increases, decreases, working in rounds, and sewing crochet pieces together.
2. What yarn is best for crochet Christmas stockings?
Medium worsted-weight acrylic or an acrylic blend is a practical choice.
Cotton yarn is also useful for decorative flowers and leaves because it can provide good stitch definition.
3. Can I make the stocking without the poinsettia?
Absolutely!
The plain ivory stocking with a ribbed cuff looks beautiful on its own.
You can also decorate it with snowflakes, initials, or other Christmas motifs.
4. How big will the finished stocking be?
The size depends on your yarn and gauge.
This pattern is intended to create a medium-to-large decorative Christmas stocking, approximately fifteen to eighteen inches when measured from toe to cuff.
5. Can I use chunky yarn?
Yes, but the stocking will become larger and thicker.
You may need a bigger hook and should check your gauge before beginning.
6. Can I make matching family stockings?
Yes.
Use the same stocking construction and customize the appliqués, flower colors, or embroidered names.
7. Do I need to stuff the stocking?
No.
This is a hollow Christmas stocking designed for hanging and holding lightweight gifts.
The heel and foot should remain unstuffed.
8. How many poinsettia petals do I need?
The main pattern uses six large red petals.
You can optionally add three smaller petals for a fuller layered appearance.
9. Can I substitute a different flower?
Yes.
You can replace the poinsettia with a crocheted rose, winter flower, or another decorative appliqué.
Make sure it is securely attached.
10. Can I sell finished stockings made from this tutorial?
Finished handmade items can generally be sold, subject to applicable laws and marketplace rules.
If you plan to sell them, make sure the construction is durable and your product descriptions accurately explain their decorative purpose.
11. Can I hang the stocking directly above a fireplace?
Only if it remains a safe distance from heat and flames.
Yarn and crocheted decorations can burn or melt, depending on the fiber.
Use secure hooks and remove stockings from any area exposed to fireplace heat.
12. How can I make my stocking look more professional?
Maintain even tension, count stitches carefully, shape the heel neatly, align the cuff, arrange the flower before sewing, and weave in all yarn ends securely.
Taking extra care with the finishing makes a noticeable difference.
Conclusion: Create a Beautiful Handmade Christmas Tradition
There's something especially meaningful about decorating your home with something you've made yourself.
This Festive Crochet Stockings for Christmas pattern combines beautiful traditional colors, classic crochet stitches, and delicate floral decorations to create a stocking full of handmade holiday charm.
From the rounded toe and shaped heel to the folded ivory cuff, dimensional red poinsettia, forest-green leaves, and tiny festive berries, every detail adds warmth and personality.
Although the project includes several individual pieces, the process is enjoyable when completed one step at a time.
Begin with the stocking body, shape the heel, crochet the cuff, and then take your time creating the beautiful flower and foliage.
Once everything is assembled, you'll have a lovely Christmas decoration that can be displayed year after year.
You can create a single stocking for your home, crochet matching stockings for your family, or personalize one as a thoughtful handmade gift.
And when you're ready for another festive project, try experimenting with different colors, flowers, and decorative details.
If you enjoyed this tutorial, save this Festive Crochet Stockings for Christmas pattern to your favorite Pinterest Christmas Crochet board so you can easily find it again.
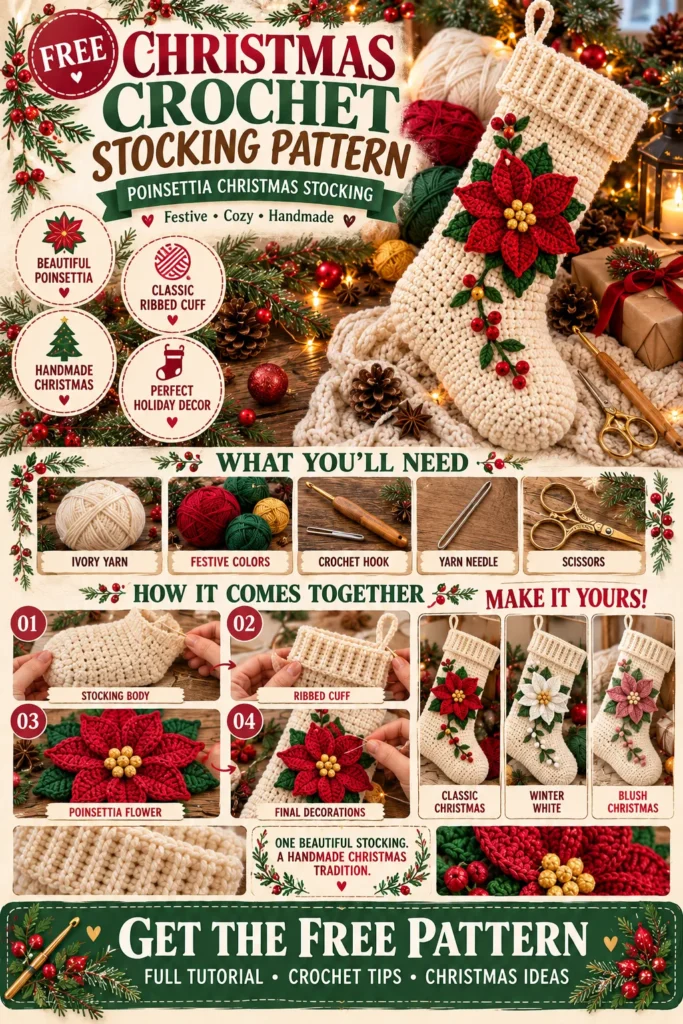
Don't forget to explore more cozy Christmas crochet patterns here at Crochet Petal Studio for additional handmade holiday inspiration.
Happy crocheting, and Merry Christmas!
Crochet Petal Studio — A Little Yarn. A Little Wonder. Something Made by Hand.