
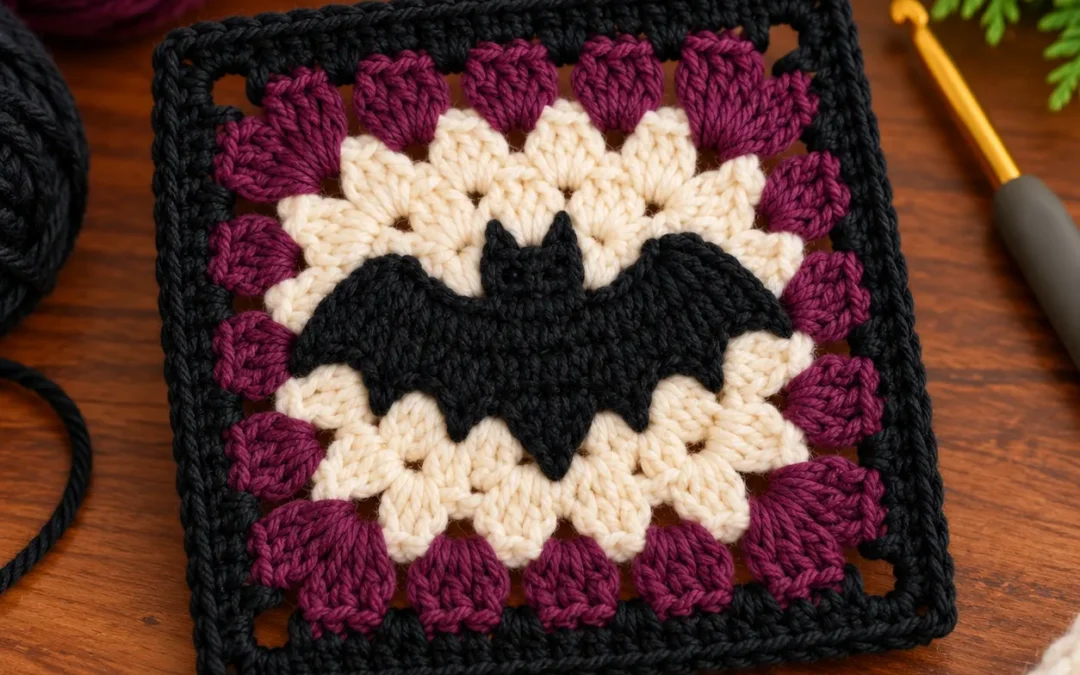
Looking for a Halloween crochet project that feels a little spooky, a little elegant, and completely handmade? This Midnight Bat Granny Square in Plum and Cream brings together a charming black bat silhouette, soft cream crochet stitches, deep plum accents, and a bold black border.
It's a lovely way to celebrate the Halloween season without relying on the usual bright orange decorations. The rich plum yarn creates a beautiful contrast against the cream background, while the little black bat gives the entire square its playful nighttime personality.
Whether you're making Halloween decorations, a seasonal crochet blanket, a spooky tote bag, or a collection of decorative granny squares, this project is a wonderful opportunity to experiment with color, texture, and appliqué techniques.
And the best part? You can make one square as a quick seasonal project or crochet an entire collection to join into something larger.
In this tutorial, I'll walk you through the materials, stitches, individual granny-square rounds, bat appliqué construction, assembly, finishing, and plenty of helpful tips.
Let's gather our yarn and make something delightfully spooky!
What Is the Midnight Bat Granny Square?
The Midnight Bat Granny Square is a Halloween-inspired crochet motif featuring a black bat at its center.
The design combines several attractive elements:
- A bold black bat silhouette with outstretched wings.
- A soft cream granny-square background.
- Rich plum crochet clusters for a dramatic accent.
- A structured black outer border.
- Small corner openings that give the motif its classic granny-square appearance.
Unlike a traditional granny square featuring only repeating clusters, this design adds a separate crocheted bat appliqué.
That technique allows the background to be worked using straightforward granny-square rounds before the decorative bat is added.
The result is a dimensional square that works especially well for Halloween blankets, wall hangings, seasonal bags, and handmade gifts.
For crocheters who enjoy small, satisfying projects, it's also a great way to use leftover yarn.
Project Details at a Glance
| Detail | Information |
|---|---|
| Project | Midnight Bat Granny Square |
| Skill Level | Adventurous beginner to intermediate |
| Crochet Terminology | US terms |
| Construction | Granny-square base with sewn-on bat appliqué |
| Main Colors | Cream, deep plum, and black |
| Recommended Yarn | DK or light worsted-weight yarn |
| Main Hook | 4.0 mm (G/6) |
| Bat Hook | 3.25 mm (D/3) |
| Estimated Size | Approximately 6.5–7.5 inches (16.5–19 cm) square |
| Approximate Time | 2–3 hours for a first square |
| Finishing | Weaving ends, sewing appliqué, optional blocking |
These measurements are estimates rather than results from a finished, measured sample. Your finished size will depend on yarn, hook, and personal tension.
Materials and Tools You'll Need

Before beginning, gather all your supplies. Having everything ready makes the crocheting process much more enjoyable.
Yarn
I recommend DK-weight cotton or a cotton-acrylic blend because these yarns offer good stitch definition and help the square maintain its shape.
You'll need three colors:
Color A – Cream
Use approximately 15–20 grams for the granny-square background.
Choose a warm ivory or soft cream rather than a bright white. The subtle warmth creates an attractive contrast with the black bat.
Color B – Deep Plum
Use approximately 8–12 grams for the decorative outer granny round.
Look for a rich wine, berry, aubergine, or plum shade.
Color C – Black
Use approximately 10–15 grams for the bat appliqué and outer border.
A true black or soft charcoal-black yarn works beautifully.
Yarn requirements are approximate; keep additional yarn available until you've completed your first square.
Additional Supplies
You'll also need:
- A 4.0 mm crochet hook for the granny-square base.
- A 3.25 mm crochet hook for the bat appliqué.
- A tapestry needle for weaving ends and sewing pieces together.
- Sharp embroidery scissors.
- Several stitch markers.
- A measuring tape.
- Blocking pins and a foam blocking mat, if desired.
Helpful tip: Using a slightly smaller hook for the bat creates a firmer, more defined silhouette that sits neatly against the softer granny-square background.
Crochet Abbreviations and Stitches
This pattern uses US crochet terminology.
| Abbreviation | Meaning |
|---|---|
| ch | Chain |
| sl st | Slip stitch |
| sc | Single crochet |
| dc | Double crochet |
| st | Stitch |
| sts | Stitches |
| sp | Space |
| inc | Increase: 2 sc in one stitch |
| sc2tog | Single crochet 2 stitches together |
| sc3tog | Single crochet 3 stitches together |
| rep | Repeat |
| RS | Right side |
| WS | Wrong side |
Special Techniques
Granny cluster: A group of three double crochet stitches worked into the same chain space.
Corner: A chain-2 space that creates the corner of the square. Working the specified stitches into each corner allows the motif to expand evenly.
Single crochet increase: Work two single crochet stitches into one stitch.
Single crochet decrease (sc2tog): Insert your hook into the next stitch, yarn over and pull up a loop. Repeat in the following stitch. Yarn over and pull through all three loops.
Single crochet three together (sc3tog): Draw up a loop in each of three consecutive stitches, then yarn over and pull through all four loops on your hook.
Picot: A small chain-and-slip-stitch detail used to create a pointed shape.
Magic ring: An adjustable loop used when beginning crochet projects in the round.
If you're new to making granny squares, practice a few clusters before starting the full project.
Before You Begin: Understanding the Construction
The square is made in two separate parts:
- A cream and plum granny-square background with a black border.
- A black bat appliqué, made separately and sewn to the center.
We'll crochet the base first, then make the bat, position it, and attach it securely.
The granny-square base uses continuous color sections rather than complicated mid-round color changes.
This makes the overall construction more manageable, especially if you're still building confidence with crochet patterns.
Important Pattern Notes
The beginning chain-3 of each granny-square round counts as one double crochet.
The chain-1 spaces between granny clusters are essential. Don't accidentally skip them.
Each round increases by four granny clusters, keeping the square balanced.
Join rounds with a slip stitch into the top of the beginning chain-3 unless otherwise instructed.
When changing colors, fasten off the previous yarn and join the new color in any corner space.
The bat pieces are worked flat in rows. Their stitches do not count toward the granny-square round totals.
Part 1: Crochet the Cream Granny-Square Base
This section establishes the main shape of your project.
The cream background creates the soft contrast needed to make the black bat stand out.
Round 1 – Create the Center
Using cream yarn and your 4.0 mm hook, begin with a magic ring.
- Make a magic ring.
- Chain 3. This counts as your first double crochet.
- Work 2 dc into the ring.
- Chain 2.
- Work 3 dc into the ring.
- Chain 2.
- Work 3 dc into the ring.
- Chain 2.
- Work 3 dc into the ring.
- Chain 2.
- Join with a slip stitch to the top of the beginning chain-3.
- Pull the magic ring closed.
Stitch count: 12 dc and four chain-2 corner spaces.
You should now have four groups of three double crochet stitches.
These groups form the foundation of your granny square.
Before continuing, make sure all four chain-2 corners are visible.
Round 2 – Expand the Center
Slip stitch across the next two stitches and into the first corner space.
- Chain 3 and work 2 dc into the same corner.
- Chain 2.
- Work 3 dc into that same corner.
- Chain 1.
- In the next corner, work (3 dc, ch 2, 3 dc).
- Chain 1.
- Repeat Step 5 in each of the remaining two corners, chaining 1 after each corner.
- Join to the top of the beginning chain-3.
Stitch count: 24 dc, four chain-2 corners, and four chain-1 spaces.
The square should now show eight granny clusters.
Each corner contains two clusters separated by a chain-2 space.
Round 3 – Build the Cream Background
Slip stitch across to the nearest corner space.
- In the corner, work (3 dc, ch 2, 3 dc), using the beginning chain-3 as the first dc.
- Chain 1.
- Work 3 dc into the next chain-1 side space.
- Chain 1.
- Work (3 dc, ch 2, 3 dc) into the next corner.
- Continue around, placing one granny cluster in every chain-1 side space and a full corner group in every chain-2 corner.
- Chain 1 between adjacent clusters.
- Join to complete the round.
Stitch count: 36 dc, four chain-2 corners, and eight chain-1 spaces.
You should now have twelve granny clusters.
The square will begin looking more structured and recognizable.
Round 4 – Finish the Main Cream Section
This round enlarges the cream background and gives us more room for the bat motif.
- Slip stitch into the nearest corner space.
- Work (3 dc, ch 2, 3 dc) in the corner.
- Chain 1.
- Work 3 dc in the next chain-1 space.
- Chain 1.
- Continue working a granny cluster into each remaining side space, with a chain-1 between clusters.
- Work (3 dc, ch 2, 3 dc) in every corner space.
- Complete all four sides and join the round.
Stitch count: 48 dc, four chain-2 corners, and twelve chain-1 spaces.
Fasten off the cream yarn.
Your cream base should have sixteen granny clusters in the fourth round.
Lay the square on a table and gently spread the corners.
If the center pulls inward slightly, don't worry. Light blocking can help later.
Part 2: Add the Rich Plum Granny-Square Round
The plum round is one of the most attractive features of this project.
It frames the light cream center while introducing a beautiful Halloween-inspired accent.
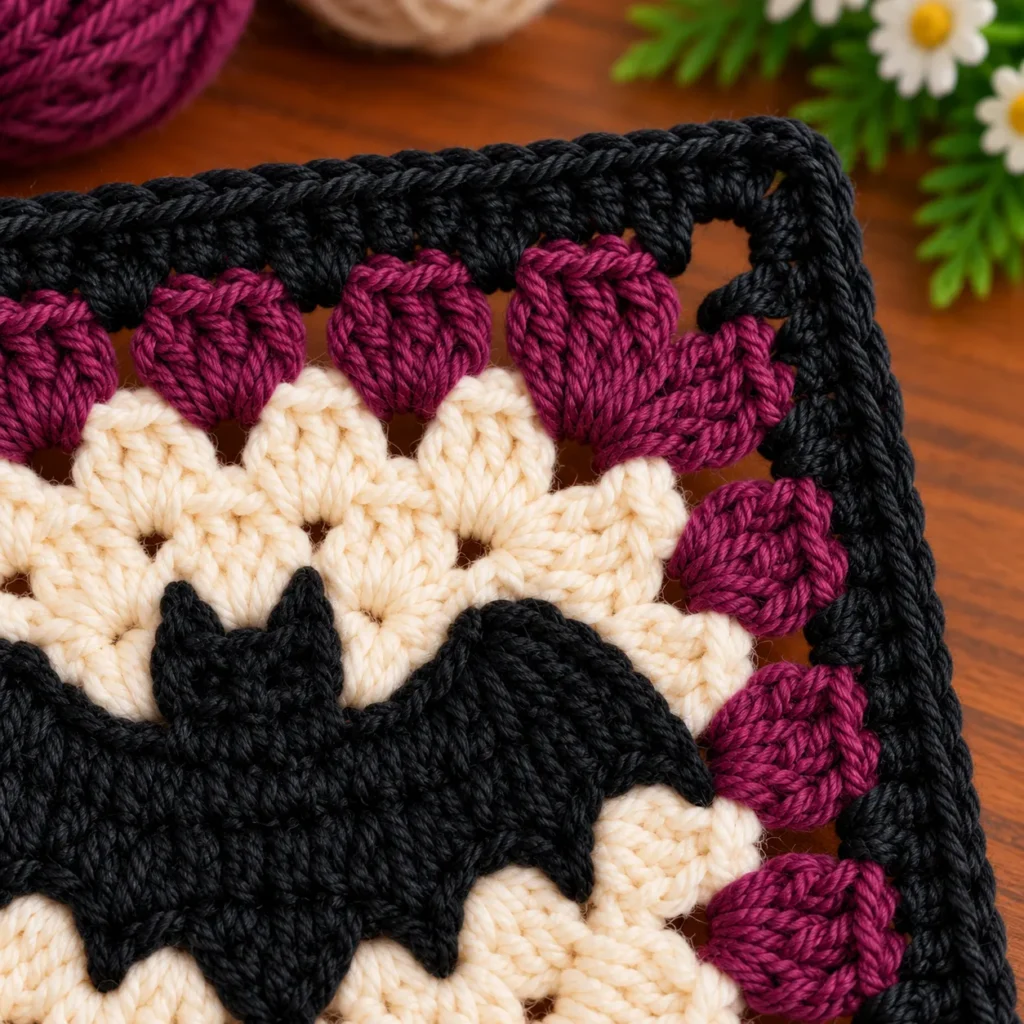
Round 5 – Crochet the Plum Accent
Join plum yarn in any corner chain-2 space.
- Chain 3 and work 2 dc into the corner.
- Chain 2.
- Work 3 dc into the same corner.
- Chain 1.
- Work 3 dc into the next side chain-1 space.
- Chain 1.
- Repeat the granny clusters in each side space.
- At every corner, work (3 dc, ch 2, 3 dc).
- Continue around the entire square, keeping one chain between adjacent clusters.
- Join with a slip stitch.
Stitch count: 60 dc, four chain-2 corners, and sixteen chain-1 spaces.
You should have twenty granny clusters in this round.
Fasten off the plum yarn.
How to Keep the Plum Stitches Neat
Avoid pulling the yarn too tightly between clusters.
The chain spaces need enough room for the final black border.
If the corners begin to curl, check that you've worked both granny clusters and the chain-2 space into every corner.
For an especially smooth appearance, gently stretch the motif into a square shape before beginning the border.
Part 3: Crochet the Black Outer Border
The black border ties the entire design together.
It also creates a stable edge for joining multiple squares into a larger project.
Round 6 – First Black Border Round
Join black yarn in any corner space.
- Chain 3 and work 1 more dc into the corner.
- Chain 2.
- Work 2 dc into the same corner.
- Work 1 dc into each of the next three dc stitches.
- Work 1 dc into the next chain-1 space.
- Continue working one dc in every dc stitch and one dc in every chain-1 space along the side.
- In the next corner, work (2 dc, ch 2, 2 dc).
- Repeat the same process around all four sides.
- Join to the top of the beginning chain-3.
Each side of the previous plum round contains fifteen dc stitches and four chain-1 spaces between its two corners.
That gives nineteen stitches between corners.
The two double crochet stitches worked at either end of each new side bring the side total to twenty-three.
Stitch count: 92 dc in total and four chain-2 corner spaces.
Your edge should now appear more solid and structured than the open granny clusters.
Round 7 – Final Black Edging
Chain 1.
- Work one sc into each dc.
- When you reach a corner chain-2 space, work (sc, ch 2, sc).
- Continue around the square.
- Work the same corner combination in all four corners.
- Join with a slip stitch to the first sc.
Stitch count: 100 sc and four chain-2 corner spaces.
Fasten off, leaving enough yarn to weave in securely.
Your granny-square background is now complete!
You can set it aside while working on the bat.
Part 4: Crochet the Black Bat Appliqué

The bat is the centerpiece of the Midnight Bat Granny Square.
For this photo-inspired version, we'll use a small body, separate head with pointed ears, and two shaped wings.
Making the pieces separately gives you more control over the silhouette and makes it easier to position everything neatly.
Use black yarn and your 3.25 mm hook.
Step 1 – Make the Bat Body
The body is worked from the pointed bottom upward.
Row 1: Chain 2. Work 1 sc in the second chain from the hook. (1 sc)
Row 2: Chain 1 and turn. Work 3 sc in the stitch. (3 sc)
Row 3: Chain 1 and turn. Work 2 sc in the first stitch, 1 sc in the next stitch, and 2 sc in the final stitch. (5 sc)
Row 4: Chain 1 and turn. Work 1 sc in each stitch. (5 sc)
Row 5: Chain 1 and turn. Work 2 sc in the first stitch, sc in the next three stitches, and 2 sc in the last stitch. (7 sc)
Row 6: Chain 1 and turn. Work 1 sc in each stitch. (7 sc)
Row 7: Chain 1 and turn. Work 2 sc in the first stitch, sc in the next five stitches, and 2 sc in the last stitch. (9 sc)
Row 8: Chain 1 and turn. Work 1 sc in each stitch. (9 sc)
Row 9: Chain 1 and turn. Work 1 sc in each stitch. (9 sc)
Row 10: Chain 1 and turn. Work sc2tog over the first two stitches, sc in the next five stitches, and sc2tog over the final two stitches. (7 sc)
Row 11: Chain 1 and turn. Work 1 sc in each stitch. (7 sc)
Fasten off, leaving a long tail for sewing.
You should have a small body that widens toward the upper section and narrows to a point at the bottom.
This creates the central shape of the bat.
Step 2 – Crochet the Bat Head and Ears
Using black yarn, chain 6.
Row 1: Work 1 sc in the second chain from the hook and in each remaining chain. (5 sc)
Row 2: Chain 1, turn, and work 5 sc.
Row 3: Chain 1, turn, and work 5 sc.
Now add the little pointed ears.
Ear edging:
- Chain 1 and turn.
- Work 1 sc into the first stitch.
- Chain 3.
- Slip stitch into the first of those three chains to create a small picot.
- Work 1 sc in each of the next three stitches.
- Work 1 sc in the final stitch.
- Chain 3 and slip stitch into the first of those three chains to create the second ear.
Fasten off with a sewing tail.
The two picots should sit at opposite ends of the head's top edge.
If the ears appear too rounded, gently shape them with your fingers.
Step 3 – Crochet the First Wing
Each wing is a shallow, stepped wedge with two small points along its lower edge.
Chain 13.
Row 1: Sc in the second chain from the hook and across. (12 sc)
Row 2: Chain 1, turn, and sc in all 12 stitches. (12 sc)
Row 3: Chain 1, turn, and sc in the next 10 stitches. Leave the final two stitches unworked. (10 sc)
Row 4: Chain 1, turn, and sc in all 10 stitches. (10 sc)
Row 5: Chain 1, turn, and sc in the next 8 stitches. Leave the final two stitches unworked. (8 sc)
Row 6: Chain 1, turn, and sc in all 8 stitches. (8 sc)
Row 7: Chain 1, turn, and sc in the next 6 stitches. Leave the final two stitches unworked. (6 sc)
Row 8: Chain 1, turn, and sc in all 6 stitches. (6 sc)
Fasten off.
The stepped edge creates a tapered wing shape.
Step 4 – Add the Wing Points
To give the wing a more recognizable bat appearance, add two small decorative points to its long foundation edge.
With the wing's foundation edge facing you:
- Join black yarn at the first foundation stitch.
- Slip stitch through the first two foundation stitches.
- Chain 3.
- Slip stitch into the second chain from the hook.
- Single crochet into the remaining chain.
- Slip stitch into each of the next four foundation stitches.
- Repeat Steps 3–6 once more.
- Slip stitch into the final two foundation stitches.
Fasten off and weave in the short tail.
You should now see two small pointed details extending from the long edge of the wing.
They imitate the pointed scallops often seen along a bat's lower wing outline.
Step 5 – Make the Second Wing
Repeat the wing instructions to make a second identical piece.
You'll mirror the two wings during assembly by turning one over.
Don't worry if the pieces look slightly angular at first. Once pinned in place and sewn to the body, the finished silhouette will become much more recognizable.
Step 6 – Arrange the Bat Shape
Lay the granny square on a flat surface with the right side facing upward.
Position the bat body in the center.
Place the head above the body, allowing the lower edge of the head to overlap the upper part of the body slightly.
Position one wing on each side.
Arrange the wings so their longer edges extend outward and the decorative points face downward.
Overlap the inner ends of the wings slightly with the upper sides of the body.
Try angling the upper wing edges gently upward.
The finished shape should resemble a bat spreading its wings.
Use stitch markers or removable pins to hold the pieces in place.
Important: Check the proportions before sewing. The assembled bat should fit comfortably within the cream background. If it is too wide, use a smaller hook to remake the wings or adjust their overlap with the body.
Part 5: Attach the Bat to the Granny Square

Once you're happy with the placement, it's time to attach the bat.
Use a tapestry needle and black yarn.
First, Secure the Head
Position the head at the top of the body.
Sew the bottom edge of the head to the upper body using small, discreet stitches.
Keep both ears pointing upward.
Avoid pulling your sewing stitches too tightly, as that may distort the shape.
Next, Attach the Wings
Position the first wing beside the body.
Sew the inner portion of the wing securely to the body, making sure the yarn doesn't bunch.
Repeat on the opposite side.
Check that the wings look reasonably balanced.
They don't need to be perfectly identical, but they should feel visually symmetrical.
Finally, Sew the Bat to the Background
Center the assembled bat over the cream granny-square section.
Thread a needle with black yarn.
Working from the back whenever possible, make small securing stitches around the bat's body, head, and wing edges.
Catch enough of the cream background stitches to hold the appliqué securely without pulling the surrounding fabric out of shape.
Take special care around the pointed ears and wing details.
If desired, leave the outermost wing points slightly free for a dimensional effect. For projects that will be frequently washed or handled, sew the points down securely.
Once finished, weave in all loose ends on the wrong side.
Your midnight bat should now stand out beautifully against the cream background.
Part 6: Finishing and Blocking
Finishing is one of the most important steps in achieving a neat, professional-looking granny square.
Even when your crochet stitches are consistent, the corners can sometimes curl slightly.
Blocking helps create a flatter, more regular shape.
How to Block Your Granny Square
- Check your yarn label to determine the appropriate blocking method.
- For suitable cotton yarn, lightly dampen the square with clean water.
- Remove excess moisture by gently pressing it between towels.
- Lay the square on a foam blocking mat.
- Carefully stretch it into an even square without overstretching the stitches.
- Pin the four corners.
- Add a few additional pins along the sides if necessary.
- Allow the square to dry completely before removing the pins.
Avoid pressing a hot iron directly onto the yarn, particularly if you're using acrylic.
For acrylic yarn, use the care instructions provided by the yarn manufacturer and avoid direct high heat.
When blocking is complete, check that the bat lies flat and the wing tips remain clearly defined.
Tips for Making Your Bat Granny Square Look Beautiful
1. Choose Yarn With Good Stitch Definition
Smooth cotton yarn makes it easier to see the individual clusters.
Very fuzzy yarn can soften the bat's shape and make the wing details harder to recognize.
2. Keep Your Cream Stitches Even
The cream background should look balanced and relatively flat.
If some clusters are much taller than others, the plum round may appear uneven.
Maintain a relaxed, consistent tension throughout the project.
3. Use a Slightly Smaller Hook for the Bat
A tighter fabric works well for small appliqués.
It helps keep the head and wing tips from becoming too loose.
4. Position the Bat Before Sewing
Don't rush into attaching your appliqué.
Place the body, head, and wings onto the square first.
Stand back and look at the design to check that it looks centered.
Small positioning adjustments can make a surprisingly big difference.
5. Block Before Joining Squares
If you're making several bat granny squares, block them to the same dimensions before joining.
This makes the joining process much easier and keeps your final blanket or bag looking consistent.
How to Customize the Midnight Bat Granny Square
One of the most enjoyable things about crochet is being able to make a project your own.
Although the plum, cream, and black combination is especially beautiful, you can easily explore other palettes.
Classic Halloween Colors
Replace plum with pumpkin orange for a more traditional Halloween appearance.
Keep the cream center and black bat for contrast.
Gothic Purple and Charcoal
Use deep purple, charcoal gray, and black for a dramatic gothic-inspired square.
Soft Halloween Pastels
Try lavender, pale cream, and charcoal for a sweeter, more playful version.
Monochrome Bat Square
Work the entire background in cream or pale gray, keeping only the bat and border black.
This creates a clean, modern look.
Make the Square Larger
To enlarge the background, continue working additional granny rounds before the plum accent.
Each additional round should contain a granny cluster in every side chain-1 space and a standard corner group in each chain-2 corner.
The number of granny clusters increases by four in each round.
For a larger square, you may also want to crochet a larger bat using thicker yarn or a larger hook.
Always check that your finished appliqué fits the background before sewing.
What Can You Make With Midnight Bat Granny Squares?
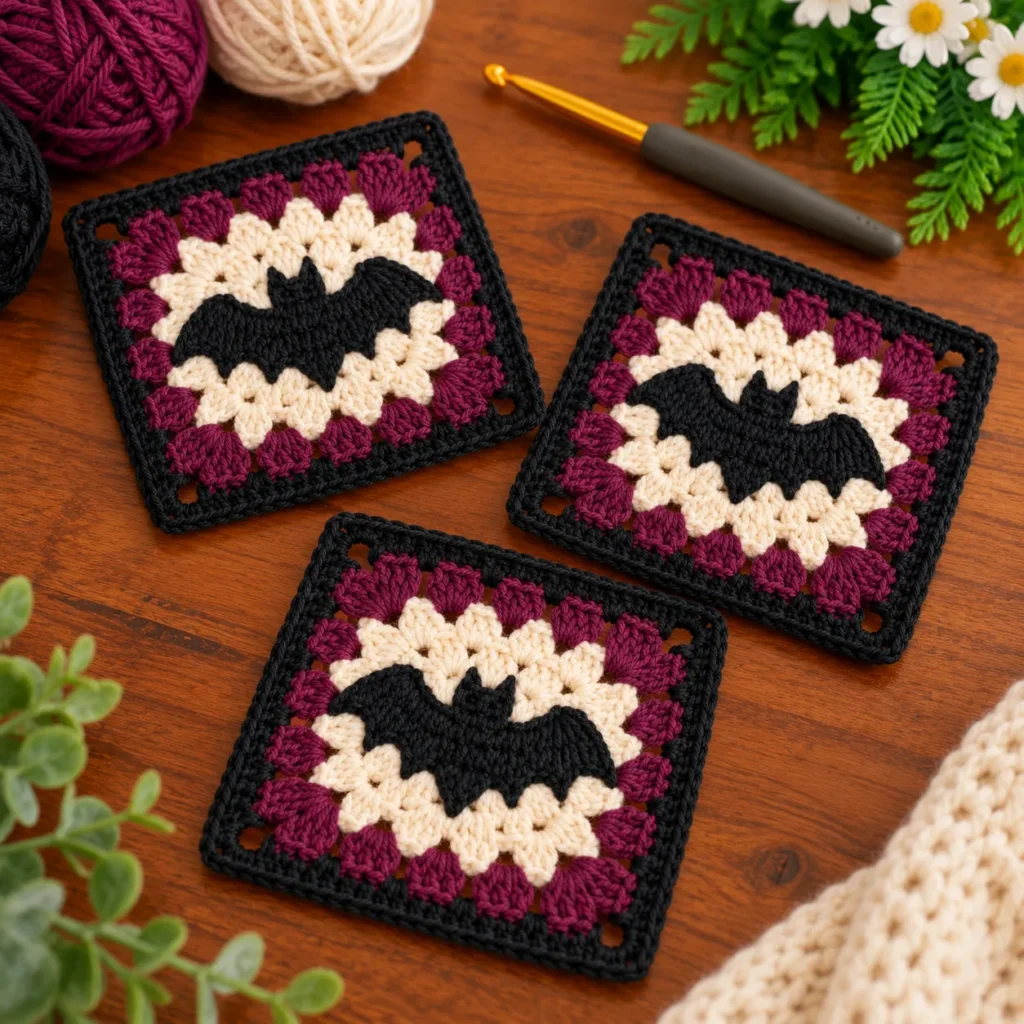
A single granny square can be surprisingly versatile.
Here are some creative ways to use your finished motifs.
Halloween Crochet Blanket
Make multiple squares and arrange them into a cozy Halloween blanket.
You can alternate bat squares with plain plum, black, or cream granny squares to give the finished blanket a balanced appearance.
Spooky Crochet Tote Bag
Join several bat granny squares into panels for a seasonal tote bag.
Add sturdy crocheted straps and a fabric lining if you plan to carry heavier items.
Halloween Wall Hanging
Create a decorative wall hanging using three or four squares joined vertically.
Attach the top edge to a wooden dowel and add a hanging cord.
Decorative Table Mat
Join four squares into a small decorative mat for a Halloween-themed table arrangement.
Handmade Gift
A matching pair of bat squares can become a cute seasonal gift, especially when included in a larger handmade project.
Halloween Cushion Cover
Join enough squares to create a cushion front, then make a coordinating solid crochet back.
A removable cover makes it easier to wash and store your decoration between seasons.
Common Mistakes and How to Fix Them
Even experienced crocheters encounter occasional problems.
Here are some common issues and practical solutions.
My Granny Square Is Curling
Curling often happens when stitches are worked too tightly or the hook is too small.
Try relaxing your tension or moving up half a hook size for the background.
Also check that each corner has the required chain-2 space.
My Square Has Uneven Sides
Count the granny clusters in each round.
All four sides should have the same number of clusters.
Missing a chain-1 space or corner increase can throw the square out of balance.
My Bat Looks Crooked
Before sewing, use the center of the square as a guide.
Align the head with the center of the body and arrange the wings at similar angles.
If the bat is already attached, carefully remove only the stitches that need repositioning.
The Bat Is Too Large
Try making the appliqué with a smaller hook.
Alternatively, add another cream granny round before the plum section so the bat has more room.
The Wing Tips Keep Curling
Small shaped details can curl naturally.
Lightly dampen and gently flatten them if your yarn allows wet blocking.
Securing the tips with a few discreet sewing stitches can also help.
My Border Is Wavy
Check that you worked only one stitch into each dc and chain-1 side space during Round 6.
Accidentally adding extra stitches along the sides can cause the border to ripple.
How to Care for Your Finished Crochet Square
The best washing method depends on your yarn.
For most cotton crochet projects, gentle hand washing is a good starting point.
Fill a bowl with cool or lukewarm water and add a mild detergent suitable for the yarn.
Submerge the piece gently and avoid aggressive rubbing or twisting.
Rinse thoroughly, then press between clean towels to remove excess water.
Lay the square flat to dry, reshaping the corners as needed.
If you turn the squares into a blanket or bag, make sure all joining and appliqué stitches are secure before washing.
For long-term storage, keep your finished crochet projects clean, completely dry, and away from prolonged direct sunlight.
Frequently Asked Questions
1. Is the Midnight Bat Granny Square beginner-friendly?
The granny-square background is beginner-friendly if you already know chain stitches, double crochet, and slip stitches.
The bat appliqué involves shaping and assembly, so the complete project is better suited to adventurous beginners or intermediate crocheters.
You don't need to master complicated stitch techniques, but patience and careful counting will help.
2. Can I make this square using worsted-weight yarn?
Yes.
Worsted-weight yarn works well, although your square may turn out larger and thicker.
Choose a hook that produces a comfortable, even fabric and adjust the bat hook accordingly.
Remember to check the finished dimensions before making multiple squares.
3. How many squares do I need for a blanket?
That depends on the size of the blanket and your finished square measurements.
For example, if your blocked squares measure seven inches and you arrange them in an 8-by-10 grid, you'll need 80 squares.
The joined blanket would measure approximately 56 by 70 inches before any additional border, depending on your joining method.
4. Can I use acrylic yarn instead of cotton?
Absolutely.
Acrylic yarn can be soft, lightweight, affordable, and practical for blankets.
Just remember that acrylic responds differently to heat, so always follow the yarn label when washing or blocking.
5. Do I need to sew the bat onto the square?
In this version, yes.
The bat is crocheted separately and attached using a tapestry needle.
This allows you to adjust the placement of the silhouette and keep the background construction simple.
An integrated colorwork bat would require a different pattern.
6. Can I make the bat in a different color?
Of course!
While black gives the strongest contrast against the cream background, charcoal, deep purple, dark brown, or even dark navy could work.
Choose a color that remains clearly visible against the background.
7. How do I join multiple granny squares together?
You can use several methods, including slip-stitch joining, single-crochet joining, or mattress-stitch seaming.
For a Halloween-themed blanket, black joining yarn can create a beautiful framed appearance.
Keep your joining tension consistent so the fabric remains flat.
8. What if my bat isn't perfectly symmetrical?
Small differences are normal in handmade crochet.
Before attaching the bat, pin the wings into position and compare both sides.
You can adjust the angle and overlap of the pieces to achieve a more balanced shape.
9. Should I block each square before joining?
Blocking is recommended, especially when making a blanket or bag.
It helps bring the squares to consistent dimensions and makes joining easier.
If you're using a delicate or heat-sensitive yarn, select a blocking method appropriate for that fiber.
10. Can I use this design for projects outside Halloween?
Definitely.
Although the bat motif is perfect for Halloween, bats also work beautifully in gothic, celestial, nighttime, and nature-inspired crochet projects.
Change the surrounding colors to create a different mood and enjoy the design throughout the year.
Conclusion: Make Your Own Midnight Bat Granny Square
There's something especially satisfying about turning a handful of yarn into a small piece of seasonal artwork.
The Midnight Bat Granny Square in Plum and Cream combines classic granny-square construction with a playful appliqué motif, creating a project that's decorative, versatile, and full of handmade charm.
The soft cream background gives the bat room to stand out, the rich plum clusters bring warmth and color, and the black border adds the perfect finishing touch.
Whether you make just one square or an entire collection, this project is a fun way to bring a little Halloween magic into your crochet basket.
Take your time with the bat shaping, enjoy the contrast between the colors, and don't forget to block your finished piece for a beautiful result.
If you enjoyed this crochet project, save it to your favorite Pinterest crochet board so you can easily find it again when you're ready for your next Halloween make.
Happy crocheting, and may your next project be filled with a little yarn, a little wonder, and something beautiful made by hand!