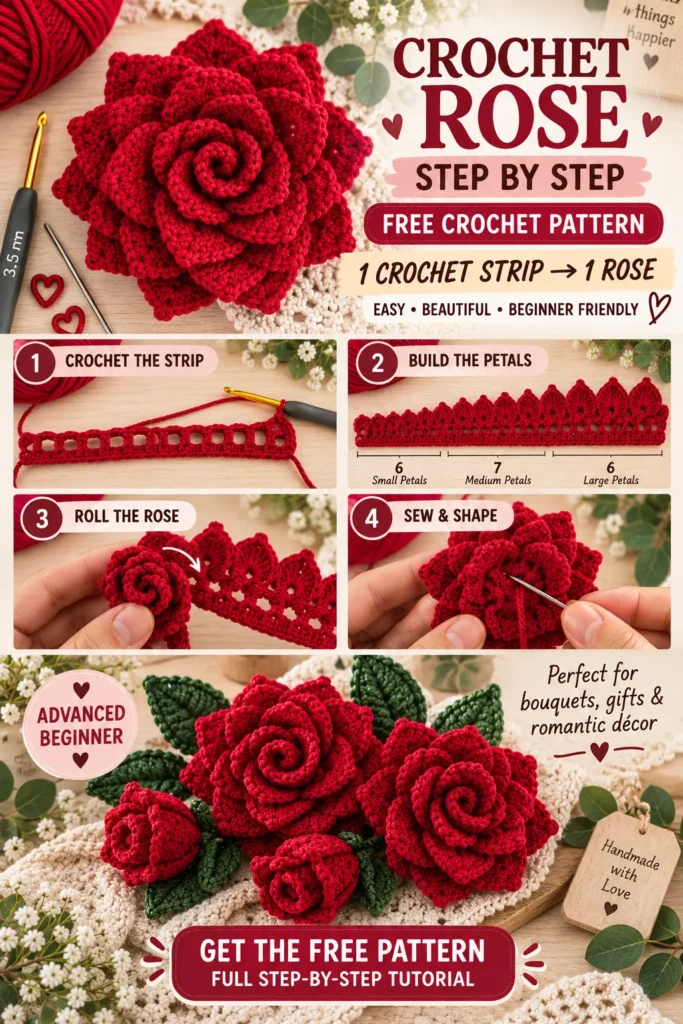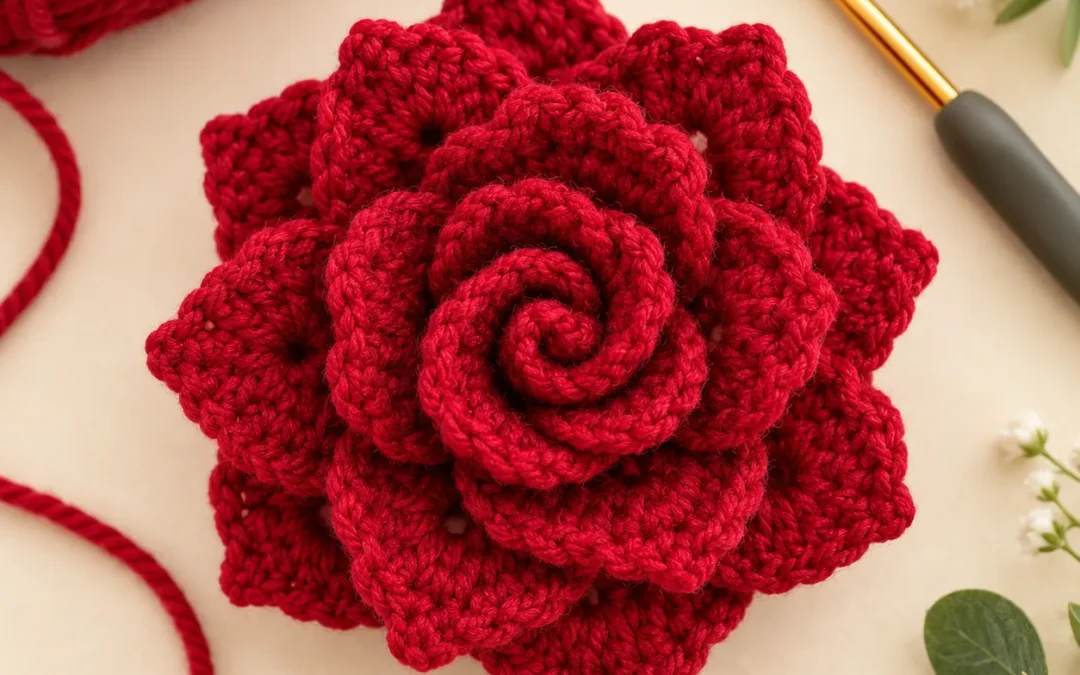
Create a beautiful, dimensional flower with this Red Roses Crochet Pattern.
Instead of crocheting every petal separately, this rose is made from one long textured strip. Small petals begin at one end, medium petals build the middle, and larger pointed petals finish the outer edge.
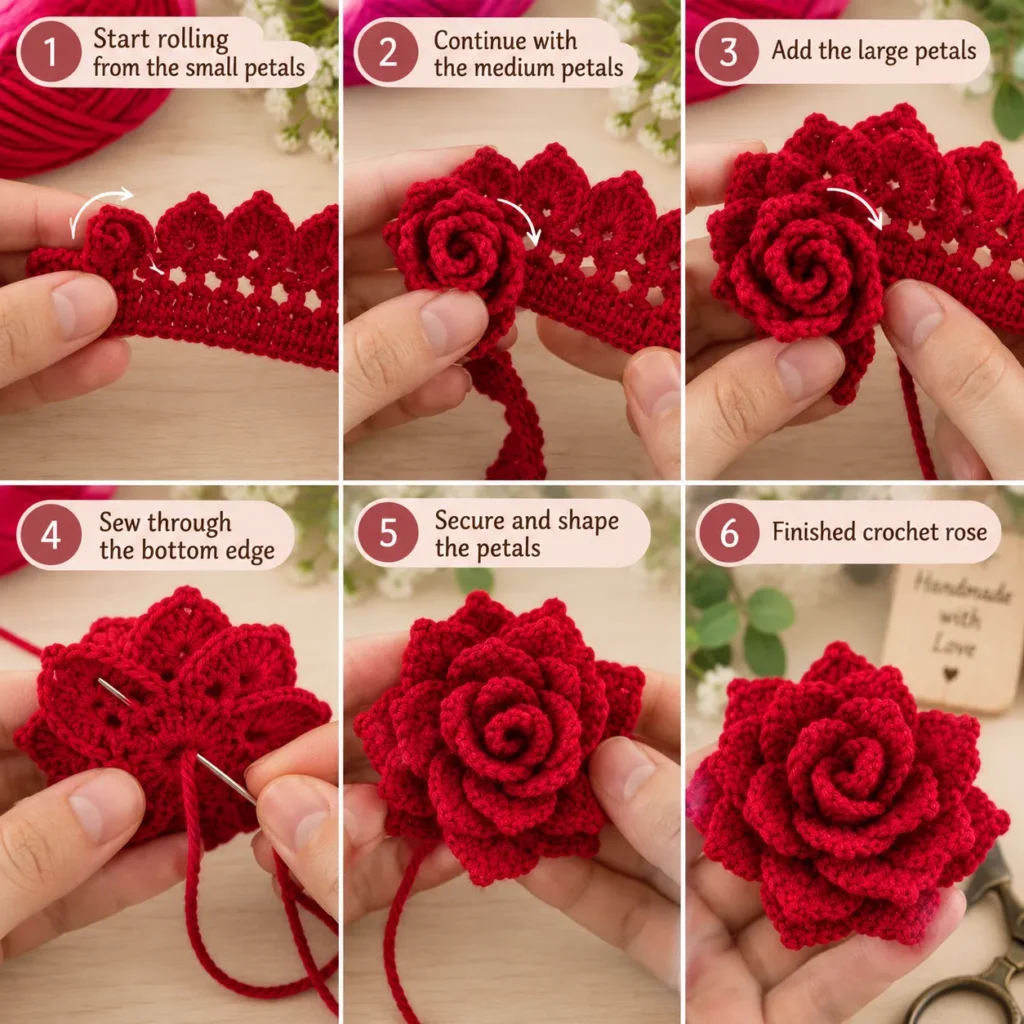
Once the strip is complete, simply roll it from the small-petal end, shape the layers, and sew the base together.
The result is a full 3D crochet rose that looks detailed but is surprisingly manageable.
Use deep red for the classic romantic version, or try blush pink, ivory, burgundy, peach, dusty rose, or pale yellow.
Red Crochet Rose Pattern at a Glance
| Pattern Detail | Information |
|---|---|
| Skill Level | Advanced Beginner |
| Crochet Terms | US terminology |
| Yarn Weight | DK / Light #3 |
| Hook Size | 3.5 mm |
| Construction | One long petal strip, rolled and sewn |
| Approx. Flower Width | 3.5–4 in / 9–10 cm |
| Petal Sections | Small, medium and large |
| Main Stitches | sc, hdc, dc, tr |
| Special Detail | Pointed picot petals |
| Estimated Time | Approx. 1–2 hours |
| Best For | Bouquets, gifts, bags, hats, décor |
Why You’ll Love This Crochet Rose
This pattern looks complicated when finished, but the construction is actually very straightforward.
You crochet one continuous strip.
The first petals are smaller so they create the tightly curled center.
The middle petals become slightly taller.
The final petals are larger and more open, creating the dramatic outside layers.
This means there are no piles of separate petals to organize before assembly.
It also makes the finished flower very easy to customize.
Roll the strip tightly for a compact rosebud.
Roll it more loosely for a fuller garden rose.
Materials
For one medium rose:
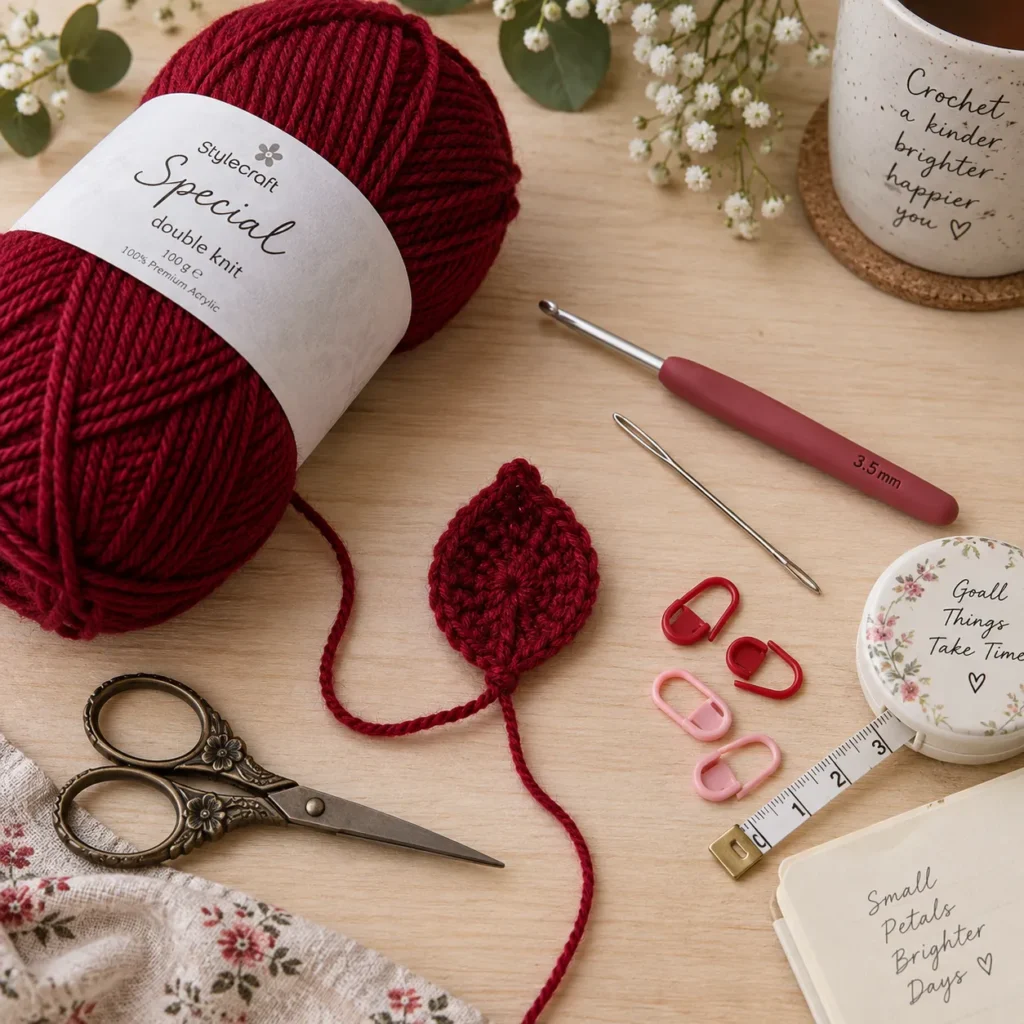
- Approx. 40–50 yards / 37–46 m deep-red DK yarn
- 3.5 mm crochet hook
- Yarn needle
- Scissors
- Stitch markers, optional
- Measuring tape
Optional for long-stem roses:
- Dark-green DK yarn
- Floral wire
- Green floral tape
- Thin wire for leaves
Cotton, mercerized cotton, cotton-acrylic blends, or smooth acrylic all work well.
For the crispest petal definition, choose yarn that is not excessively fluffy.
Crochet Abbreviations
| Abbreviation | Meaning |
|---|---|
| ch | Chain |
| sl st | Slip stitch |
| sc | Single crochet |
| hdc | Half double crochet |
| dc | Double crochet |
| tr | Treble crochet |
| st / sts | Stitch / stitches |
| sp | Space |
| sk | Skip |
| rep | Repeat |
Special Stitch – Picot
A tiny picot creates the subtle pointed tip visible on each rose petal.
Work:
ch 2
then:
sl st into the second chain from the hook
Continue the petal normally.
Pattern Notes
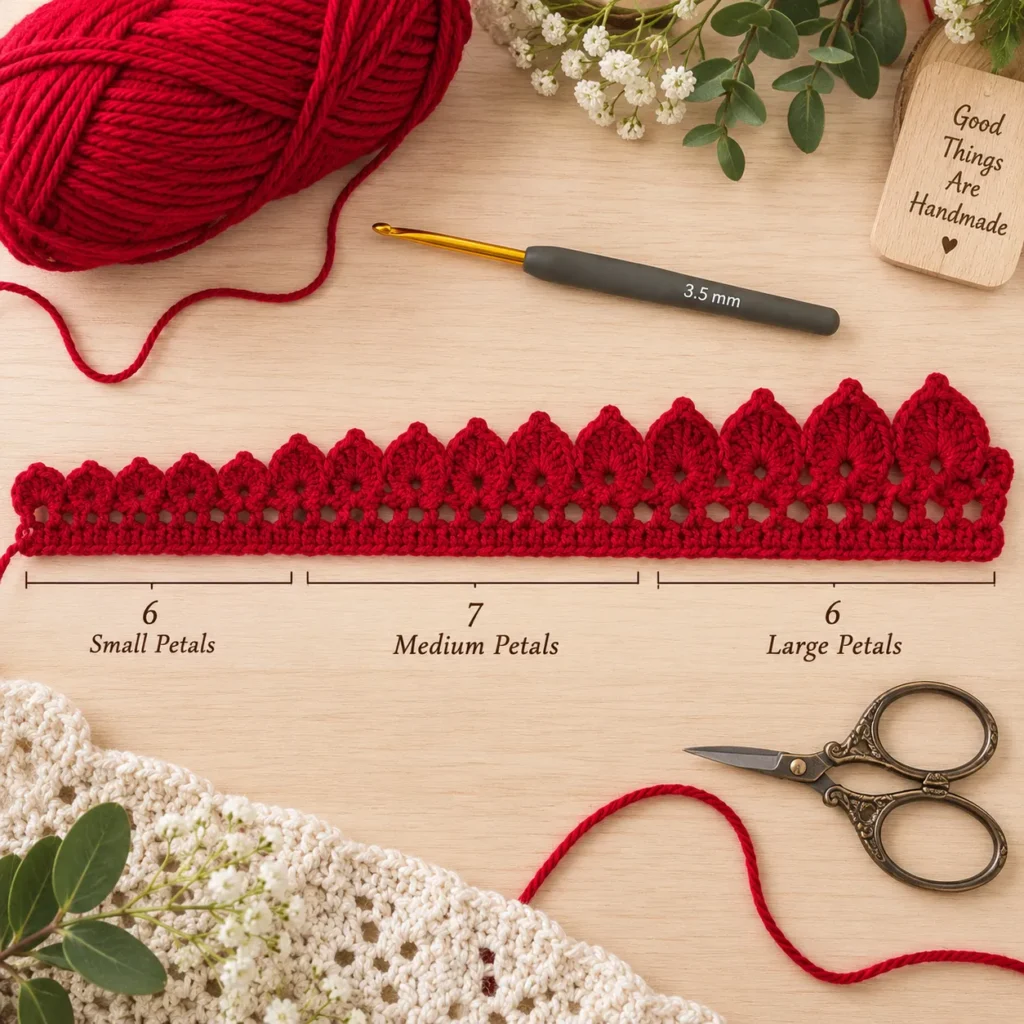
The rose strip contains approximately 19 petal sections.
They are divided into:
- 6 small petals
- 7 medium petals
- 6 large petals
The size gradually increases along the strip.
When assembling, always begin rolling from the small-petal end.
The bottom mesh edge becomes the base of the flower and will later be sewn together.
Part 1: Crochet the Foundation Strip
Using deep-red yarn:
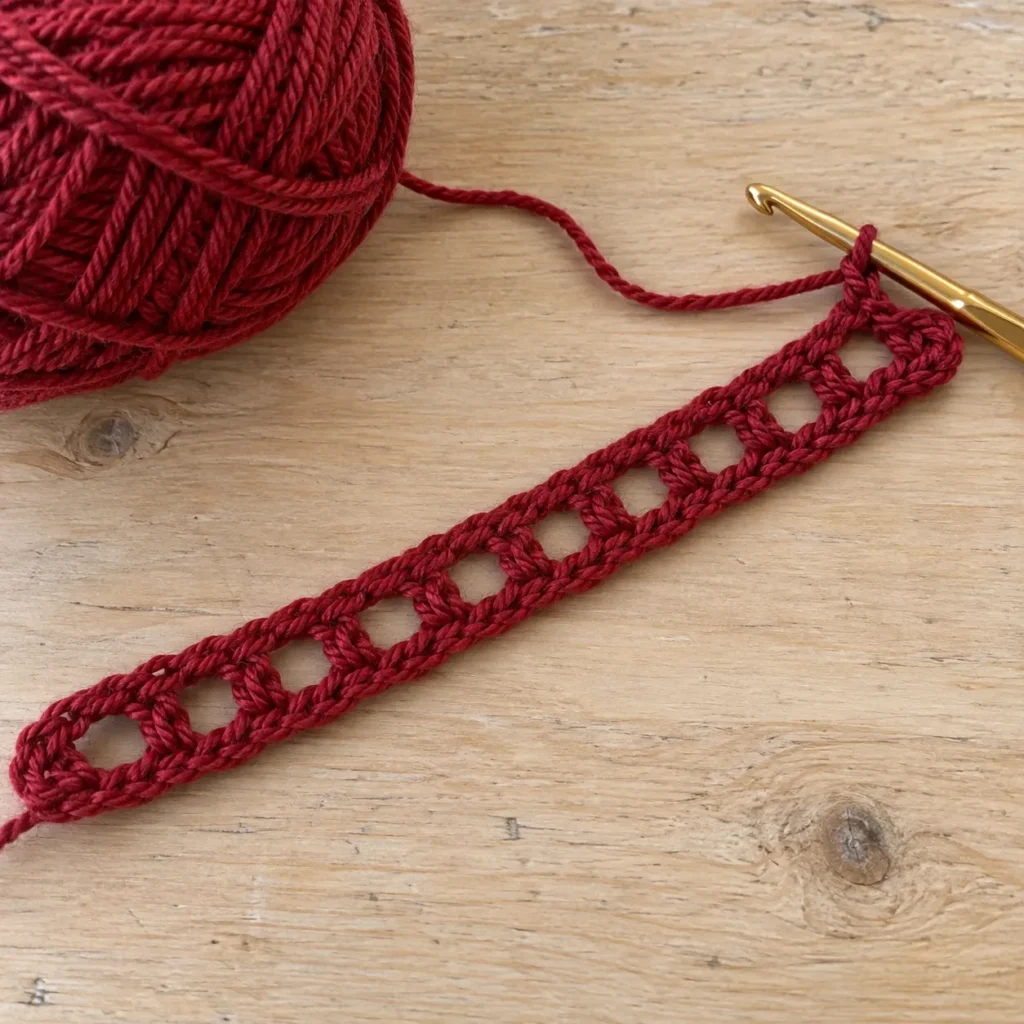
Ch 59.
Row 1
Sc in the second chain from the hook.
Then repeat:
ch 2, skip 2 chains, sc in next chain
across.
You should finish with approximately 19 ch-2 spaces.
These open spaces form the foundation for the individual rose petals.
Do not worry if the strip looks loose and simple at this stage.
The next row creates the flower shape.
Part 2: Crochet the Six Small Petals
Turn.
Move into the first ch-2 space.
For each of the first 6 spaces, work:
hdc, 2 dc, picot, 2 dc, hdc
all into the same ch-2 space.
Then:
sl st into the next sc
Repeat across the first six spaces.
These petals should be fairly compact.
They will become the tightly rolled center of the rose.
Part 3: Crochet the Seven Medium Petals
For the next 7 ch-2 spaces, work:
dc, 2 tr, picot, 2 tr, dc
into each space.
After each petal:
sl st into the next sc
These petals should stand noticeably taller than the first group.
Try to keep your tension consistent so the transition between sizes remains smooth.
Part 4: Crochet the Six Large Outer Petals
For the final 6 ch-2 spaces, work:
dc, 3 tr, picot, 3 tr, dc
into each space.
After each petal:
sl st into the next sc
Continue to the end.
Fasten off, leaving a long yarn tail approximately:
24–30 inches / 60–75 cm
This tail will be used to sew the rose together.
Part 5: Prepare the Strip for Rolling
Lay the completed strip flat with the petals pointing upward.
Locate the end with the smallest petals.
This will become the center of the rose.
Before rolling, gently shape each petal with your fingers.
Curve the small petals inward.
Leave the medium petals more relaxed.
Gently pull the large outer petals outward.
Do not block the strip flat.
A little natural curl helps the rose form properly.
Part 6: Roll the Rose Center
Take the first small petal.
Roll it tightly around itself.
The first 2–3 petals should create a compact spiral.
Hold the lower mesh edge together as you roll.
After the first few petals, insert your yarn needle through the bottom layers and make several securing stitches.
Do not sew through the visible tops of the petals.
Keep all assembly stitches near the lower foundation edge.
Part 7: Add the Middle Petal Layer
Continue rolling.
Allow the petals to overlap naturally rather than placing one directly behind another.
Rotate the flower slightly as you work.
The medium petals should surround the tight center without completely covering it.
Every few petals, sew through the bottom edge again.
This prevents the flower from unraveling while you finish rolling.
Part 8: Add the Large Outer Petals
Continue with the six largest petals.
At this stage, loosen the roll slightly.
The large petals should create a wide outer ring.
Instead of wrapping them tightly around the flower center, allow each one to flare outward.
When the final petal is positioned, sew firmly through the entire bottom of the rose several times.
Secure with a knot.
Weave the tail into the base.
Part 9: Shape the Finished Rose
Hold the flower upright.
Use your fingers to adjust each layer.
Keep the center petals tightly curled.
Gently pull the medium petals outward.
Open the large outside petals farther.
You can also bend individual pointed tips slightly backward.
Do not try to make the rose perfectly symmetrical.
Natural roses have slightly uneven petals, and small differences usually make the crochet version look better.
Optional: Make a Smaller Rosebud
For a smaller flower, stop after:
- 6 small petals
- 4 medium petals
Roll the shortened strip tightly.
This creates a compact rosebud that works beautifully beside larger flowers in a bouquet.
Optional: Make an Extra-Full Garden Rose
For a fuller flower, add another 3–4 large petal spaces to your foundation chain.
For each additional large petal, add:
3 foundation chains
to the starting chain.
Then work the same large-petal stitch combination.
A looser final roll will create a broad, open garden rose.
Optional Crochet Leaf
Using dark-green yarn:
Ch 14.
Starting in the second chain from the hook:
sl st
sc
hdc
dc in next 6 chains
hdc
sc
Work 3 sc into the final chain.
Continue along the opposite side:
sc
hdc
dc in next 6
hdc
sc
sl st
Fasten off.
For a bouquet, make one or two leaves per rose.
Optional Long Stem
Cut floral wire approximately:
11–12 inches / 28–30 cm
Bend the top into a small loop.
Sew or secure the rose base around the loop.
Wrap green floral tape tightly beneath the flower.
Attach one or two crochet leaves several inches down the stem.
Continue wrapping to the bottom.
Always fully cover the wire ends.
Rose Color Ideas
Classic Romance
Deep red
Valentine Rose
Bright crimson
Vintage Rose
Burgundy
Wedding Rose
Ivory or cream
Soft Romantic
Dusty pink
Spring Rose
Blush pink
Sunset Rose
Peach or coral
Golden Rose
Soft yellow
You can also combine different shades in one bouquet.
How to Make a Crochet Rose Bouquet
For a medium bouquet, crochet approximately 5–7 roses.
Use a mixture of:
- full open roses
- medium roses
- smaller rosebuds
Vary the stems slightly in length.
For an all-red arrangement, try combining:
- deep burgundy
- classic red
- crimson
This gives the bouquet more depth than using one identical shade.
Add several dark-green leaves between the flowers.
Project Ideas for Crochet Roses
These roses do not need stems.
You can also use them for:
- Tote bag decorations
- Crochet hats
- Headbands
- Hair accessories
- Wreaths
- Cushion embellishments
- Gift wrapping
- Cardigans
- Brooches
- Wedding décor
A flat-backed rolled rose is especially useful for accessories because the bottom can be sewn directly onto another crochet project.
Tips for a Beautiful Crochet Rose
Use a slightly smaller hook for firm petals.
Keep the first petals tightly rolled.
Gradually loosen the flower as the petals increase in size.
Sew through the bottom after every few petals.
Do not flatten the flower after assembly.
Shape each outer petal individually.
If the rose feels too tight, loosen only the outside layer rather than unrolling the entire flower.
Washing and Care
For roses without wire, gently hand wash in cool water.
Press excess water out with a towel.
Do not wring.
Reshape every petal while damp.
Lay flat to dry.
For wired long-stem roses, spot cleaning is preferable.

Frequently Asked Questions
Is this Red Roses Crochet Pattern beginner friendly?
Yes, for a confident beginner.
The crochet strip itself uses basic stitches. The main challenge is learning how tightly to roll and shape the flower.
Is the rose made from separate petals?
No.
This version is made from one continuous petal strip, which is then rolled into the flower.
How many petals does one rose have?
This version has approximately 19 visible petal sections:
6 small + 7 medium + 6 large.
Why are the petals different sizes?
The changing sizes help create a natural rose shape.
Small petals form the center and large petals create the open outer bloom.
Can I use worsted-weight yarn?
Yes.
The finished rose will be larger.
Try approximately a 4–4.5 mm hook depending on the yarn.
Can I make a rose without floral wire?
Absolutely.
Wire is only needed if you want a long-stem flower.
Can I use this rose on a bag or hat?
Yes.
Leave the back flat and sew the flower directly onto your project.
Save This Red Roses Crochet Pattern
Save this Red Roses Crochet Pattern to Pinterest for your next handmade flower project.
The simple strip construction makes it easy to create several roses in different colors for bouquets, gifts, Valentine’s Day, Mother’s Day, weddings, accessories, and home décor.