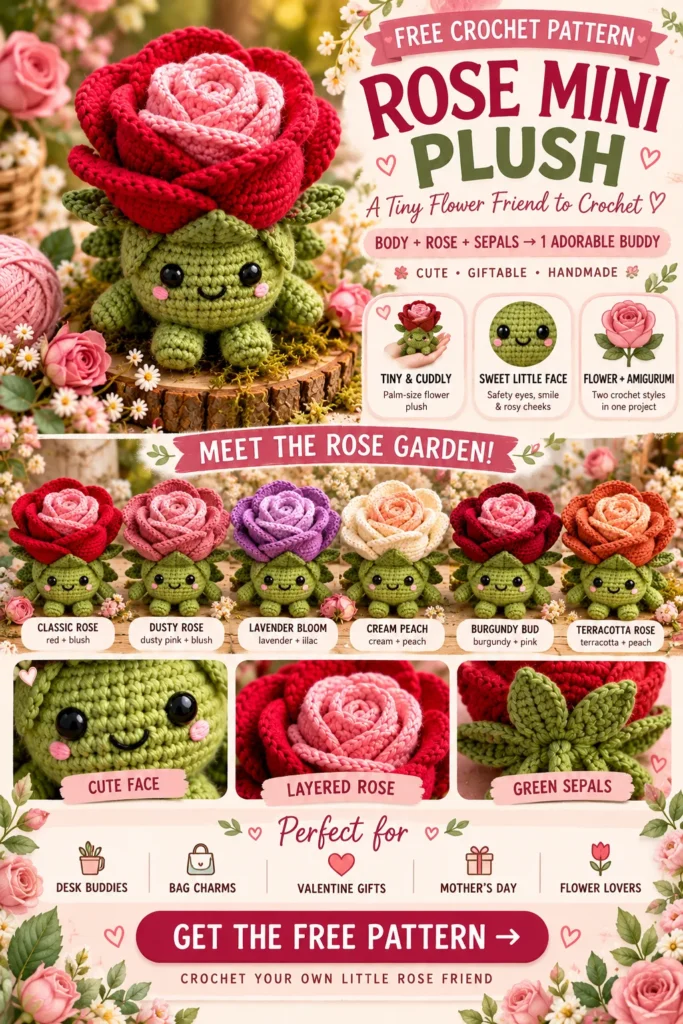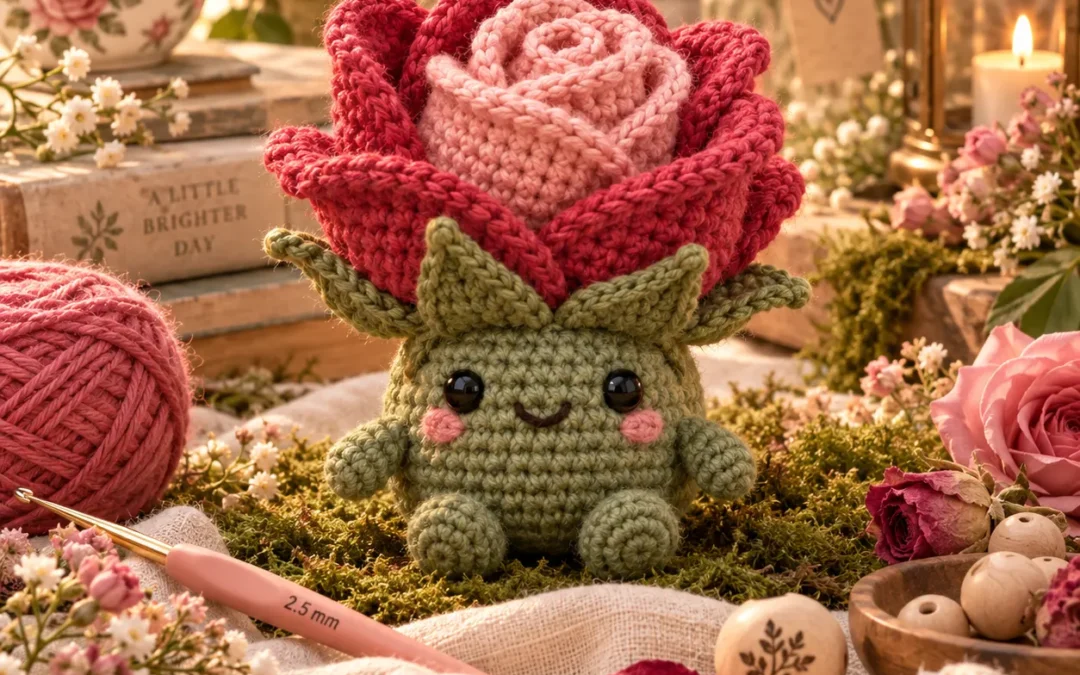
If you love flowers and tiny amigurumi projects, this Rose Mini Plush Crochet Pattern combines both into one adorable handmade project.
This little rose buddy features a softly stuffed moss-green body, a dimensional crochet rose blooming from the top, a sweet embroidered smile, tiny arms and feet, and layered petals in blush pink and deep rose.
The flower is built in separate sections, which makes the project much easier than it first appears. You’ll crochet the little body, make a rolled inner rose, surround it with larger outer petals, add a five-point green sepal underneath, and then assemble everything into one miniature flower plush.
It makes a lovely handmade gift, desk companion, shelf decoration, Valentine’s project, Mother’s Day gift, nursery accent, or addition to a crochet flower collection.
Pattern at a Glance
| Detail | Pattern Information |
|---|---|
| Skill Level | Confident Beginner |
| Crochet Terms | US terminology |
| Yarn | Sport / light DK cotton |
| Hook | 2.5 mm |
| Construction | Separate body, rose and sepals |
| Finished Height | Approx. 3½–4 in / 9–10 cm |
| Eyes | 6 mm safety eyes or embroidery |
| Stuffing | Polyester fiberfill |
| Main Stitches | sc, hdc, dc, tr, inc, dec, sl st |
| Approx. Time | 2–3 hours |
The finished plush is intentionally small enough to sit in the palm of your hand while still having enough space for the layered flower and facial details.
Materials
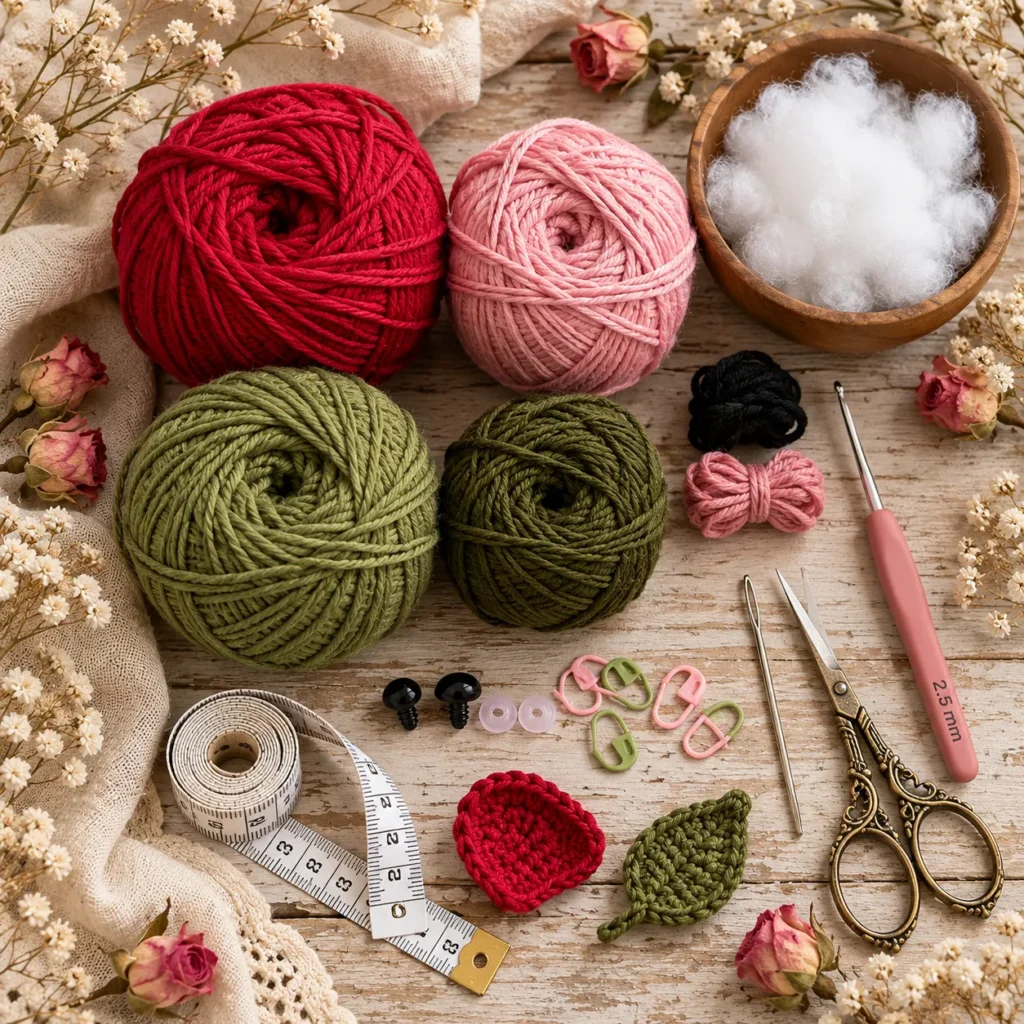
You’ll need sport-weight or light DK cotton yarn in deep rose red, blush pink, moss green and olive green, plus a very small amount of black yarn for the mouth and dusty pink for the cheeks.
Use a 2.5 mm crochet hook, polyester fiberfill, two 6 mm safety eyes, yarn needle, scissors and stitch marker.
For a plush intended for a baby or very young child, replace plastic safety eyes with securely embroidered eyes.
Abbreviations
| Abbreviation | Meaning |
|---|---|
| MR | Magic Ring |
| ch | Chain |
| sc | Single Crochet |
| hdc | Half Double Crochet |
| dc | Double Crochet |
| tr | Treble Crochet |
| inc | 2 sc in same stitch |
| dec | Single crochet decrease |
| sl st | Slip Stitch |
| BLO | Back Loop Only |
| FO | Fasten Off |
Part 1: Crochet the Green Plush Body
Use moss-green yarn.
Round 1
MR, 6 sc.
6 sts
Round 2
Inc around.
12 sts
Round 3
(sc, inc) around.
18 sts
Round 4
(2 sc, inc) around.
24 sts
Round 5
(3 sc, inc) around.
30 sts
Rounds 6–10
Sc around.
30 sts
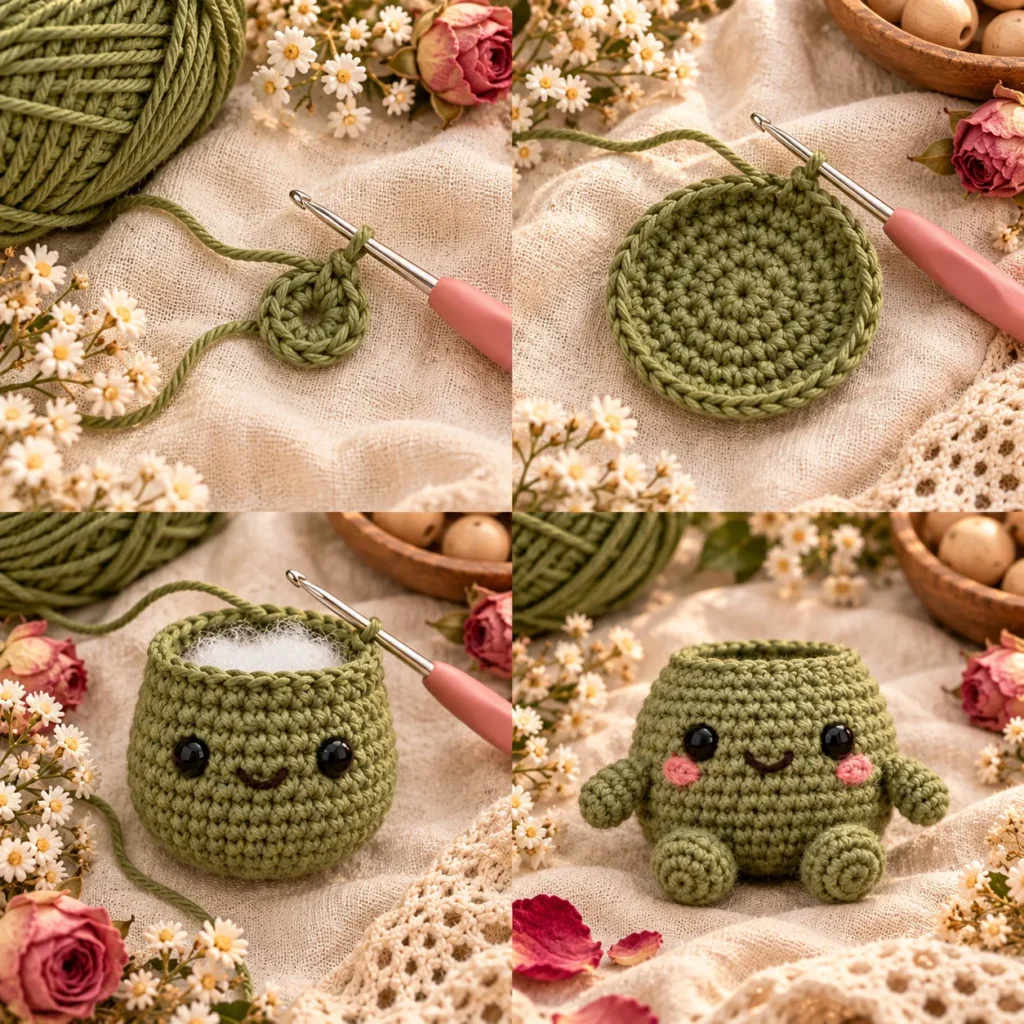
The body should now resemble a small rounded cup.
Before beginning the decreases, add the face.
Insert the safety eyes between Rounds 7 and 8, approximately 5–6 stitches apart.
Embroider a tiny curved smile one round underneath.
Add two small dusty-pink horizontal stitches beside the eyes for blush.
Round 11
(3 sc, dec) around.
24 sts
Round 12
(2 sc, dec) around.
18 sts
Begin stuffing firmly but gently.
Round 13
(sc, dec) around.
12 sts
Add more stuffing.
Round 14
Dec around.
6 sts
Fasten off and close the opening.
The top closure will eventually be hidden beneath the rose.
Part 2: Add the Tiny Feet and Arms
For each foot, use moss-green yarn.
MR and work 6 sc into the ring.
Work one additional round of 6 sc.
Fasten off with a sewing tail.
Make two.
Lightly flatten them rather than heavily stuffing them and sew them toward the front underside of the body.
For each arm:
Ch 6.
Starting in the second chain from the hook, sl st back across the chain.
Fasten off with a long sewing tail.
Make two and sew one to each side of the body.
The arms should curve naturally rather than sticking straight outward.
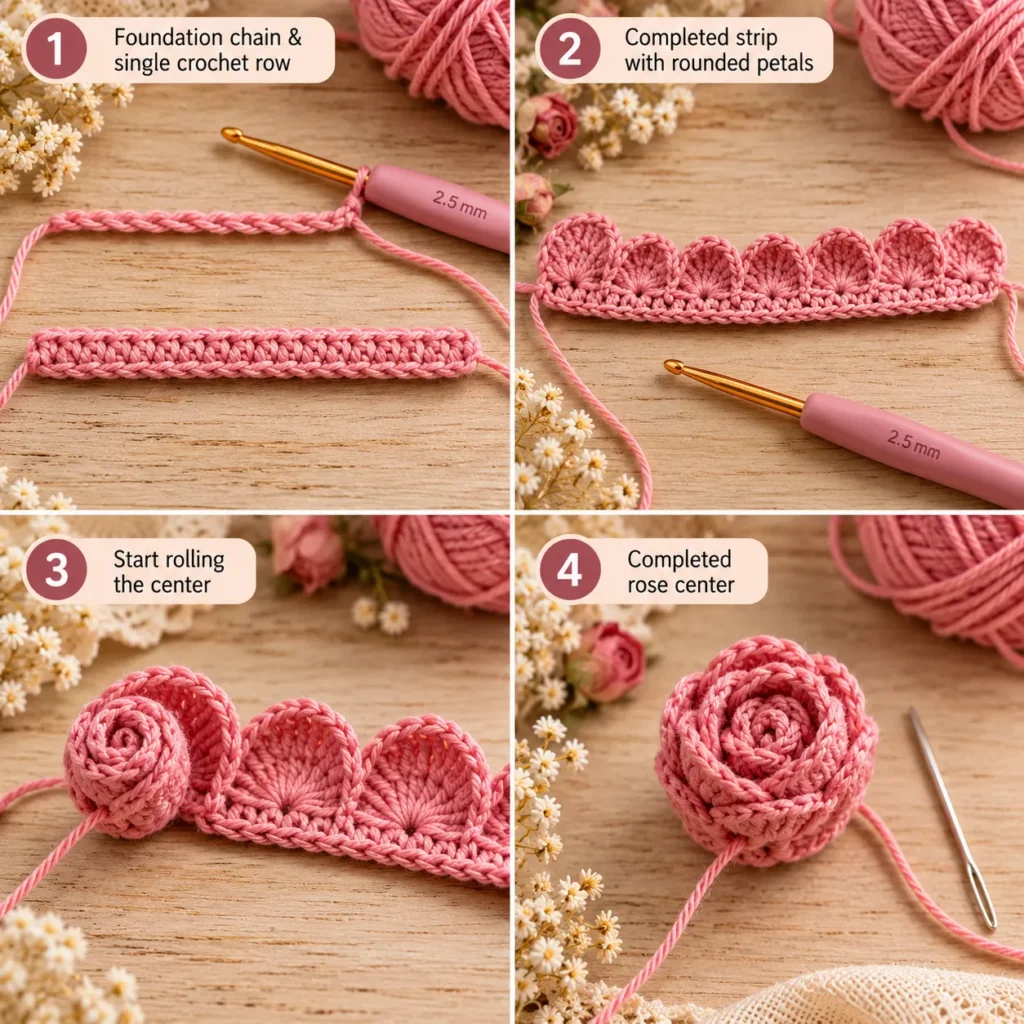
Part 3: Crochet the Blush-Pink Rose Center
The center of the flower is made using a small rolled petal strip.
Using blush-pink yarn:
Ch 31.
Starting in the second chain from the hook:
Work 1 sc in every chain across.
You should have 30 sc.
Turn.
For the petal row, repeat:
sl st in next stitch, 5 dc in next stitch
across the strip.
This produces approximately 15 rounded petals.
Fasten off, leaving a long sewing tail.
Roll the Inner Rose
Begin at one end of the strip.
Roll the first few petals very tightly to form the rosebud center.
Continue rolling while allowing the remaining petals to loosen slightly.
Thread the long tail onto your yarn needle and sew through the bottom layers several times.
The finished center should stay compact and rounded.
Part 4: Crochet the Deep-Rose Outer Petals
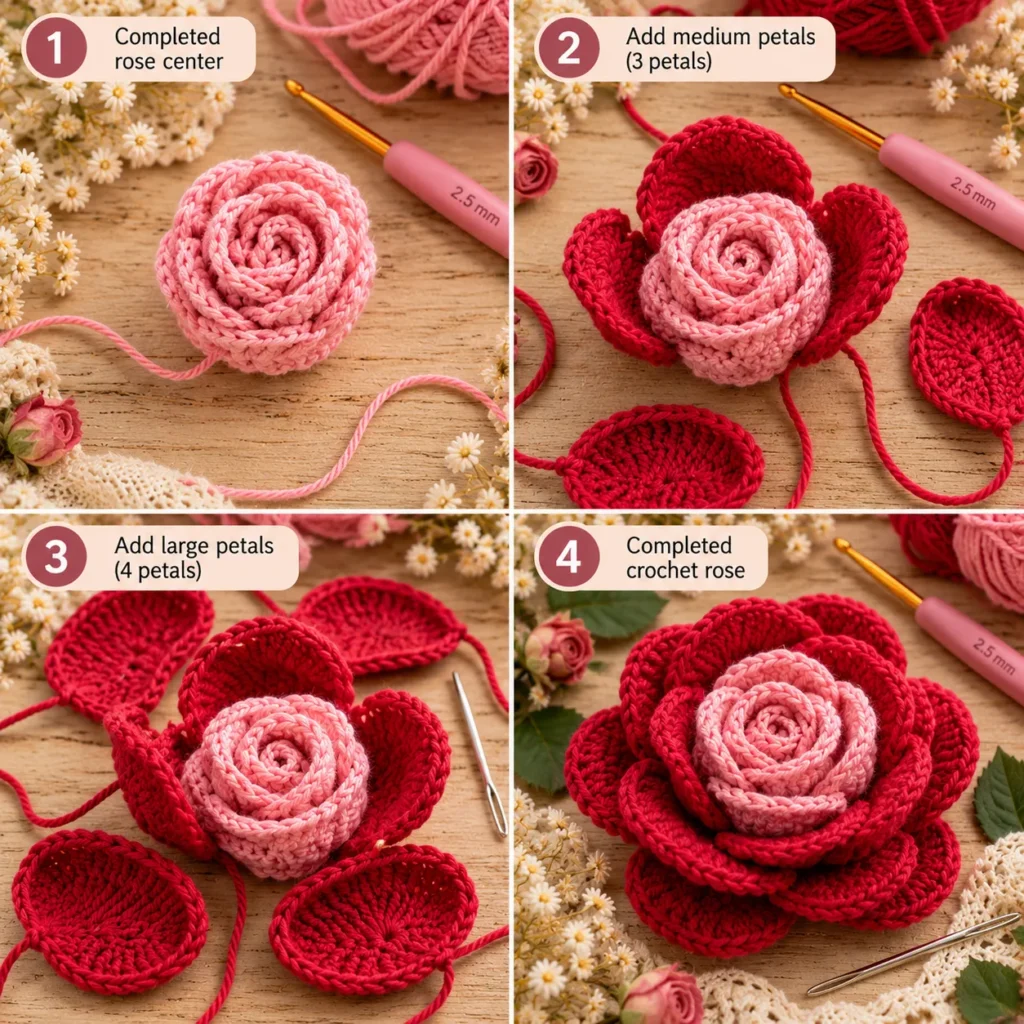
The larger red petals are worked individually and sewn around the blush center.
Make 3 medium petals and 4 large petals.
Medium Petal
Using deep-rose yarn:
Ch 5.
Beginning in the second chain from the hook work:
sc, hdc, dc
Work 5 dc into the final chain.
Now continue along the opposite side of the foundation chain:
dc, hdc, sc
Sl st to finish.
Fasten off with a long sewing tail.
Large Petal
Ch 6.
Beginning in the second chain from the hook work:
sc, hdc, dc, tr
Work 7 tr into the last chain.
Continue down the opposite side:
tr, dc, hdc, sc
Fasten off.
Assemble the Rose
Place the three medium petals around the blush-pink rose center.
Allow each petal to overlap slightly.
Sew them securely around the bottom of the rosebud.
Next position the four large petals outside the medium layer.
Angle them slightly outward to create a naturally opening bloom.
The completed flower should have a tight pink center surrounded by richer deep-red petals.
Part 5: Crochet the Five-Point Sepal
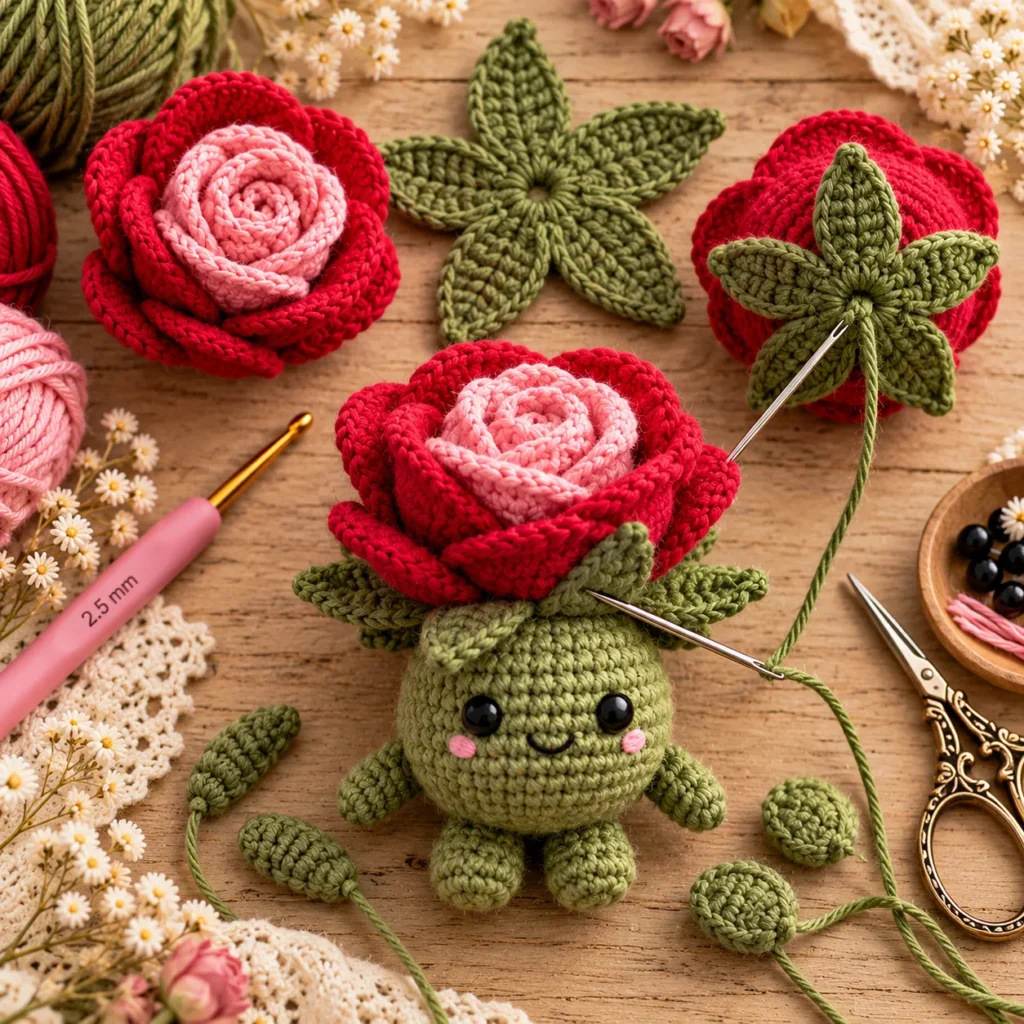
The green sepal sits underneath the flower and helps the rose transition naturally into the plush body.
Using olive-green yarn:
MR.
Work 5 sc into the ring.
Do not close completely until the points have been added.
For each of the five stitches:
Ch 6.
Starting in the second chain from the hook work:
sl st, sc, hdc, dc, tr
Sl st into the next stitch of the center ring.
Repeat until you have five pointed sepals.
Fasten off with a long sewing tail.
Gently stretch each point into a narrow leaf shape.
Attach the Sepal to the Rose
Place the green star underneath the completed flower.
The five points should extend visibly between the red outer petals.
Sew the center securely to the underside of the flower.
Do not stitch the tips completely flat—letting them lift slightly gives the flower more dimension.
Attach the Flower to the Body
Center the completed rose over the top of the green body.
Use the sepal tail or a separate strand of green yarn to stitch through:
the sepal base, the bottom of the rose, and the upper portion of the plush body.
Work around the flower several times until it cannot wobble.
Shaping the Finished Rose
After assembly, spend a minute shaping the petals.
Keep the blush center curled tightly.
Pull the medium petals outward just slightly.
Allow the large outer petals to open the most.
You can also gently curl the top edge of an outer petal backward with your fingers.
This small amount of shaping makes a surprisingly big difference.
Optional Details
A tiny embroidered highlight inside each eye can make the face look more expressive.
You can also add miniature embroidered freckles, a tiny heart on the body, additional leaves behind the flower, or a small chain-loop keyring attachment.
If you plan to use the plush as a keychain or bag charm, reinforce the hanging loop by sewing through several body stitches rather than attaching it only to the rose.
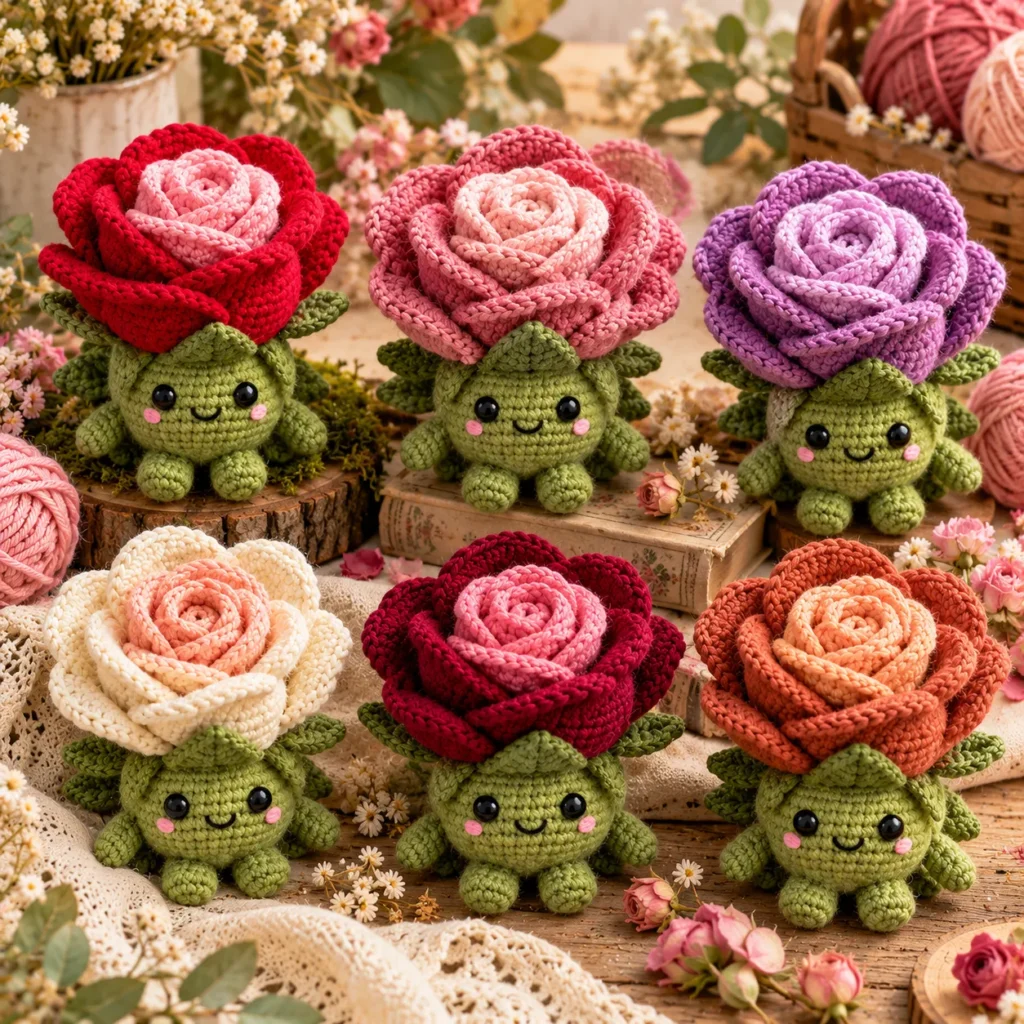
Color Ideas
The same pattern can create completely different flower characters.
Try a classic red rose with a pale pink center, dusty rose with blush petals, cream with peach, lavender with lilac, burgundy with dusty pink, terracotta with peach, or even a fantasy blue rose with pale-sage leaves.
Make It Into a Keychain
Use sport-weight cotton and keep the original proportions.
Before attaching the flower, create a strong chain loop at the top rear of the green body.
Pass a metal keyring through the loop after assembly.
A mini rose plush makes a cute handmade bag charm or backpack accessory.
Make a Tiny Version
Use fingering-weight cotton with a 2.0 mm hook.
Reduce the body by stopping the increases at 24 stitches instead of 30.
Use fewer petals around the rose.
The finished piece can become a tiny keychain, ornament, or desk buddy.
Make a Larger Rose Plush
Use worsted-weight yarn with a 3.5–4 mm hook.
Follow the same stitch counts.
The larger yarn automatically scales up the entire design.
You may need 8–10 mm safety eyes instead of 6 mm eyes.
Tips for a Professional Finish
The most important detail is keeping your crochet tension firm enough that the stuffing cannot show through.
Do not overstuff the body, because too much filling can stretch the stitches and distort the shape.
Roll the pink rose center tightly, then gradually loosen the outer petals.
Sew through multiple layers when attaching the rose so the flower cannot rotate.
Finally, make sure the five sepals remain visible beneath the bloom rather than disappearing completely underneath it.
Frequently Asked Questions
Is the Rose Mini Plush beginner friendly?
It is suitable for a confident beginner who knows basic amigurumi stitches, increases, decreases, working in rounds, and simple sewing.
How large is the finished plush?
With sport/light DK yarn and a 2.5 mm hook, it should measure approximately 3½–4 inches / 9–10 cm tall.
Can I use acrylic yarn?
Yes. Smooth cotton gives especially crisp petals, but lightweight acrylic works well too.
Can I embroider the eyes?
Yes, and embroidered eyes are preferable if the finished plush is intended for a young child.
Do I have to add the tiny arms and feet?
No. They are decorative and can be omitted for a simpler rose-bud plush.
Can I make the rose all one color?
Absolutely. A monochrome rose can look especially elegant.
Can I use chenille yarn?
You can, but the petals will become much larger and softer and some stitch definition will be lost.
Can I turn it into a bag charm?
Yes. Add a reinforced yarn loop or hardware attachment before final assembly.
Save This Rose Mini Plush Crochet Pattern
Save this Rose Mini Plush Crochet Pattern to Pinterest for your next cute amigurumi project.
The combination of a smiling little green character, tightly rolled rosebud center, layered outer petals, pointed sepals, and endless color combinations makes this a charming small crochet project for gifts, collectibles, desk décor, flower lovers, and handmade accessories.