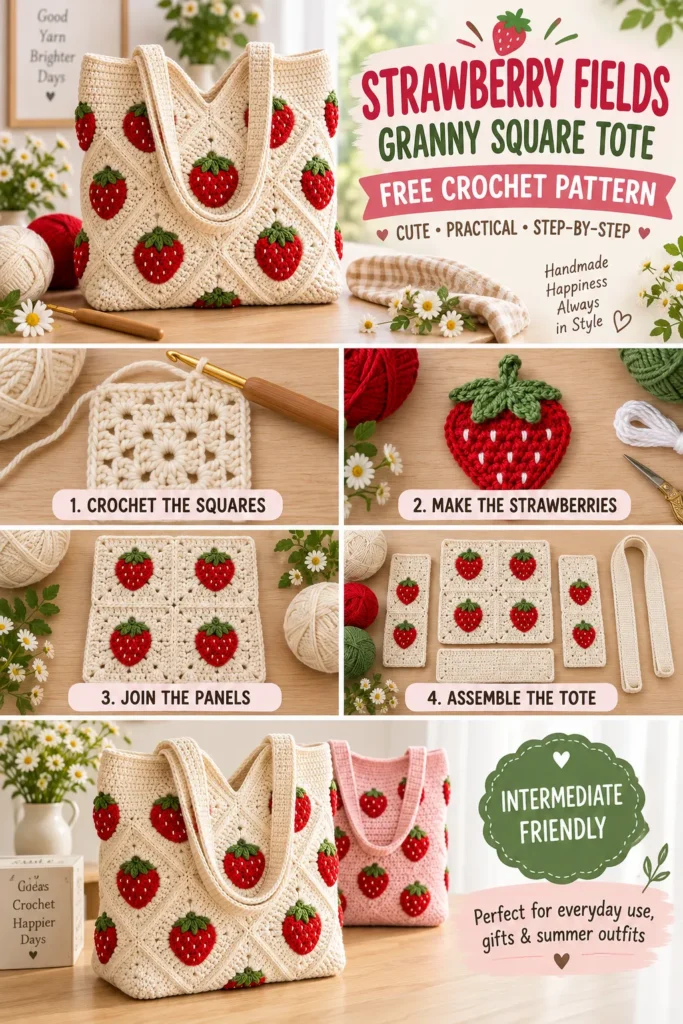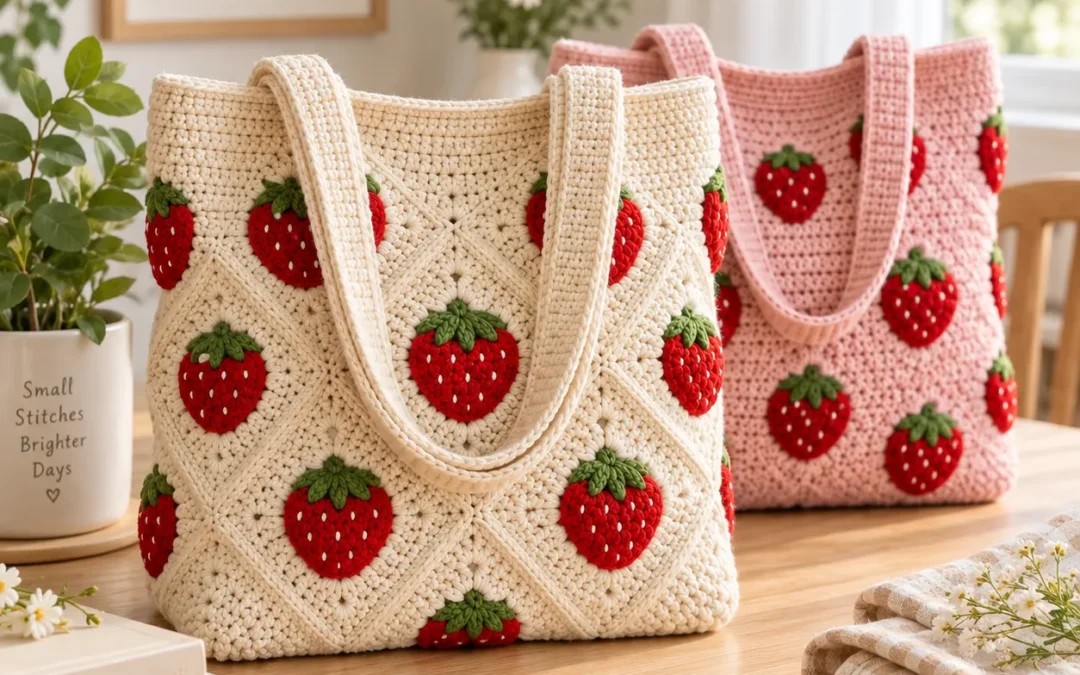
Sweet strawberries, soft cream crochet, and a practical everyday shape come together in this Strawberry Fields Granny Square Tote.
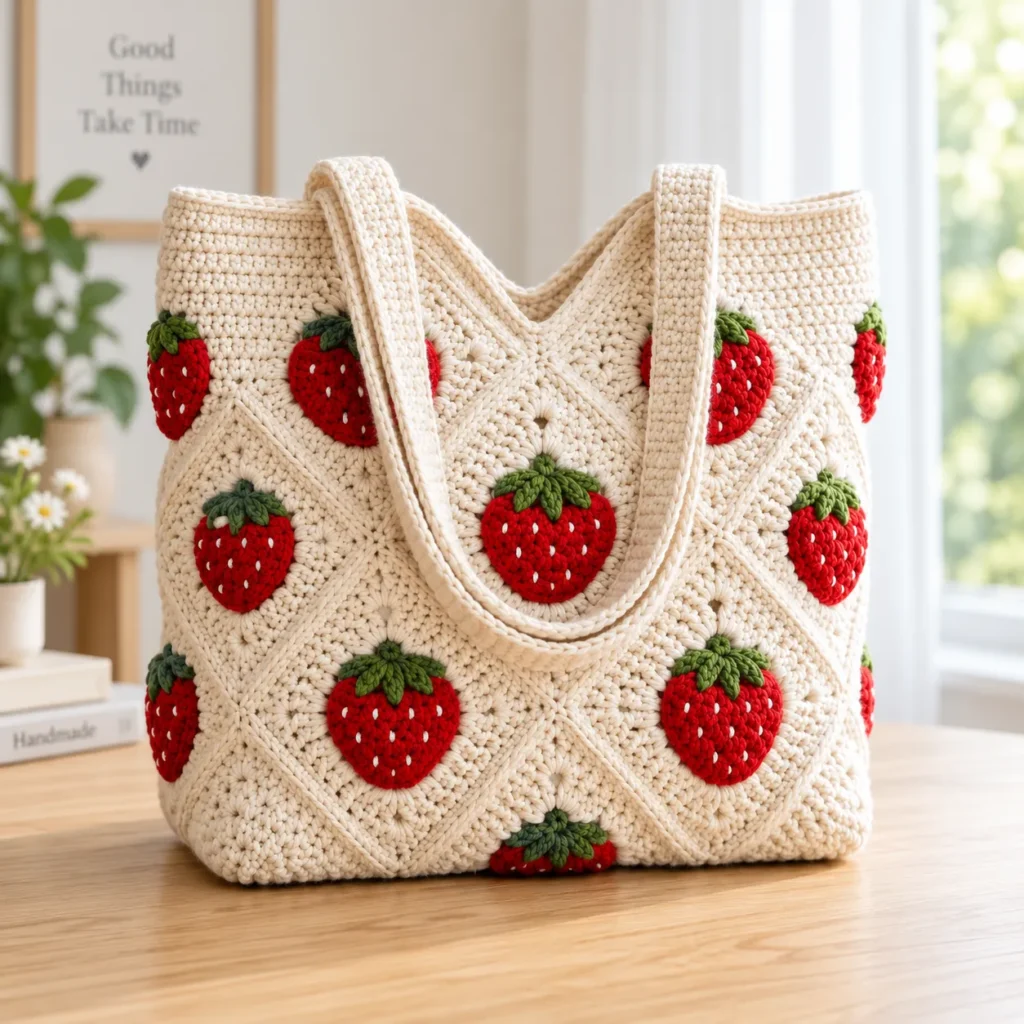
This cottagecore-inspired crochet bag is made from individual solid granny squares decorated with dimensional strawberry appliqués. The squares are joined to create the front, back, sides, and base before sturdy crochet handles are added.
The modular construction makes the project easy to work on one piece at a time, while the raised berries add just enough texture and color to make the finished tote stand out.
Use classic cream with bright red strawberries, create a blush-pink version, or mix several background colors for a completely different look.
Strawberry Granny Square Tote Pattern at a Glance
| Pattern Detail | Information |
|---|---|
| Skill Level | Intermediate |
| Crochet Terms | US terminology |
| Yarn Weight | Worsted / Medium #4 |
| Recommended Fiber | Cotton or cotton blend |
| Hook Size | 4.0 mm |
| Construction | 14 solid granny squares |
| Approx. Finished Width | 10 in / 25 cm |
| Approx. Finished Height | 10 in / 25 cm |
| Approx. Depth | 5 in / 12.5 cm |
| Handles | Approx. 24–26 in |
| Strawberry Appliqués | 12 |
| Main Techniques | Double crochet, single crochet, joining, appliqué, embroidery |
The final dimensions may vary slightly depending on yarn choice, hook size, and individual crochet tension.
Why You’ll Love This Strawberry Crochet Tote
The combination of neutral crochet and colorful strawberries gives this bag a cheerful handmade look without making the design difficult to coordinate with everyday outfits.
Instead of crocheting one large bag body, this version is constructed from smaller granny squares. That makes the project portable and allows the individual components to be blocked before assembly.
The strawberry appliqués are made separately, so their placement can also be customized.
A cream background creates a classic cottagecore appearance, while blush pink, pale sage, butter yellow, or light blue backgrounds can give the same pattern a different personality.
Materials
For one medium tote:
- Approximately 550–650 yards / 500–595 m worsted-weight cream cotton yarn
- Approximately 100–130 yards / 90–120 m red yarn
- Approximately 30–40 yards / 27–37 m green yarn
- Small quantity of white yarn or embroidery thread
- 4.0 mm crochet hook
- Tapestry needle
- Scissors
- Stitch markers
- Blocking mat and pins, optional
- Small quantity of fiberfill, optional
- Fabric for lining, optional
- Magnetic snap, optional
Cotton works particularly well for crochet bags because it creates defined stitches and usually stretches less than many soft acrylic yarns.
Crochet Abbreviations
| Abbreviation | Stitch |
|---|---|
| ch | chain |
| sc | single crochet |
| hdc | half double crochet |
| dc | double crochet |
| sl st | slip stitch |
| st / sts | stitch / stitches |
| sp | space |
| inc | increase |
| dec | decrease |
| MR | magic ring |
| RS | right side |
| WS | wrong side |
Pattern Notes
This tote uses 14 solid granny squares.
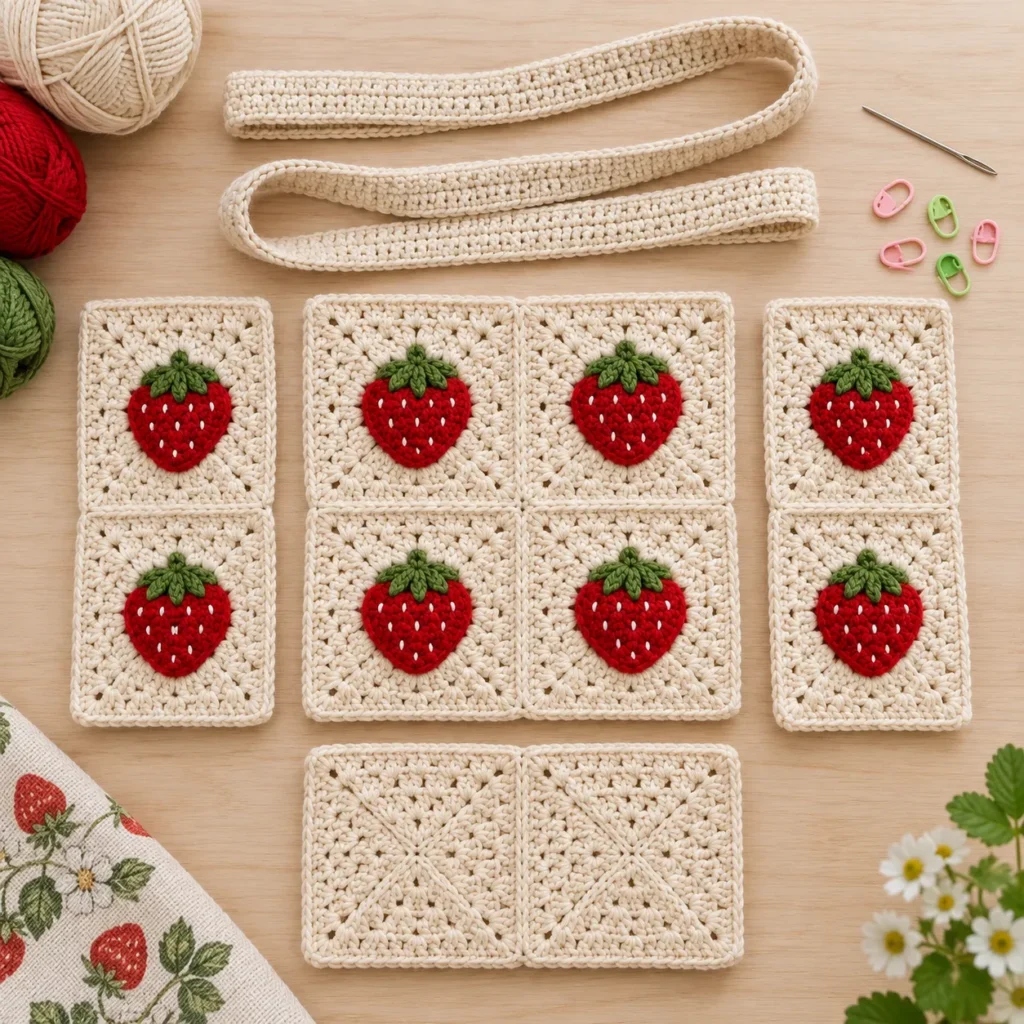
Four squares form the front.
Four squares form the back.
Two squares form each side.
Two additional squares create the bottom.
Twelve strawberry appliqués are attached before final bag assembly. The two bottom squares remain undecorated.
Each granny square should measure approximately 5 × 5 inches / 12.5 × 12.5 cm after blocking.
The starting ch 3 counts as the first dc unless otherwise stated.
Part 1: Crochet the Solid Granny Squares
Use the main cream yarn.
Make 14 squares total.
Round 1
Create a magic ring.
Ch 3.
Work 2 dc into the ring.
Ch 2.
Work:
3 dc, ch 2
three times.
Join with a sl st to the top of the beginning ch 3.
Pull the magic ring closed.
There should now be four groups of three double crochet stitches.
Round 2
Sl st across to the first corner space.
Ch 3.
Work:
1 dc, ch 2, 2 dc
into the same corner.
Work 1 dc in every stitch across the side.
At the next corner work:
2 dc, ch 2, 2 dc
Continue around all four sides.
Join with a sl st.
Rounds 3–6
Continue using the same construction.
Work 1 dc into every stitch along each side.
Inside every corner space work:
2 dc, ch 2, 2 dc
Join each round with a sl st.
Continue until the square measures approximately 5 inches / 12.5 cm.
Fasten off.
Repeat until there are 14 matching squares.
Blocking the Squares
Blocking before assembly helps the panels line up more evenly.
Lightly dampen each square and shape it to approximately 5 × 5 inches.
Pin the corners into position and allow the pieces to dry fully.
Try to keep all 14 squares close to the same dimensions.
Part 2: Crochet the Strawberry Appliqués
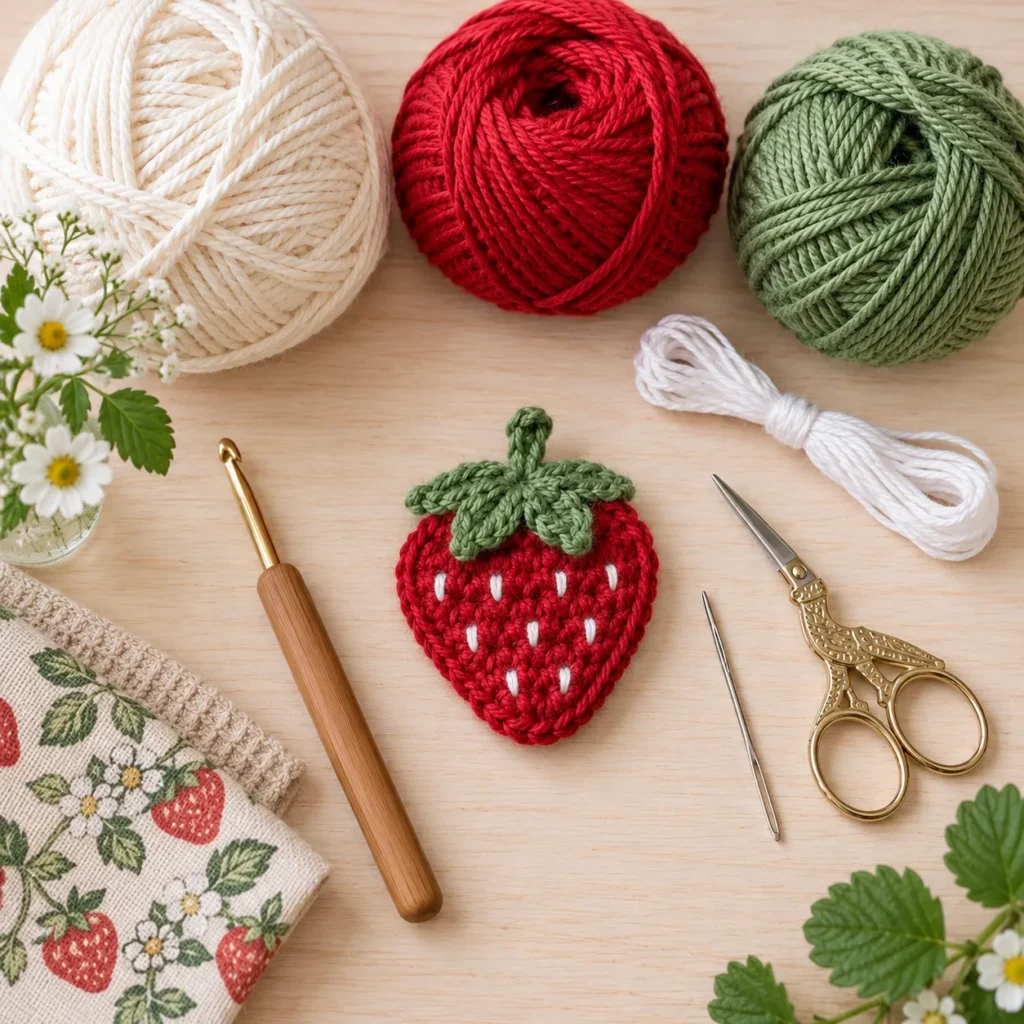
Make 12 strawberries.
The appliqués are worked from the pointed bottom upward.
Strawberry Body
Use red yarn.
Row 1
Ch 2.
Work 2 sc into the second ch from the hook.
Ch 1 and turn.
2 sts
Row 2
Work 2 sc into each stitch.
Ch 1 and turn.
4 sts
Row 3
Work:
1 sc, 2 sc in next st
twice.
Ch 1 and turn.
6 sts
Row 4
Work:
1 sc in next 2 sts, 2 sc in next st
twice.
Ch 1 and turn.
8 sts
Row 5
Work:
1 sc in next 3 sts, 2 sc in next st
twice.
Ch 1 and turn.
10 sts
Row 6
Sc across all 10 stitches.
Fasten off, leaving a long tail for sewing.
The small triangle-shaped piece should have a rounded upper edge and pointed lower end.
For slightly puffier strawberries, leave the sewing edge partly open later and add a tiny amount of fiberfill before closing.
Part 3: Crochet the Strawberry Leaves
Use green yarn.
Create a magic ring.
Repeat the following sequence 5 times:
Ch 4.
Sl st into the second chain from the hook.
Sc in the next chain.
Hdc in the final chain.
Sl st back into the magic ring.
Pull the center closed.
Fasten off while leaving enough yarn for sewing.
Position the leafy top across the widest section of the red strawberry.
Sew securely.
Add the Strawberry Seeds
Thread a tapestry needle with thin white yarn or embroidery thread.
Add approximately 8–12 short stitches across each strawberry.
Keep the seed stitches small and slightly angled.
Space them irregularly rather than forming perfectly straight rows for a more natural strawberry appearance.
Repeat for all twelve berries.
Attach the Strawberries to the Granny Squares
Center one strawberry on each of the 12 squares that will form the front, back, and side panels.
Leave the two bottom squares undecorated.
Pin each berry into position before sewing.
Using red yarn, stitch around the edge of the berry.
Use green yarn around the leafy section.
If a dimensional strawberry is preferred, add a very small amount of fiberfill beneath the berry before closing the final few stitches.
Part 4: Build the Front and Back Panels
Create two identical 2 × 2 arrangements.
Each panel uses four strawberry granny squares:
[ Square ] [ Square ]

[ Square ] [ Square ]
Join the squares using whip stitch, mattress stitch, or flat slip-stitch joining.
Try to keep the joining tension relaxed enough that the panels remain flat.
Each completed panel should measure approximately 10 × 10 inches.
Build the Side Panels
Arrange two strawberry squares vertically.
Join them together.
Repeat for the second side.
Each side panel should measure approximately:
5 inches wide × 10 inches tall.
Build the Bottom Panel
Take the two undecorated cream squares.
Join them side by side.
The finished base should measure approximately:
10 × 5 inches.
Part 5: Assemble the Tote
Lay the front panel flat.
Attach one side panel along the left edge and the second side panel along the right edge.
Attach the back panel to the remaining edges of both side panels.
The work should now resemble an open rectangular bag.
Position the bottom panel beneath the opening.
Align all four sides carefully.
Use stitch markers to secure the corners before sewing.
Whip stitch or slip stitch the bottom securely to the front, back, and both side panels.
Turn the tote right side out.
Part 6: Crochet the Top Border
Join cream yarn at one side seam.
Round 1
Ch 1.
Work sc evenly around the entire upper edge.
Join with a sl st.
Round 2
Ch 1.
Sc in every stitch around.
Join.
Round 3
Repeat Round 2.
Fasten off and weave in the ends.
These rounds help reinforce the opening and provide a cleaner surface for attaching the handles.
Part 7: Crochet the Handles
Make 2.
Use cream yarn.
Ch until the foundation measures approximately 26 inches / 66 cm.
For most worsted yarns, this will be around 95–105 chains.
Row 1
Sc into the second chain from the hook and in every chain across.
Ch 1 and turn.
Rows 2–6
Sc in every stitch.
Ch 1 and turn after each row.
After the final row, fasten off with a long yarn tail.
For a thicker handle, fold the strip lengthwise and whip stitch the long edges together.
This creates a rounded strap with additional structure.
Repeat for the second handle.
Attach the Handles
Position the first handle on the front panel.
Place each end approximately 2–2.5 inches from the side edge.
Use stitch markers to check that both ends are positioned evenly.
Sew the handle firmly to the inside of the tote.
Create a rectangle of stitches around the attachment point and add an X through the center for reinforcement.
Repeat with the second handle on the back panel.
Optional Fabric Lining
A fabric lining can help the tote maintain its shape and prevents small objects from working through the crochet stitches.
Measure the finished interior after assembly rather than relying only on the pattern dimensions.
A simple rectangular lining with boxed bottom corners works well.
A small interior pocket or magnetic snap can also be added before the lining is sewn into the bag.
Strawberry Tote Color Ideas
The classic cream-and-red combination gives the bag its recognizable strawberry-field look, but the pattern is easy to adapt.
A blush pink bag with red berries creates a sweeter pastel version.
A sage-green background with pink strawberries creates a botanical palette.
A pale blue background with red berries gives the project a brighter summer feel.
For something more subtle, keep the cream background and use muted brick red and olive green for the appliqués.
How to Make a Larger Tote
The modular construction makes resizing straightforward.
For a wider tote, use three squares across instead of two on the front and back.
For additional height, use three rows of squares.
The side and bottom panels need to be expanded by the same number of squares so the pieces continue to line up during assembly.
Remember that a larger tote will require additional yarn and stronger handle reinforcement.
Tips for a Structured Crochet Bag
Cotton yarn helps reduce excessive stretching.
Blocking the squares before joining makes the seams easier to align.
Keep the bottom join firm but avoid pulling the yarn so tightly that the base puckers.
Handle attachment is one of the highest-stress areas of a tote, so several passes with the yarn needle can improve durability.
A lining can add additional structure when the bag will regularly carry heavier objects.
Frequently Asked Questions
Is this Strawberry Granny Square Tote beginner friendly?
The individual stitches are straightforward, but the project requires multiple components, appliqué work, seaming, embroidery, and handle attachment.
It is therefore best suited to an adventurous beginner or intermediate crocheter.
Can acrylic yarn be used?
Yes.
However, acrylic typically creates a softer bag and may stretch more than cotton.
A fabric lining can help compensate for additional stretch.
Can the strawberries be left flat?
Yes.
Simply sew the appliqués directly onto the granny squares without adding fiberfill.
How many granny squares are needed?
This version uses 14 solid granny squares: eight for the front and back, four for the sides, and two for the base.
How many strawberries are needed?
Make 12 strawberry appliqués.
The two squares used for the bottom remain plain.
Can the tote be made in pink?
Yes.
Replace the cream main color with blush, dusty pink, or pastel rose while keeping the strawberries red and green.
Finished Measurements
| Measurement | Approximate Size |
|---|---|
| Width | 10 in / 25 cm |
| Height | 10 in / 25 cm |
| Depth | 5 in / 12.5 cm |
| Handle Length | 24–26 in / 61–66 cm |
| Individual Square | 5 in / 12.5 cm |
More Free Crochet Bag Patterns
Once related posts are published, link this article naturally to projects such as a Floral Granny Square Tote, Sunflower Granny Square Bag, Cherry Crochet Tote, Daisy Granny Square Bag, and Crochet Market Bag.
That creates a strong internal cluster around the crochet-bag keywords people are already finding through Pinterest.
Save This Strawberry Crochet Tote on Pinterest
Save this Strawberry Fields Granny Square Tote free crochet pattern for a future project and come back whenever the strawberry season—or the crochet mood—arrives.